How to Highlight & Annotate PDFs in Chrome
Prerequisites
Before we begin, make sure you have our browser extension installed. You can install it here or get it from the Chrome Web Store, Firefox Add-ons, or Microsoft Edge Add-ons.
Introduction
Hey, Marius here, founder of Web Highlights. In this tutorial, I'll walk you through the complete PDF workflow — how to highlight a PDF in Chrome, annotate it with notes and tags, read it as a clean article, download or print it with your highlights, keep it in sync with Acrobat or Preview, and finally learn from and export everything you've captured.
You don't need any separate PDF software for this. The extension you already have turns Chrome into a full PDF highlighter and annotator.
Let me show you, step by step.
Opening a PDF in Chrome
Web Highlights works with two kinds of PDFs: files hosted online and files stored on your computer.
Online PDFs
Navigate to any PDF URL in Chrome — a research paper, a manual, a report. Web Highlights automatically detects the PDF and opens it in its built-in viewer, where the text becomes highlightable.
That's it. No conversion step, no settings to touch.
Local PDF Files
For a PDF on your computer, drag the file into a Chrome tab (or right-click the file → Open with → Chrome). It opens in the same viewer.
There is one thing to set up once: by default, Chrome blocks extensions from accessing local files.
Allow access to file URLs
Open chrome://extensions, find Web Highlights, click Details, and enable Allow access to file URLs. Without this toggle, the viewer can't open files from your computer.
One nuance worth knowing: highlights on a local file are tied to the file's location. Reopen the same file from the same path on the same device, and your highlights reappear right where you made them. The highlights themselves always sync to your library either way. For the full details, see Highlight Local PDFs.
One honest limitation before we start: Web Highlights works with any PDF that contains selectable text — which is almost everything except scanned, image-only documents and password-protected files. Images inside PDFs can't be highlighted either.
Highlighting Text in Your PDF
With the PDF open in the viewer, highlighting works exactly like on any webpage:
- Select any text in the PDF.
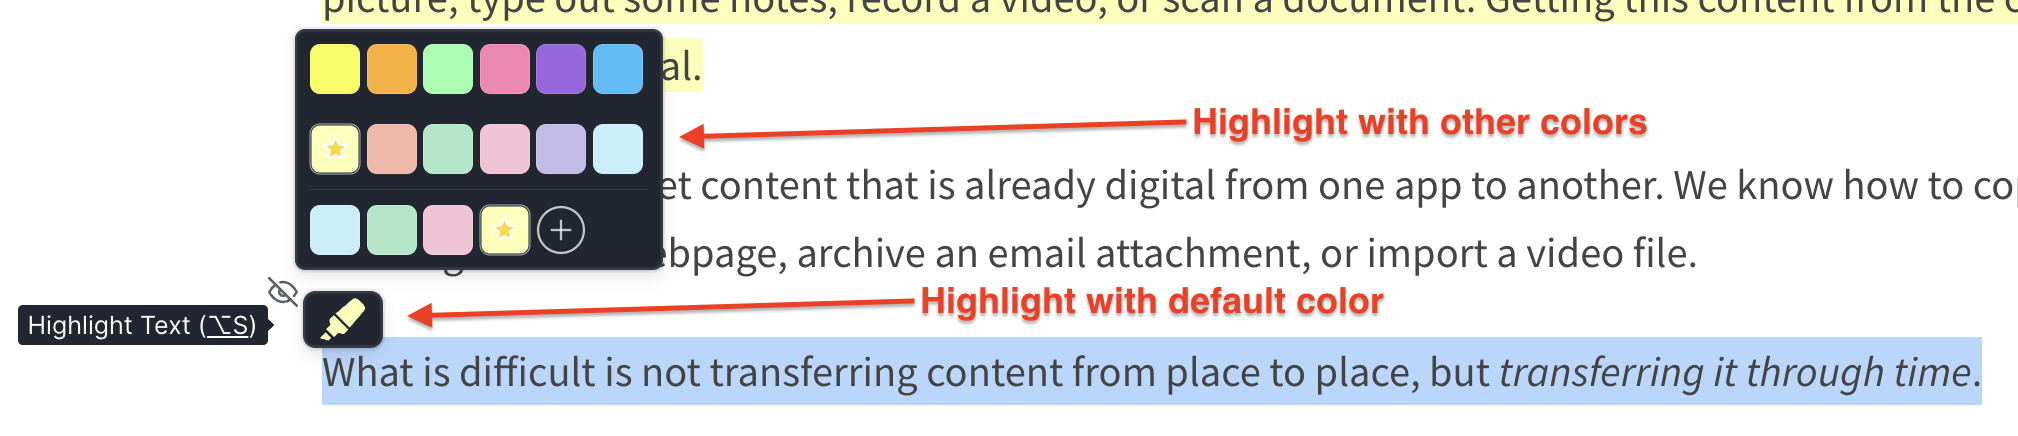
- The highlighter popup appears next to your selection.
- Click a color to save the highlight.
Your highlight is saved immediately. It syncs to your account, shows up in the sidebar and dashboard, and is restored whenever you open the same PDF again.
Switching Colors
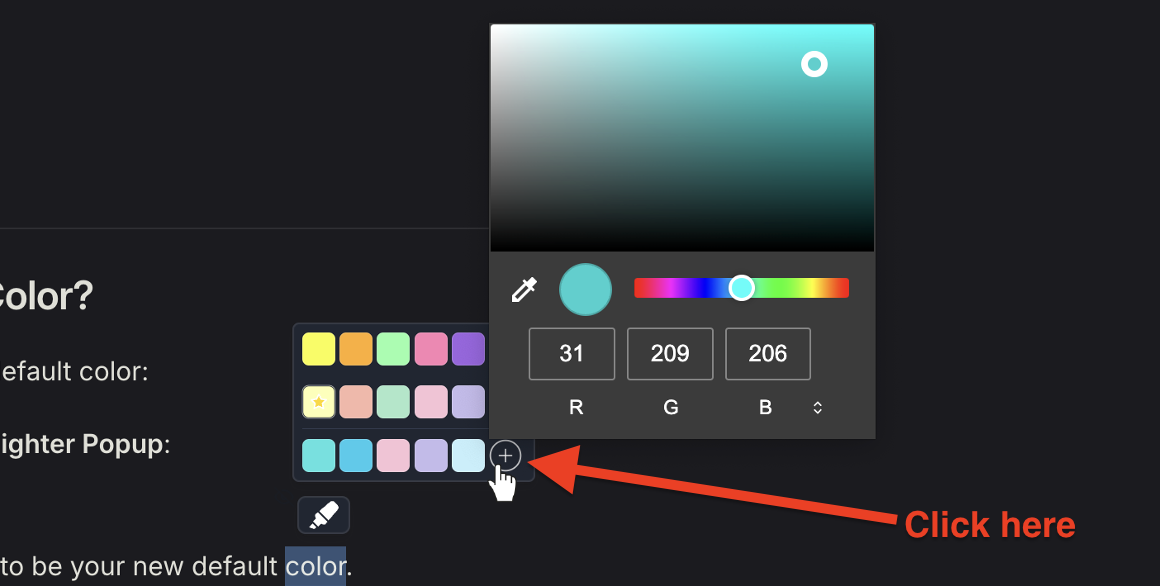
You're not limited to one color. The popup offers multiple colors, and you can add your own custom colors with the color wheel — I use this to give colors meaning: yellow for key points, red for open questions, green for definitions.
Read more about color workflows in Multiple Color Highlighting.
Prefer the keyboard?
Configure a keyboard shortcut and your selection gets highlighted in your last-used color without touching the mouse.
Adding Notes and Tags
A highlight captures what the document says — notes and tags capture what you think. Click any highlight you've made and a small toolbar appears:
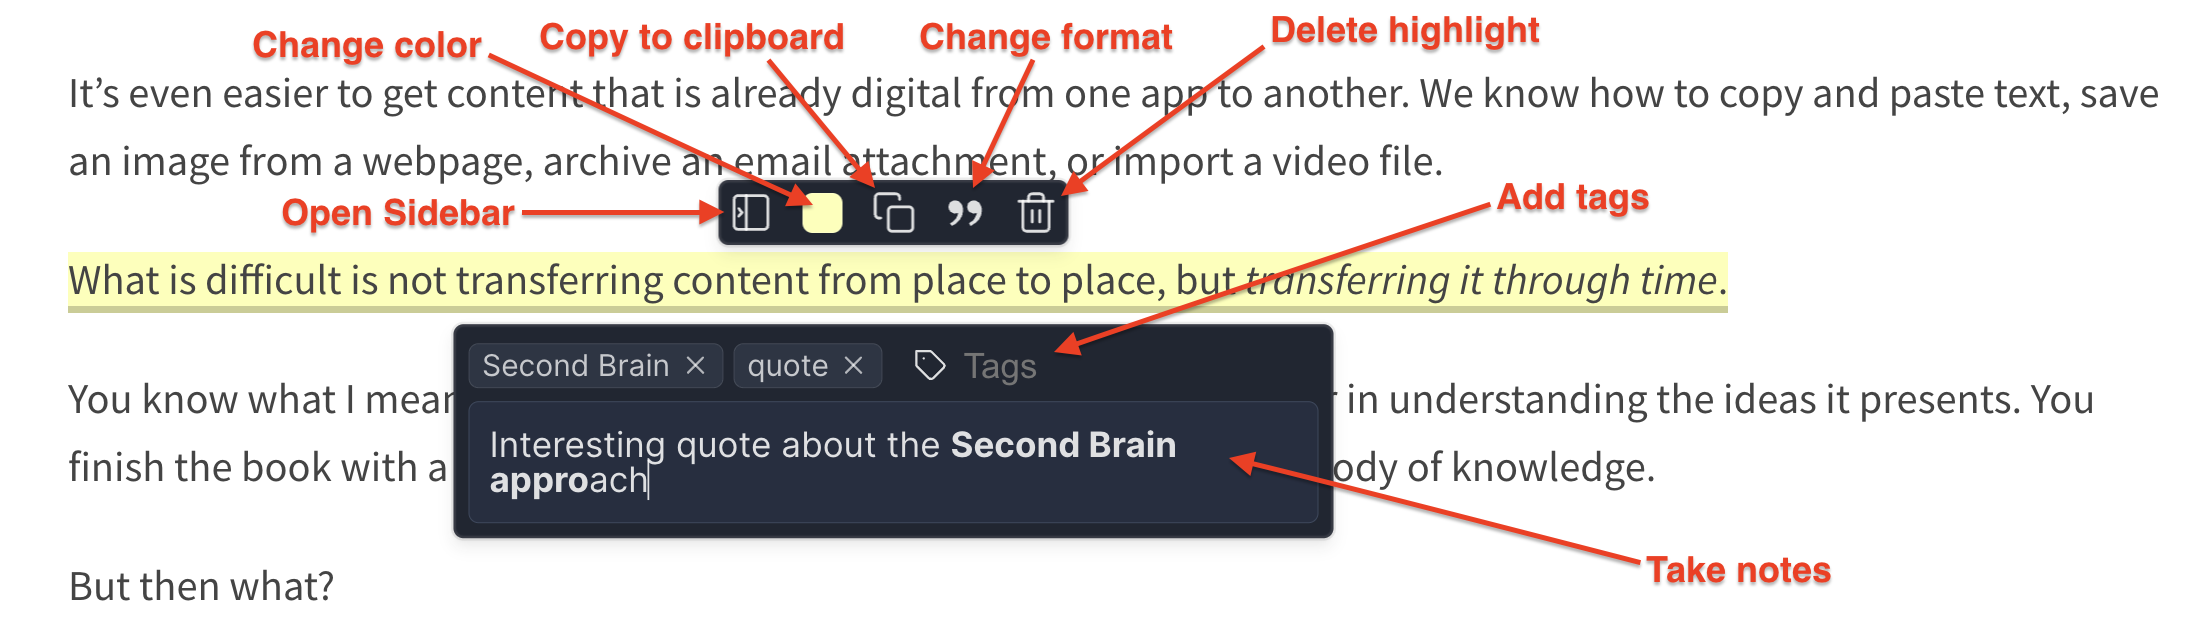
- Notes — click the note icon to open the rich-text editor. Write a summary, a question, a counter-argument. It saves automatically as you type. See Notes on Highlights.
- Tags — attach tags like
thesisorto-citeto group annotations across many PDFs and find them again later. See Tags & Organization.
This combination is what turns a marked-up PDF into actual research: every highlight carries its own context.
Navigating Your Highlights with the Sidebar
Click the Web Highlights icon in your toolbar to open the sidebar. It works right alongside the PDF viewer's own thumbnail and search controls and lists every highlight in the document — in page order, top to bottom, so the list reads like the document does.
Two things make it genuinely useful in long PDFs:
- Click a highlight in the sidebar and the viewer jumps to its page and briefly flashes the highlight — even if that page is far away.
- Click a highlight on the page and its sidebar entry is focused, so you can immediately edit its note or tags.
And everything you capture also appears in your dashboard, where you can browse, filter, and search across all your PDFs and web pages. I've written a full tutorial on the dashboard if you want to go deeper.
Working with Large PDFs
A two-page paper is easy — but what about a 400-page book or a heavyweight report? Just open it. The viewer renders the pages near your viewport first, so even very large documents open fast and stay responsive while the rest prepares in the background.
You can start reading and highlighting on page one right away, and jumping to a highlight deep in the document from the sidebar works even when that page hasn't rendered yet — the viewer pulls the page in and flashes the highlight. There's nothing to configure.
Reading Your PDF as an Article
PDF layouts are made for paper, not for screens. Once you've saved a PDF, you can open it in Reader Mode: click Open in Reader in the sidebar (or Save Document once you have highlights).
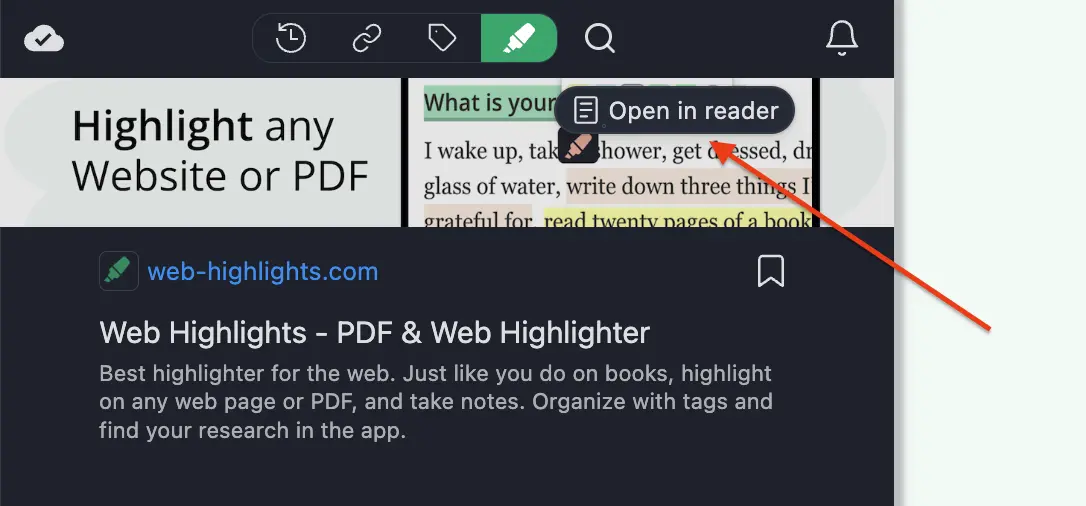
Instead of fixed pages, you get a structured article: real headings, readable paragraphs, lists, and code blocks. Two-column papers come out in the correct reading order, and your highlights come along. PDFs you saved a while ago get the improved article view automatically the next time you open them.
Reader Mode also keeps a copy of the document, so you can read your saved PDFs offline and on any device through the web app.
Downloading and Printing with Your Highlights
Your highlights don't have to stay inside Web Highlights. The viewer's toolbar has Download and Print buttons, and both take your highlights with them. The full reference lives at Download & Print PDFs with Highlights.
Download — Annotations Acrobat Can Read
Click Download and the file you save already contains your highlights — not as a flat image, but as the same kind of annotation Acrobat itself would create. Every highlight keeps its color, and each note travels with its highlight as a plain-text comment. Open the file in Adobe Acrobat, macOS Preview, Microsoft Edge, or any standard PDF app and everything is right there — visible, editable, the text underneath still selectable.
This means you can hand a marked-up PDF to a colleague or supervisor who has never heard of Web Highlights, and they see everything.
Print — Highlights on Paper
Click Print (or use your browser's print shortcut) and the print preview already shows your highlights on the pages, in color, with the text readable beneath them. Choose Save as PDF as the destination and you get a flattened copy — great for archiving or submitting.
If a PDF has no highlights, both buttons behave exactly like in any standard PDF viewer.
Importing Highlights from Other PDF Apps
The flow works in the other direction too. Open a PDF that already contains highlights — made in Acrobat, Preview, or any standard editor — and the viewer shows a callout: "Found N highlights in this PDF". One click, and they land in your sidebar and library like highlights you made yourself, keeping their colors and notes (notes arrive as plain text).
Supported are the standard text markups — Highlight, Underline, Strikeout, and Squiggly — as long as the underlying text is selectable.
Staying in Sync After the Import
Maybe you keep editing that file in Acrobat. Reopen it in Web Highlights and the viewer compares the file against what you imported and offers exactly what changed: "N new, M updated" — one click applies it. The rules are deliberately conservative:
| Situation | What happens |
|---|---|
| You reopen the same, unchanged PDF | Nothing is imported twice, no callout appears |
| You deleted an imported highlight | It stays deleted, even though the file still contains the annotation |
| The file gained or changed annotations | A callout offers "N new, M updated" — one click applies them |
| An annotation was removed from the file | Your highlight stays — sync never deletes your work |
| You edited the same highlight in both places | Your Web Highlights version wins |
In short: the import is always an offer, never a surprise, and your own work is never overwritten or deleted. The details are documented in Import PDF Annotations.
Turning Your Highlights into Flashcards
Highlighting is only half of learning — remembering is the other half. With Spaced Repetition Learning, Web Highlights turns your highlights into flashcards: the highlighted text is the front of the card, and your note appears on the back.
Start a learning session and your PDF highlights come back for review at scientifically optimized intervals — so the key points of that paper stick long after you've closed the file.
Exporting Your PDF Highlights
When the reading is done, take your research wherever you work. Open the export menu in the sidebar to:
- Copy as Markdown — paste highlights and notes into Obsidian, a README, anywhere. See Markdown Export.
- Send to Notion — sync your PDF annotations into your Notion workspace. See Notion Export.
- And more — including HTML and other formats, all from the same menu.
Conclusion
That's the full loop: open any PDF in Chrome — online or local — highlight it in your colors, annotate it with notes and tags, navigate it from the sidebar, read it as a clean article, and then take the results anywhere: download or print with your highlights embedded, stay in sync with Acrobat and Preview, review the key points as flashcards, or export everything to Notion and Markdown.
Ready to try it?
Grab any PDF — open one online or drop a file into Chrome — and make your first highlight. Everything else in this tutorial builds on that one selection.
Related Documentation
- PDF Highlighter — the PDF feature hub
- Highlight Local PDFs — file-URL access and local-file details
- Download & Print PDFs with Highlights — full reference for the export buttons
- Import PDF Annotations — import and external-edit sync in depth
- Reader Mode — distraction-free reading and offline access
- Spaced Repetition Learning — turn highlights into long-term knowledge
- Notion Export — send your PDF research to Notion
- Markdown Export — copy highlights and notes as Markdown