How To Save Bookmarks with the Web Clipper
Web Highlights isn't just for highlighting text—it also works as a web clipper, letting you save pages as bookmarks for easy access later.
Saving a Page
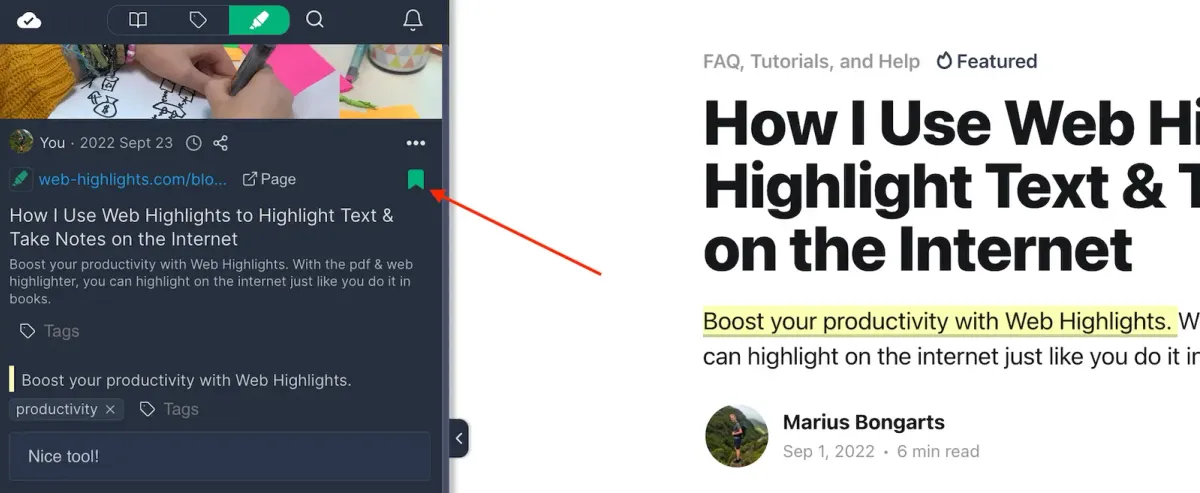
The easiest way to save any page as a bookmark is to open the sidebar and click the bookmark icon:
You can right-click anywhere on a website and select "Save page as bookmark," or just use a shortcut: Alt + B for Windows or Option + B for Mac.
Keyboard Shortcuts 💡
Paste chrome://extensions/shortcuts into your browser's address bar to change your shortcuts. You can also click the shortcut icon at the bottom of the sidebar.
After that, you'll be able to see your page in the sidebar and in the app at app.web-highlights.com, complete with its title, description (both of which you can edit), and thumbnail image.
Starring vs Auto-Bookmarking
There are two ways a page ends up in your library:
- Auto-bookmarking — When you create your first highlight on a page, Web Highlights automatically creates a bookmark entry for it. The page appears in your library but isn't starred.
- Explicit bookmarking — When you click the bookmark icon, right-click "Save page as bookmark," or use the
Alt + Bshortcut, the page is saved and starred. You'll see a "Bookmark saved" confirmation.
Starred pages are a way to mark pages you want to keep, even if you haven't highlighted anything on them yet.
Change Title & Description
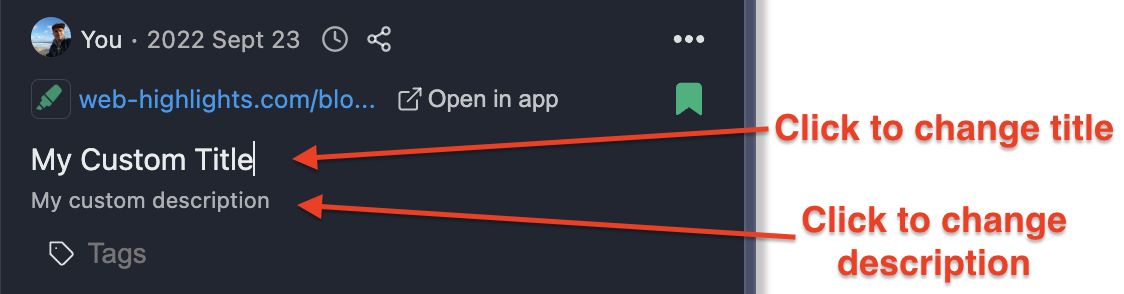
When you save a bookmark, its title and description are automatically set to match the page's title and description. But you can edit them anytime.
To make changes, just click on the title or description in the sidebar or within the app.
Before you can edit the title and description, make sure you've either created highlights on the page or saved it as a bookmark.
Organize with Tags
You can add tags to any bookmark to keep your library organized. Click on the tag area below a bookmark in the sidebar or web app, type a tag name, and press Enter. Web Highlights suggests existing tags as you type, so you can stay consistent.
Tags work across highlights and bookmarks — you can filter your entire library by tag in the web app, or use the tag: prefix in the search bar to find everything under a specific tag.
For a complete guide on using tags, see Tags & Organization.
Add Notes
Every bookmark (and every highlight within it) supports rich-text notes. Click on a highlight to open the notes editor, where you can write your thoughts, add context, or summarize what you found.
Your notes are included when you export to Markdown, Notion, or Capacities.
For more on the notes workflow, see Notes on Highlights.
Set Reminders
Want to revisit a page later? You can set an email reminder on any bookmark.
- Open the bookmark details in the sidebar or web app
- Click the clock icon in the bookmark header
- Choose a preset time — later today, tomorrow, or in 3 days — or pick a custom date and time
- Web Highlights sends you an email reminder at the scheduled time
To remove a reminder, click the X icon next to the clock.
Ultimate plan feature
Email reminders are available on the Ultimate plan and during the free trial. Compare plans →
Share Pages
You can share any bookmarked page as a public link. When you share a page, anyone with the link can view your highlights and notes — no account required.
For details on sharing, see Sharing & Public Pages.