Formatted Highlighting
You're reading a long technical article. You highlight the title, a few key paragraphs, a code snippet, and some bullet points. Later, when you open your sidebar, everything looks the same — plain quoted text. You can't tell which highlight was the heading and which was the code block.
Formatted highlighting fixes this. It preserves headings, paragraphs, bullet points, code blocks, and more — so your highlights look exactly like the content you marked.
🚀 Ultimate Feature
This feature is available in our Ultimate plan. You can try it free for 7 days. Upgrade to Ultimate anytime from the pricing page within the app.
What It Looks Like
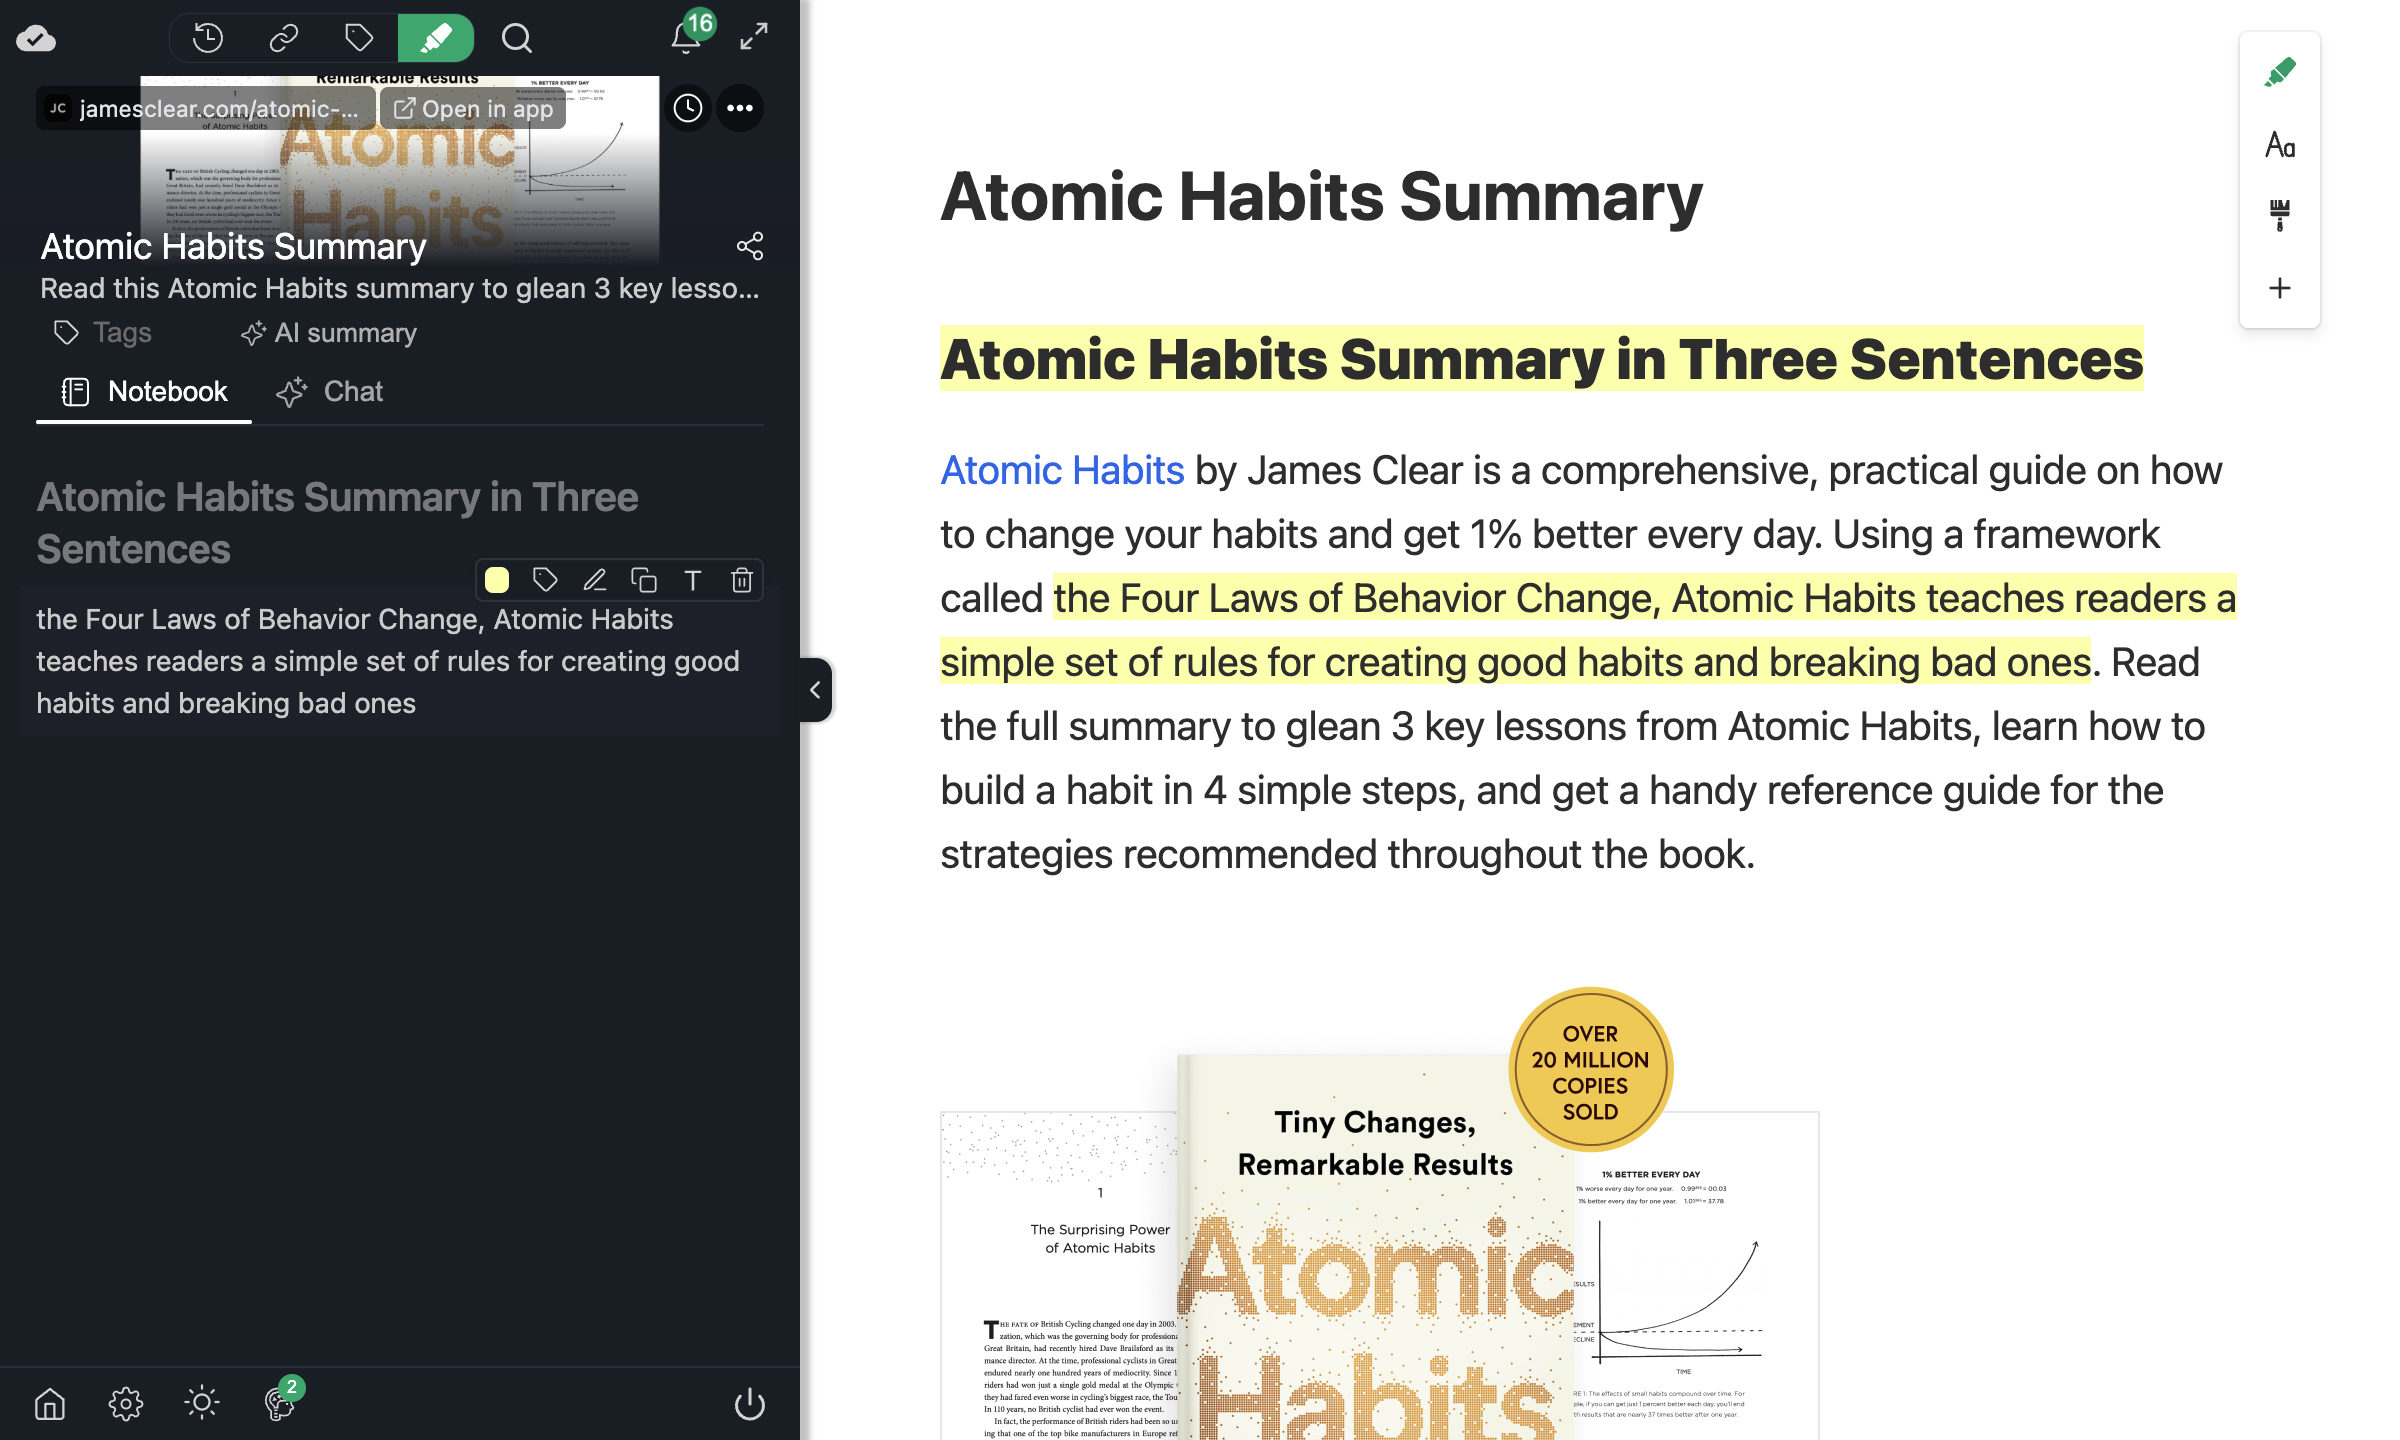
With formatted highlighting enabled, your sidebar preserves the original structure of everything you highlight. Headings stay as headings, code stays as code, and list items stay as bullets.
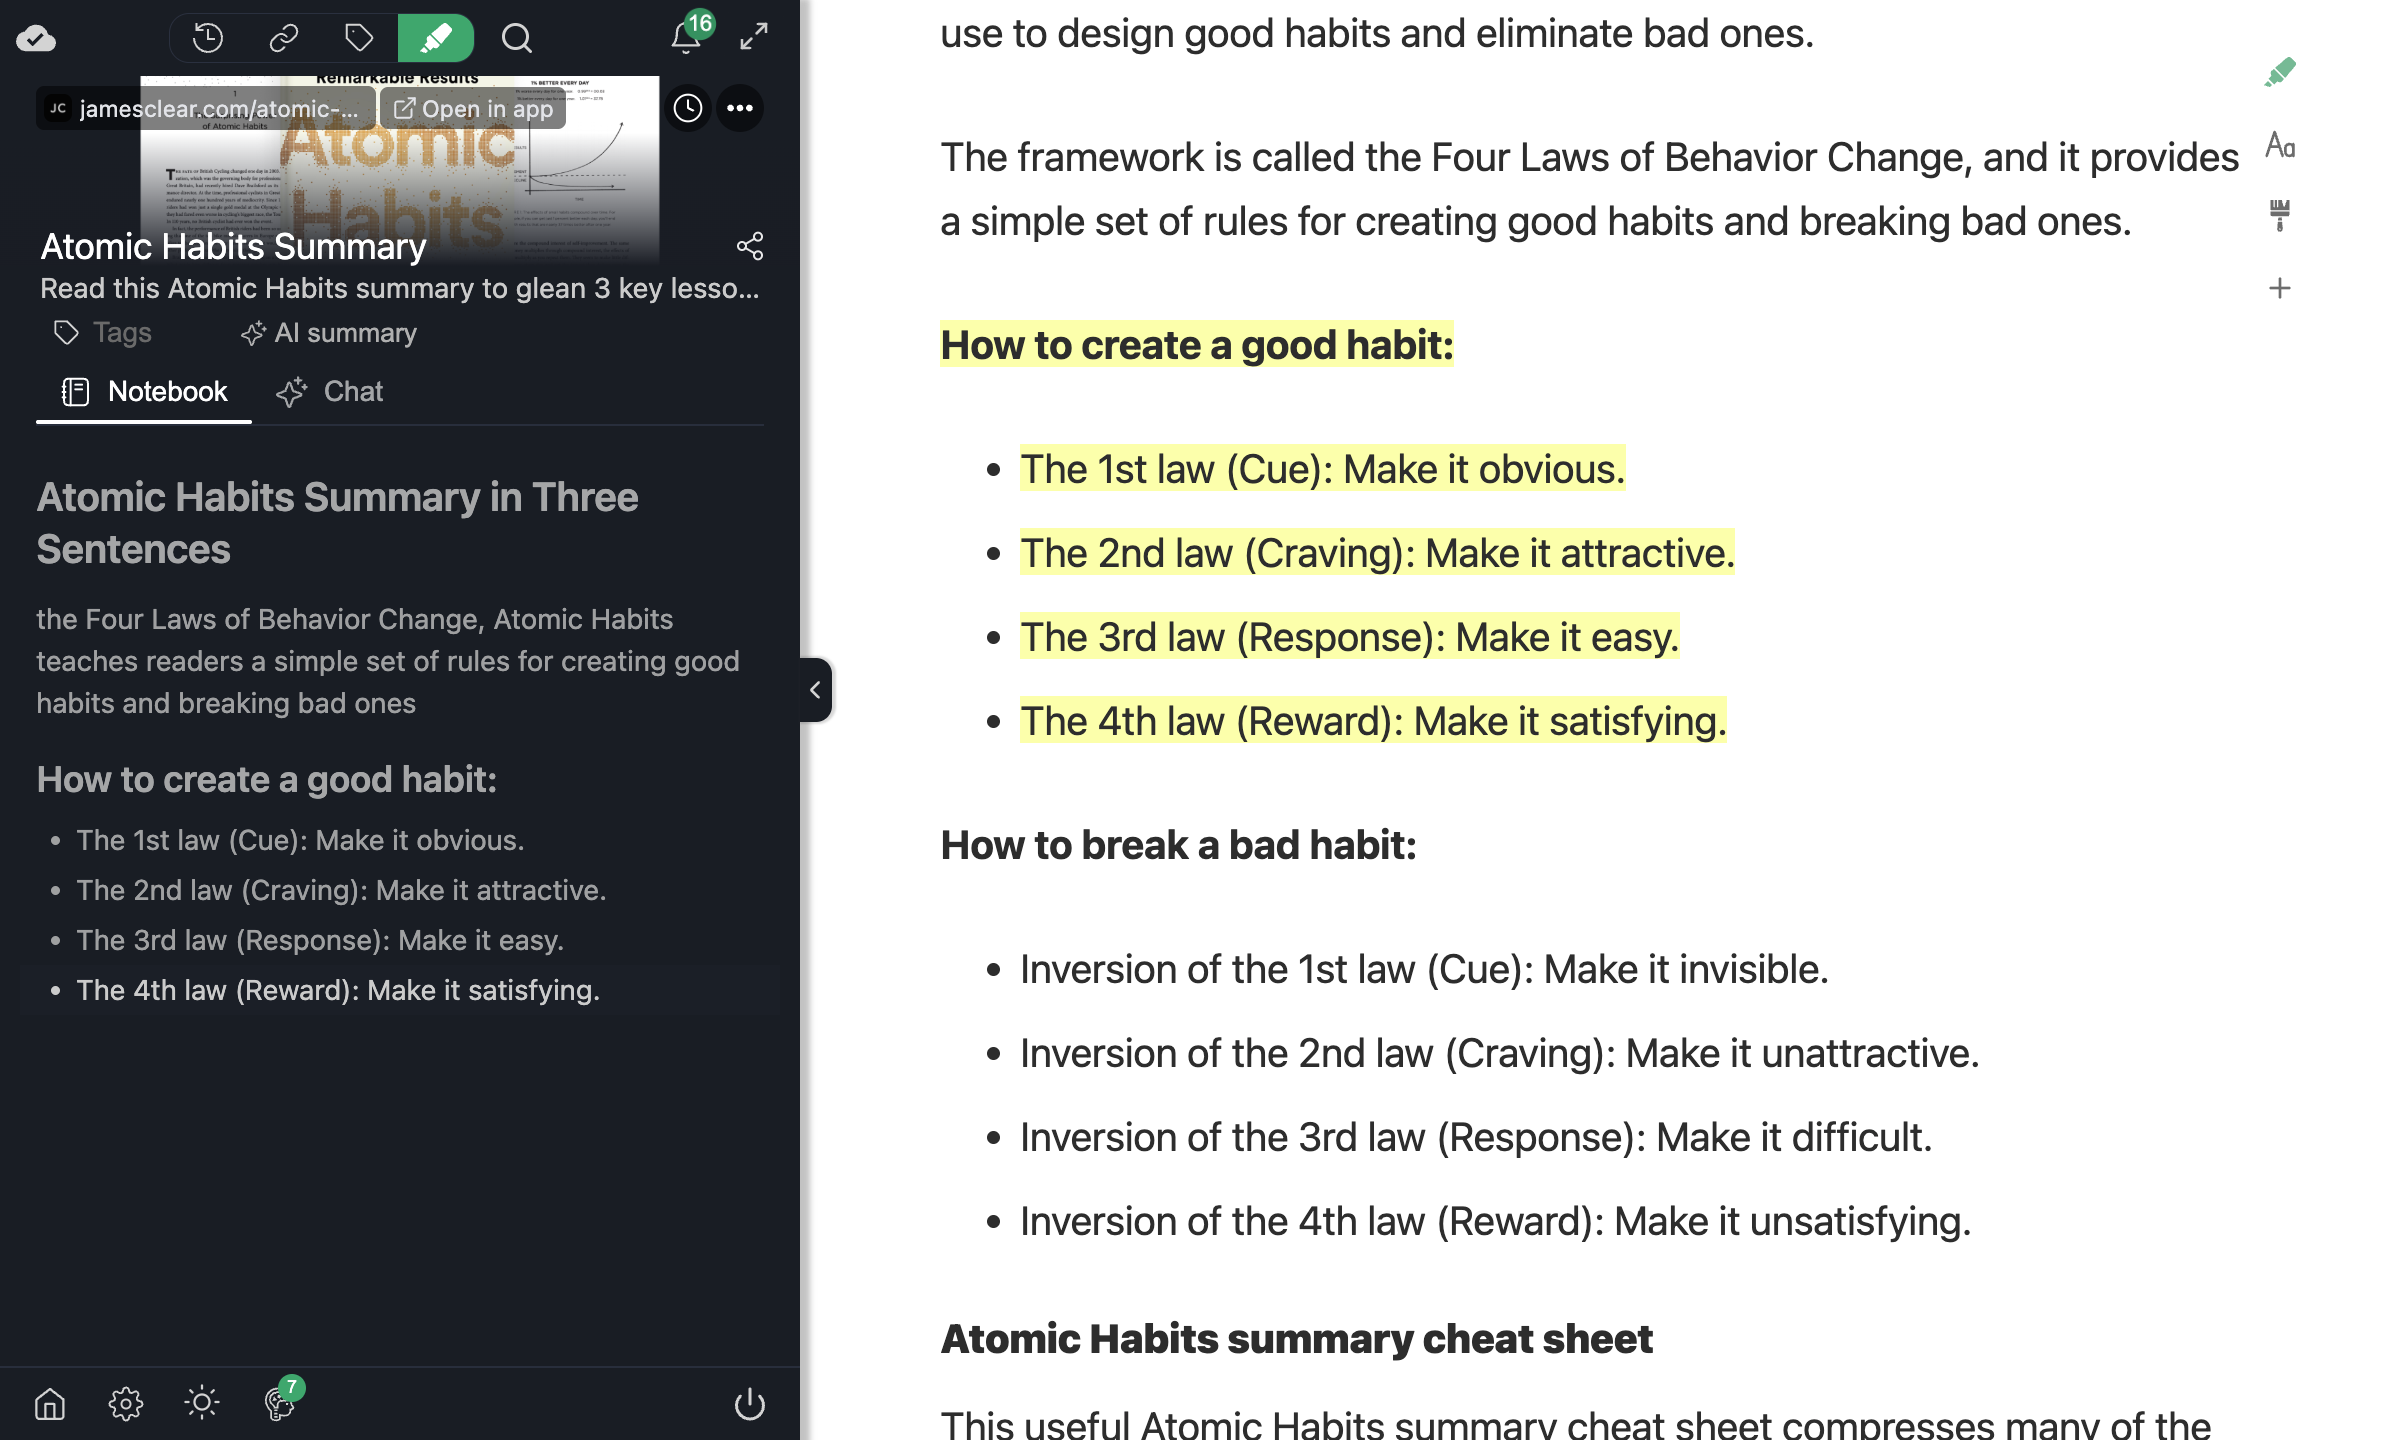
Compare this to the standard mode where every highlight is a plain quote. With formatted highlighting, scanning your notes feels like reading the original article in miniature.
How to Enable It
- Open the sidebar (click the extension icon or press
Alt + W/Option + W). - Go to Settings.
- Under Highlighter Mode, select Advanced.
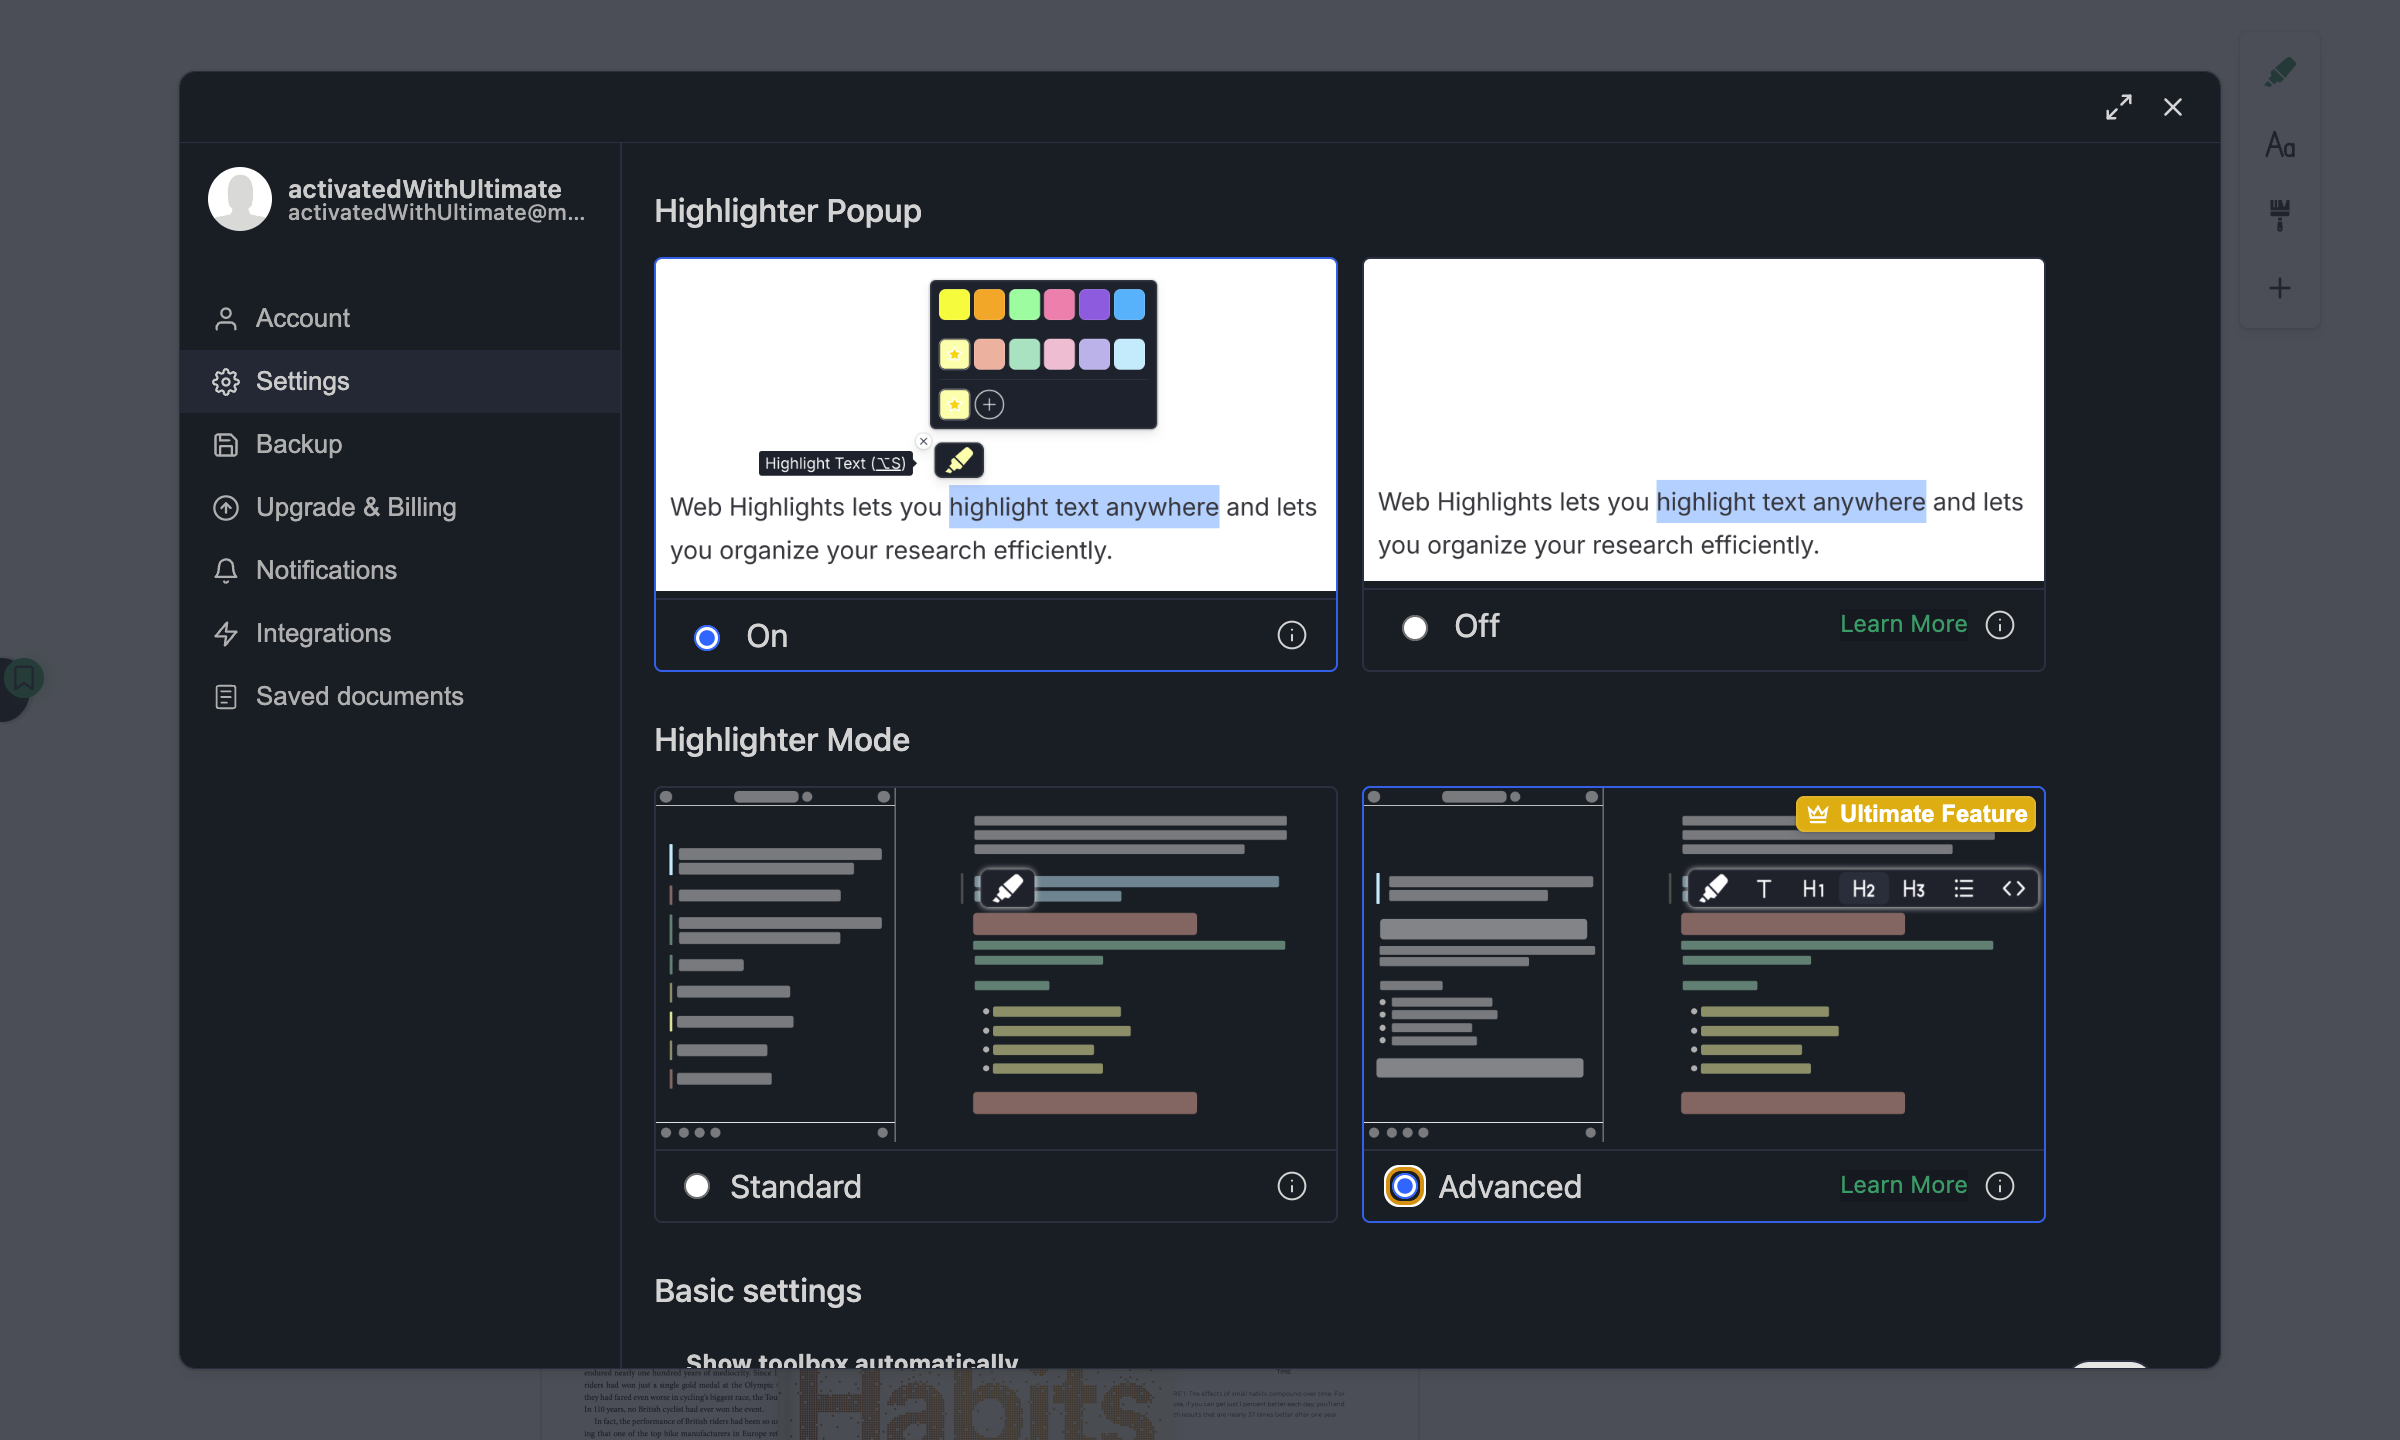
Once enabled, every new highlight will preserve its original structure.
First-time setup
The first time you create a few highlights, Web Highlights shows an overlay on the formatting toolbar with an Enable button. Click it to open the Highlighter Mode settings. This only appears once.
The Formatting Toolbar
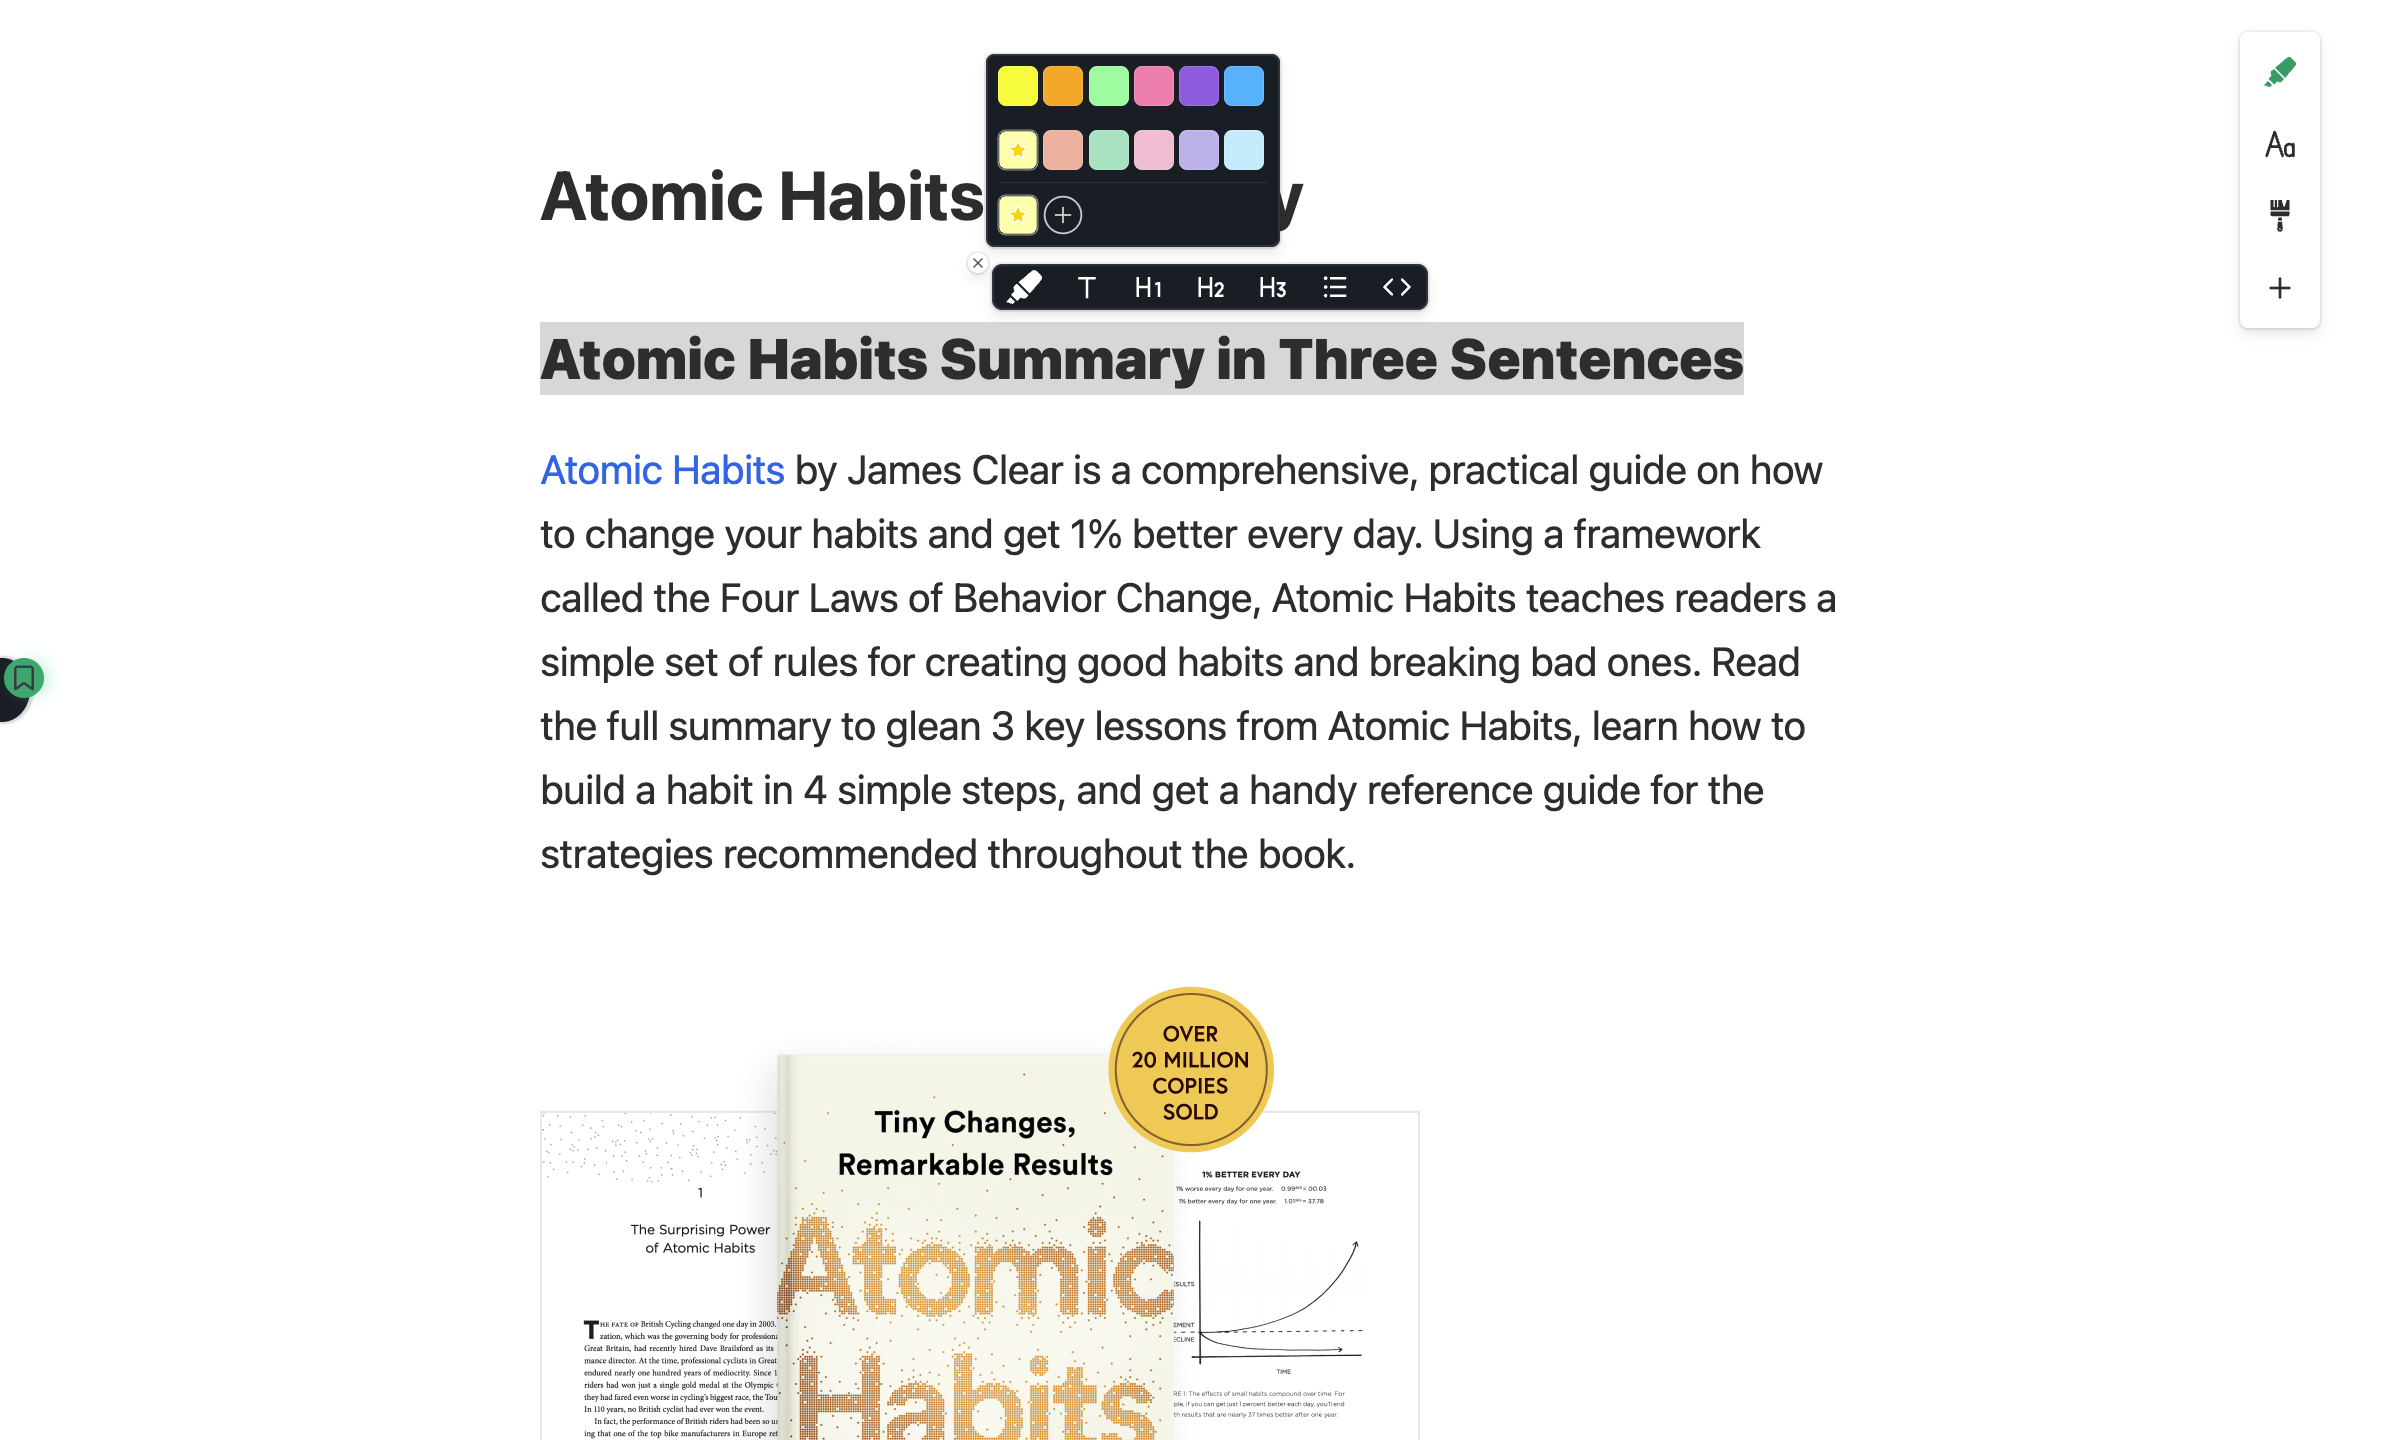
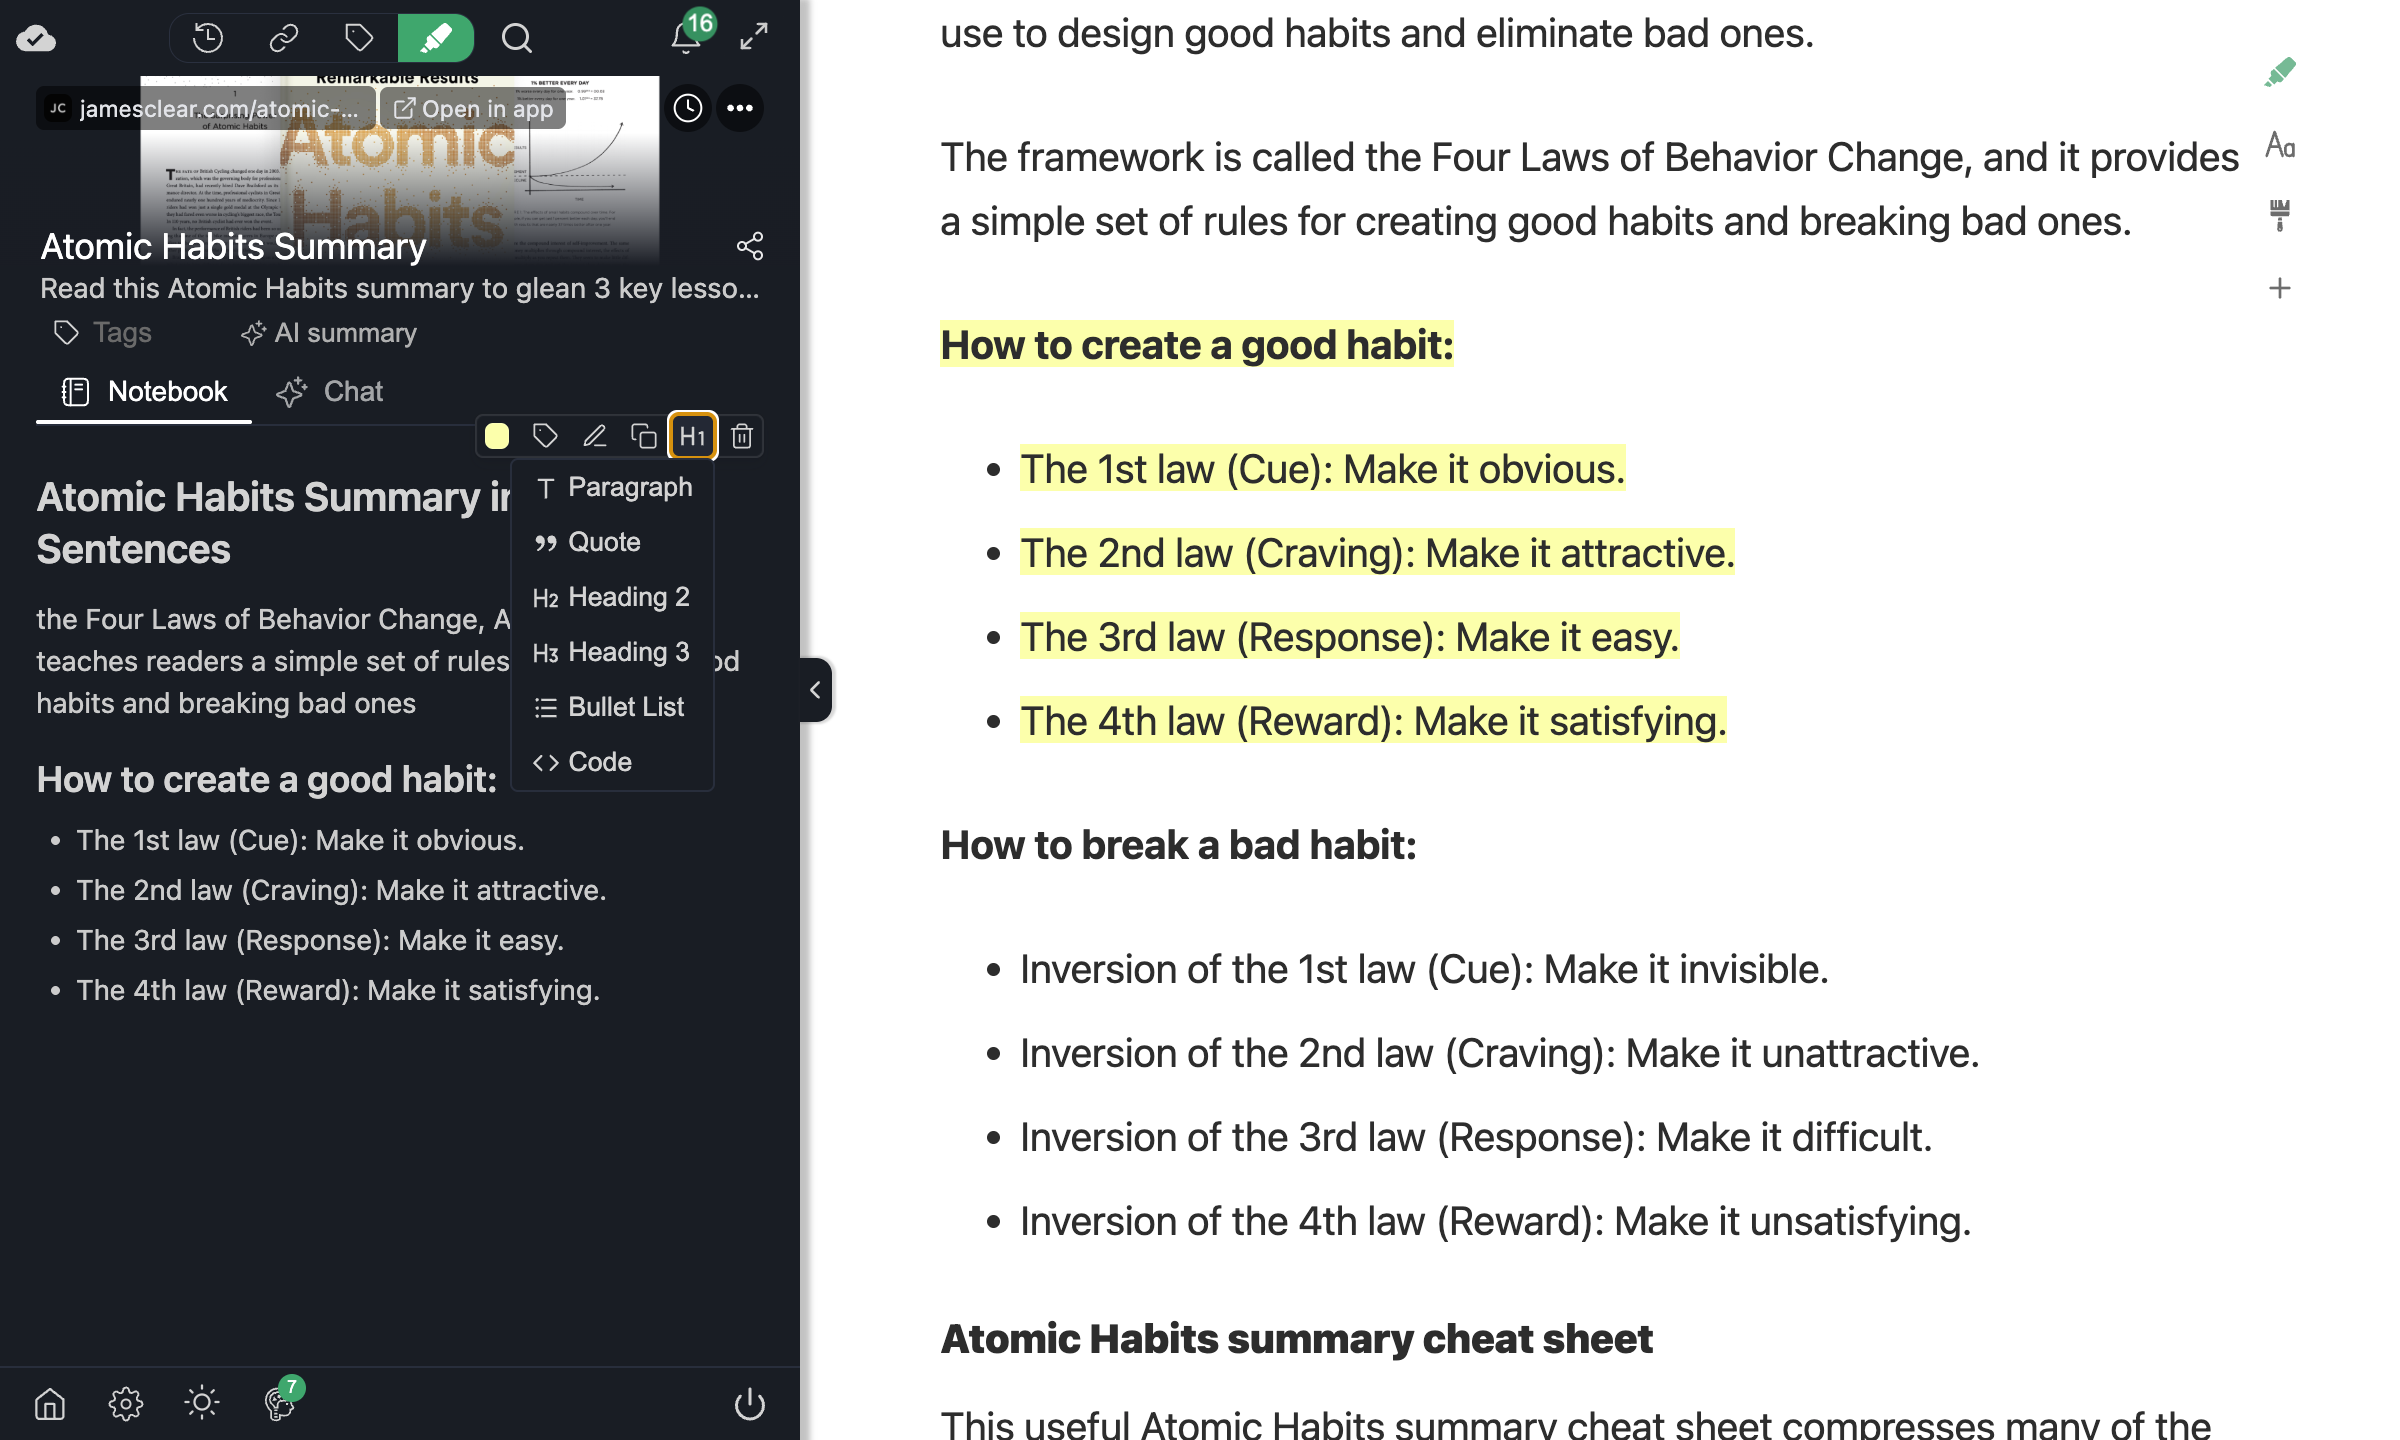
When you select text with Advanced mode enabled, the highlighter popup shows a formatting toolbar underneath. Each icon represents a different format you can apply.
Creating a Formatted Highlight
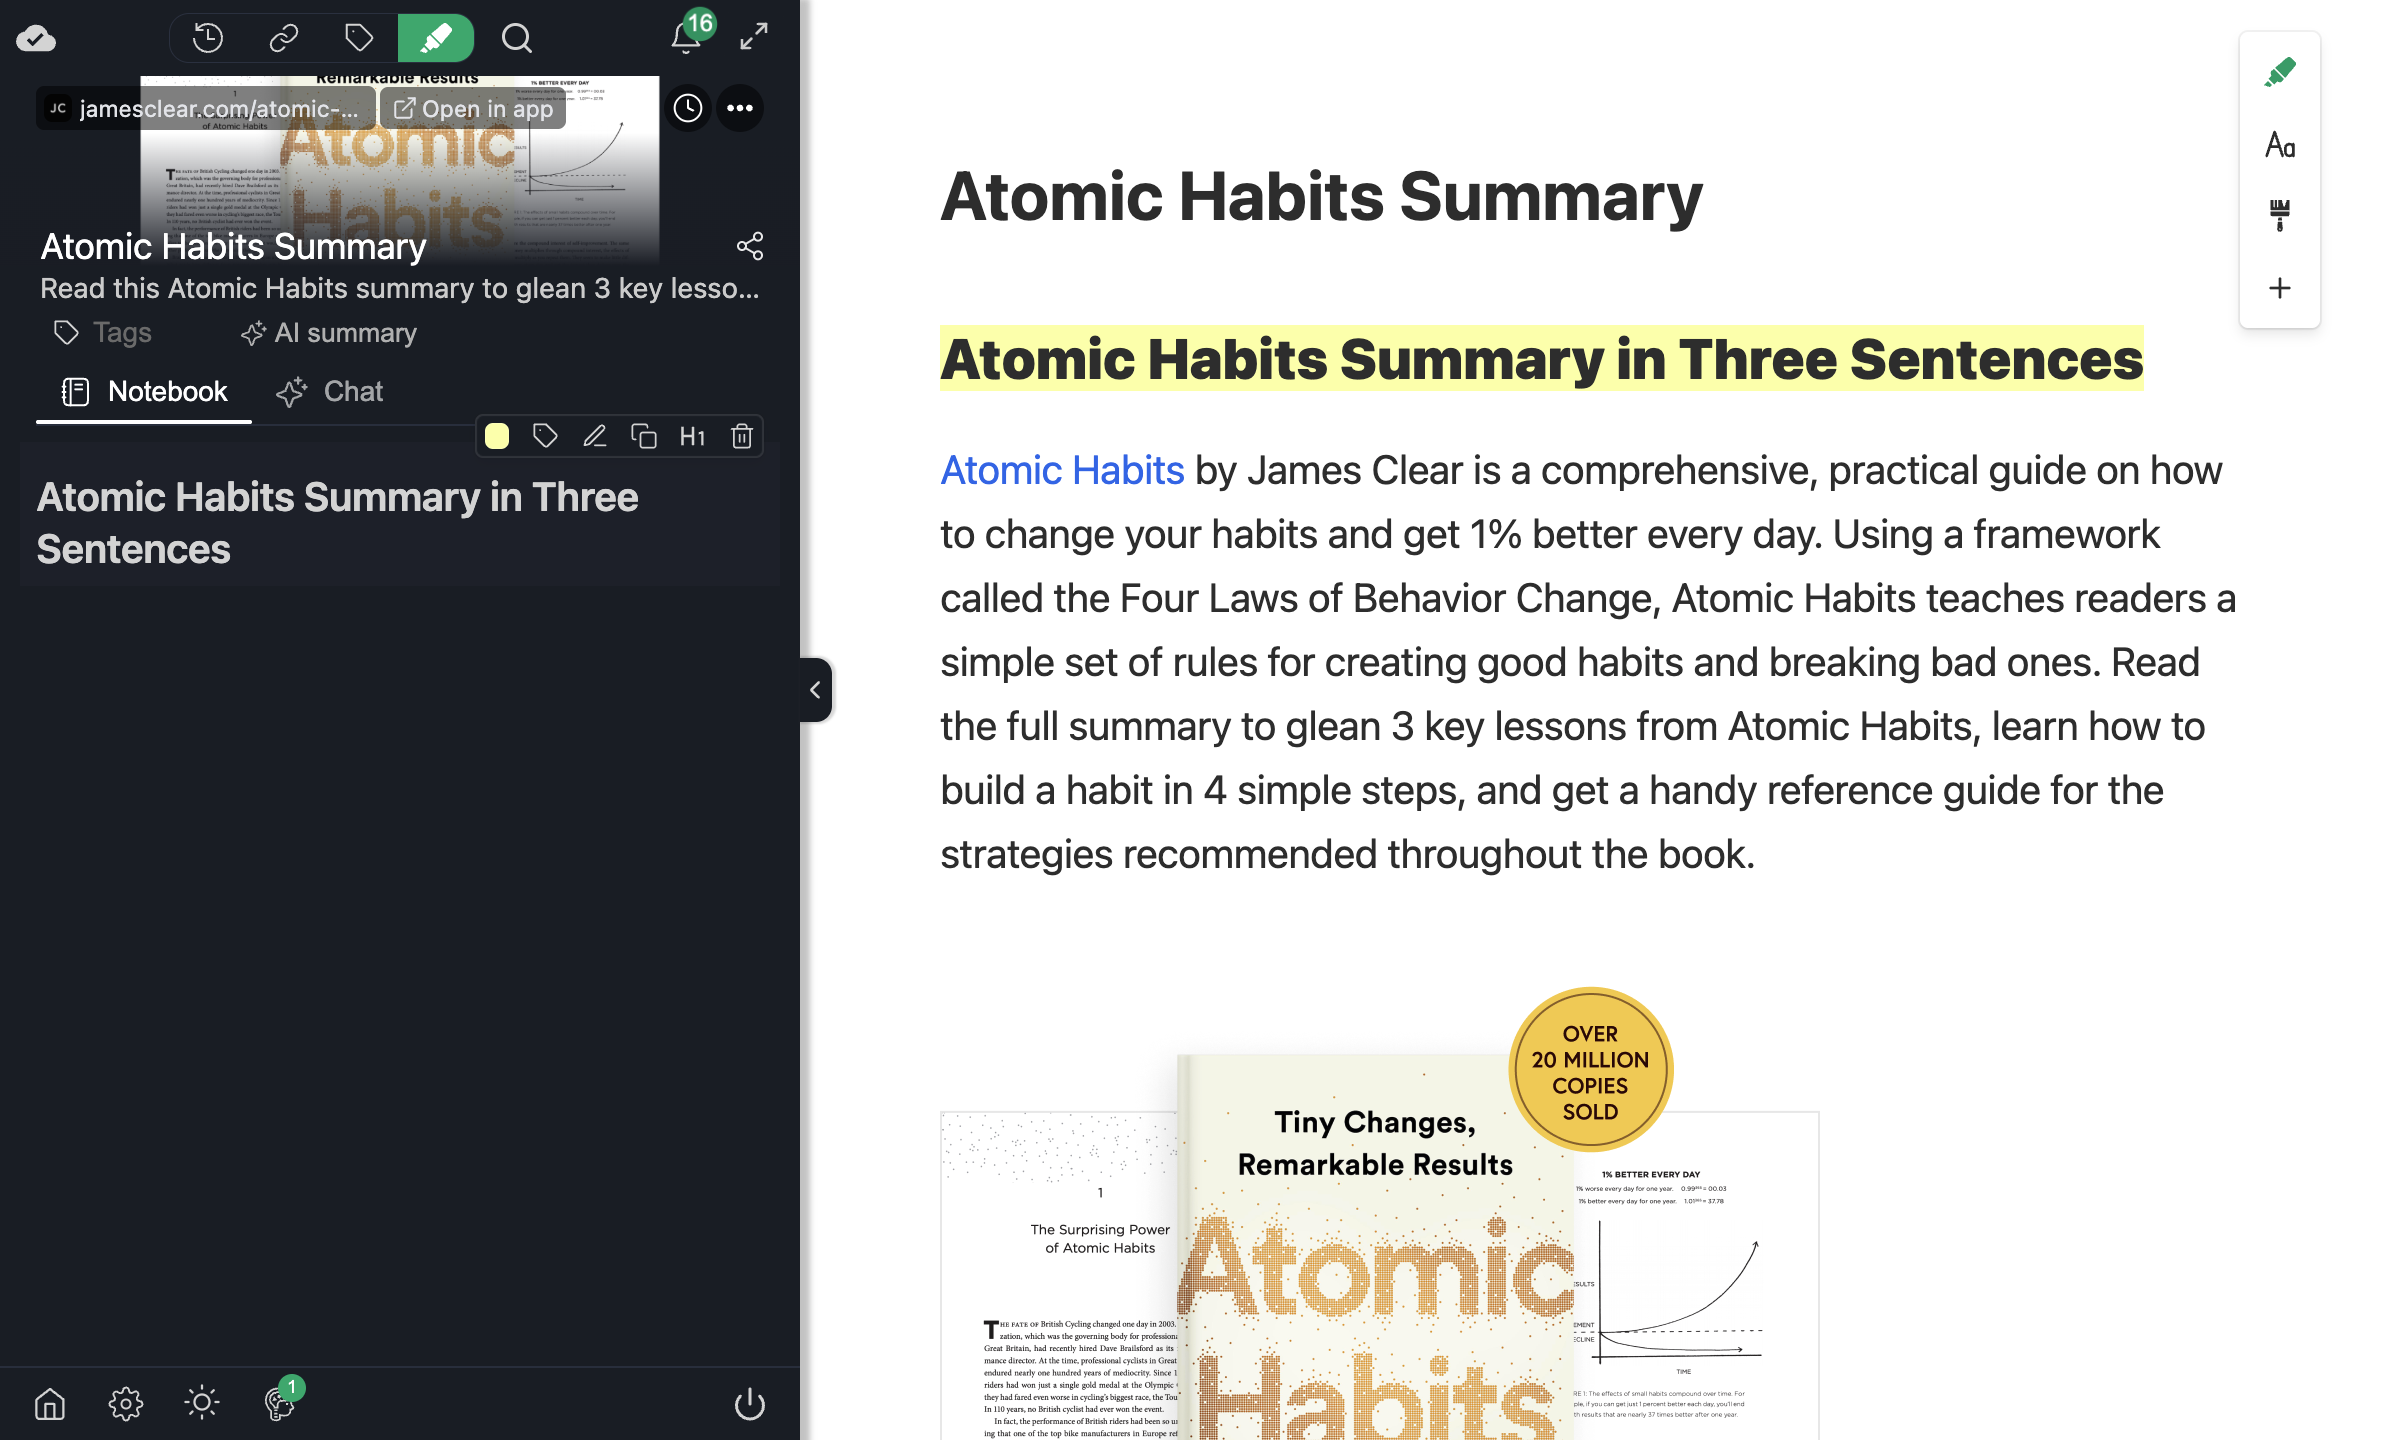
After selecting text, click a format icon in the toolbar to create a highlight with that format. For example, highlighting a title as Heading 1 preserves it as a proper heading in the sidebar:
Supported Formats
| Format | Icon | What it preserves |
|---|---|---|
| Quote | Default highlight icon | Standard colored quote — the default for every highlighter |
| Paragraph | T | Regular body text with proper spacing |
| Heading 1 | H1 | Article titles and main headings |
| Heading 2 | H2 | Section headings |
| Heading 3 | H3 | Sub-section headings |
| List item | Bullet | Bullet points and numbered items |
| Code | </> | Inline code and code blocks — perfect for technical articles |
Changing the Format Later
Made a highlight as a quote but it should have been a plain paragraph? You can change the format anytime from the sidebar.
Here's a highlight that was created with the default Quote format:

Click the format icon on the highlight to open the dropdown and pick Paragraph. The change is saved and synced immediately:
You can open the dropdown on any highlight to see all available formats:
Formatted Exports
The format carries through to every export path:
- Markdown — headings become
#,##,###; list items use-; code gets backtick fences. - Notion — each highlight is created with the matching Notion block type (heading, bulleted list, code block, etc.).
- HTML / PDF — the original HTML tags (
<h1>,<ul>,<code>, etc.) are preserved.
This means you can highlight a structured article and paste it into Notion or Obsidian with the formatting intact — no manual cleanup needed.
Keyboard shortcut
Use Alt + A (Windows) or Option + A (Mac) to highlight text with the same format as your last highlight — handy when you're marking multiple headings or list items in a row. See Keyboard shortcuts for all shortcuts.
Further reading
- Multiple Color Highlighting — customize your highlight palette.
- Highlight Images — save images alongside your text highlights.
- Keyboard Shortcuts — speed up your workflow.
You can also read the original deep-dive on this feature in our blog post: