How to Annotate YouTube Videos Like Articles
Learn how to use YouTube video annotations with Web Highlights to make your videos more interactive, organize key moments, and boost learning retention.
Watching YouTube videos can often feel like a passive activity. You might find yourself taking in a lot of information, but when it’s time to recall key takeaways, it is easy to forget important details. Without the ability to highlight or take notes, you risk losing out on valuable insights from the videos you watch.
Whether you are watching tutorials, lectures, or marketing insights, the real value lies in interacting with the content, not just passively consuming it.
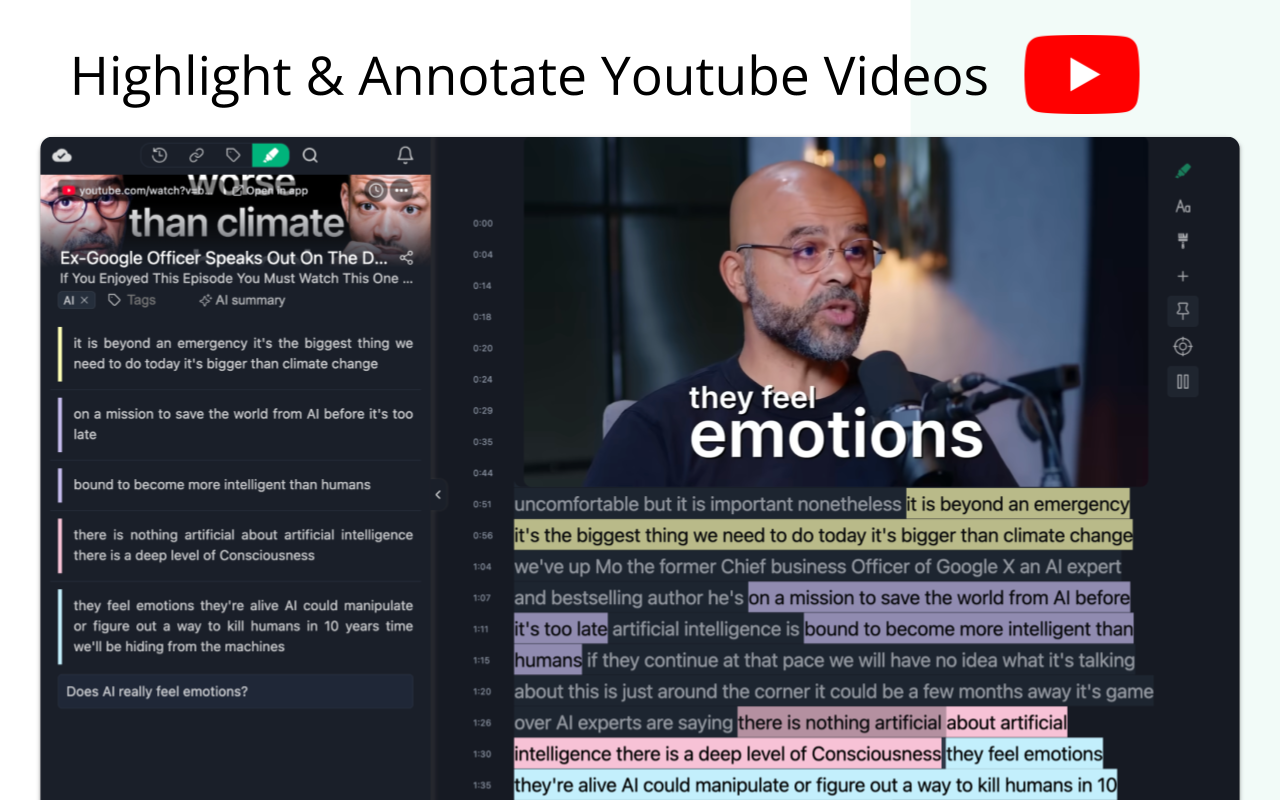
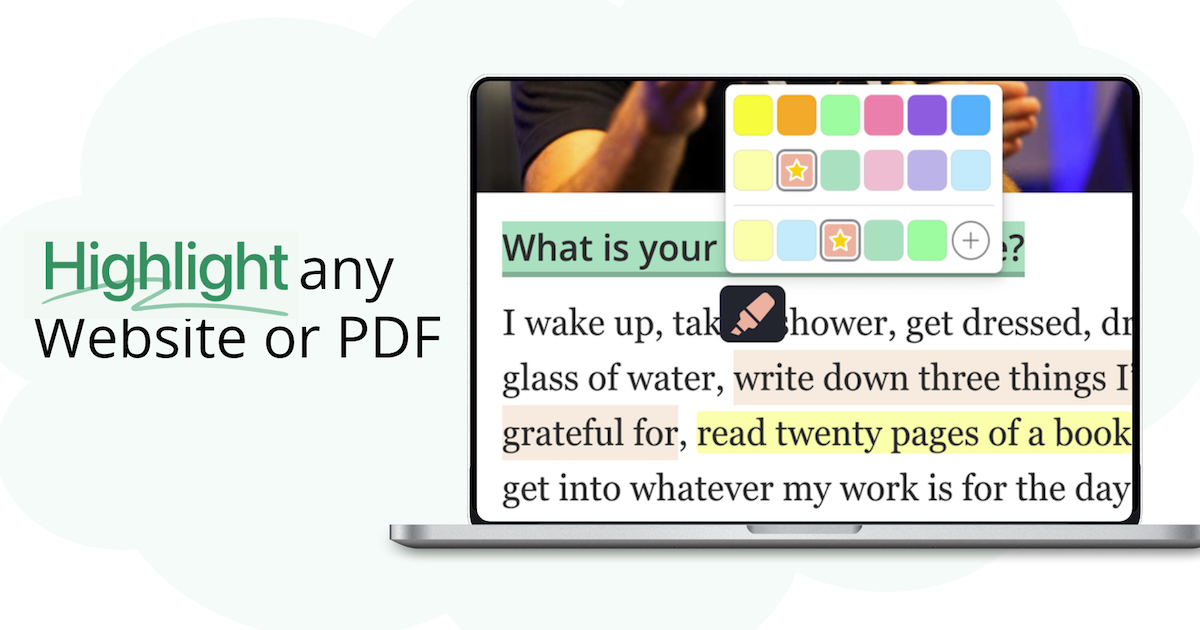
This is where YouTube video annotations help. With Web Highlights, an annotation tool, you can transform the way you engage with YouTube videos by annotating them just like articles. This tool allows you to highlight key points, add notes, and organize your insights with tags, turning passive watching into active learning.
In this blog, we’ll walk you through a step-by-step guide on how to use Web Highlights to annotate YouTube videos. You’ll learn how to use AI summaries, transcript highlighting, time-stamped notes, and smart organization tools to make YouTube a more effective learning platform.
Let’s dive in!
Why Annotating YouTube Videos Makes Learning Stick
When watching YouTube videos, it is easy to just sit back and let the information flow without truly absorbing it. However, annotation in the context of videos adds a level of engagement that turns this passive activity into something that is interactive and effective.
Highlighting the video transcript plays a key role here. Web Highlights allows you to mark key points directly in the video’s transcript, making it easier to capture the most important information. Along with highlighting, time-stamped notes are added to provide context, so you can quickly jump to specific moments in the video. These notes act as markers, reminding you of the critical points discussed at different times.
Using an AI summary before annotating further improves learning efficiency. When you preview a video through structured formats such as Key Points or TL;DR, you reduce cognitive overload and identify what truly matters. This allows you to focus your highlights and notes on high-value sections instead of marking everything.
This way, you can revisit the most valuable sections with ease, improving your overall understanding and retention of the content.
The benefits of video annotations are clear:
1. Enhanced memory retention
By actively highlighting key points and adding personal notes, you make a direct connection with the material, which strengthens your memory. Studies have shown that active listening, along with engagement with content, rather than passive consumption, boosts retention, making the information easier to recall later.
2. Easy to revisit key moments
Forget rewinding!
With annotations, you can jump straight to specific moments in the video. Whether you're reviewing an insightful tip, revisiting a tutorial step, or tracking a key takeaway, your annotated notes serve as a personalized map, helping you easily navigate back to what matters most.
3. Organized insights
No more searching through hours of video.
By tagging different sections of the video and adding context, your text annotations allow you to organize and retrieve your insights efficiently.
Web Highlights makes this process simple and intuitive by activating directly on YouTube. Once the extension is installed, it detects YouTube videos automatically and enables the annotation features right in the browser. You don’t need to leave the video or switch to another app; just click on the video transcript and start highlighting or save the entire video in your Web Highlights app to create notes from scratch.
From there, you can add highlights, tag moments, and organize everything right within your YouTube experience. This makes video annotations accessible and easy to use for anyone looking to improve their learning from YouTube videos.
Setting Up Web Highlights for YouTube Annotation
Getting started with Web Highlights for YouTube annotations is quick and easy. Here’s how you can set it up:
1. Install the Extension
First, install the Web Highlights extension from the Chrome Web Store. It is free and available for Chrome users.
If you're an Edge or Firefox user, our extension is available there too, so you can enjoy the same great features.
2. Sign In/Create an Account
Once installed, sign in or create an account to unlock all features. This will allow you to sync your video annotations across multiple devices for easy access wherever you are.
3. Using on YouTube
After installation, Web Highlights will automatically detect YouTube videos as you watch them. Just open any YouTube video, and the annotation tools will be ready for use. Highlight key moments, add time-stamped notes, and start organizing your video insights, all within your browser.
Beyond in-video annotation, Web Highlights also provides:
- A YouTube AI Summary tool for structured video summaries
- A YouTube Transcript Reader for clean, distraction-free reading
- A Highlight YouTube Video tool for direct transcript highlighting
This allows you to choose between annotating directly inside YouTube or studying the transcript in Reader Mode.
How to Annotate YouTube Videos with Web Highlights
Annotating YouTube videos with Web Highlights is designed to feel as natural as highlighting an article. Instead of passively watching, you interact with the video’s transcript, summaries, and key moments to turn each video into a structured learning resource. Here is how to do it:
Highlight Key Moments Using the Transcript Reader
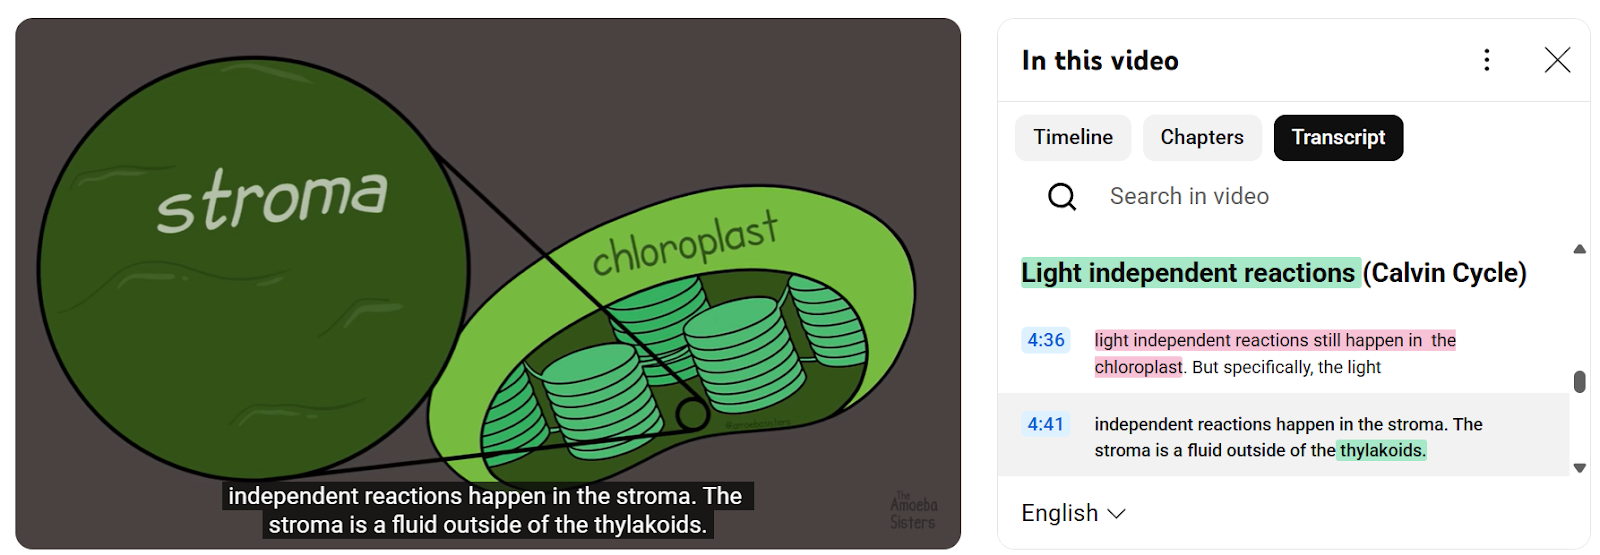
Start by using the highlighter tool directly on the video transcript, time stamps, or any other section, like chapters, to mark important sections. As you watch the video, highlight key points that stand out to you.
Web Highlights also lets you highlight directly inside the YouTube Transcript Reader, not just the video player. As the video plays, you can open the transcript in a clean, readable format and highlight important sentences, timestamps, or chapter sections.
This is especially useful for educational or long-form videos, where key explanations are often buried deep inside the timeline. By highlighting the transcript text itself, you can focus on concepts, terminology, or steps that matter, without rewatching the entire video.
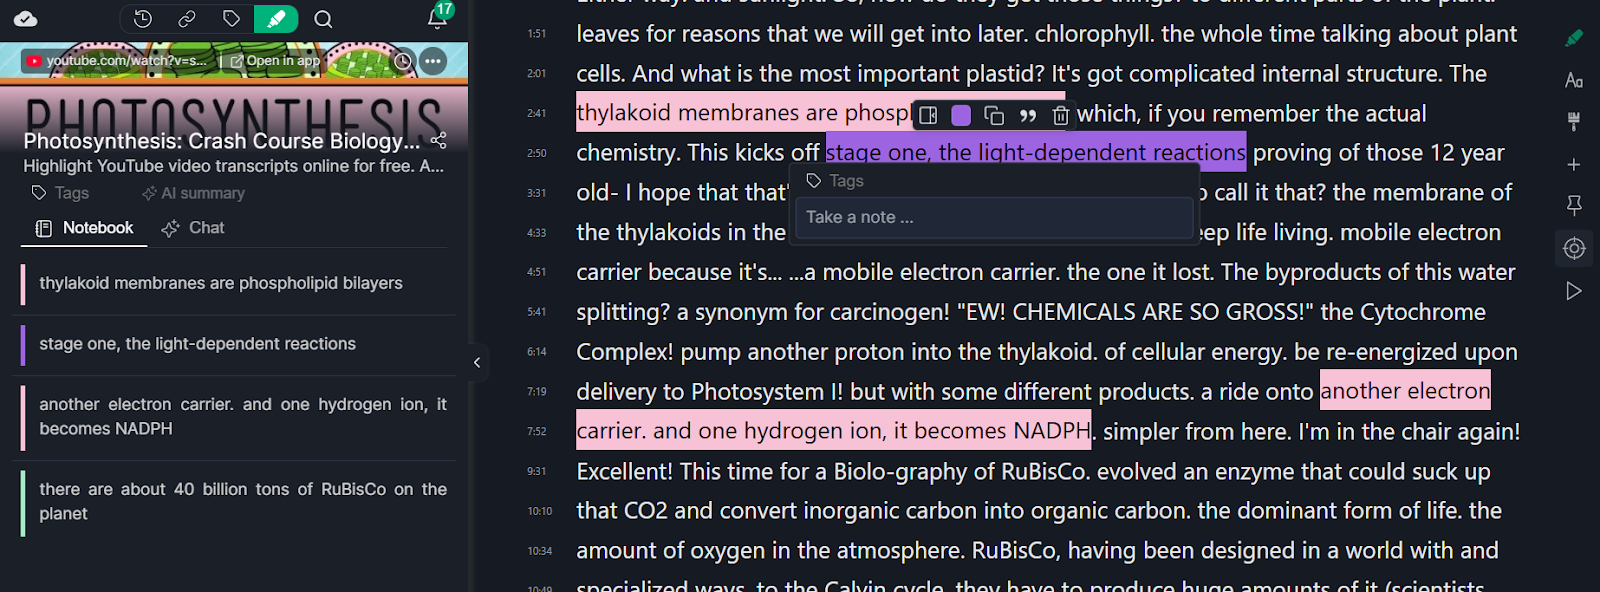
Add Time-Stamped Notes for Context
Once you've highlighted a segment, you can add time-stamped notes by clicking on the highlighted text. These notes help capture the key video details and context of each part, making it easier to understand and remember specific details.
For example, if you’re watching a video on a scientific topic, you can add a note explaining the process or providing a brief summary of what was discussed at that timestamp. These time-stamped notes are especially useful for revisiting content quickly without searching through the video again.
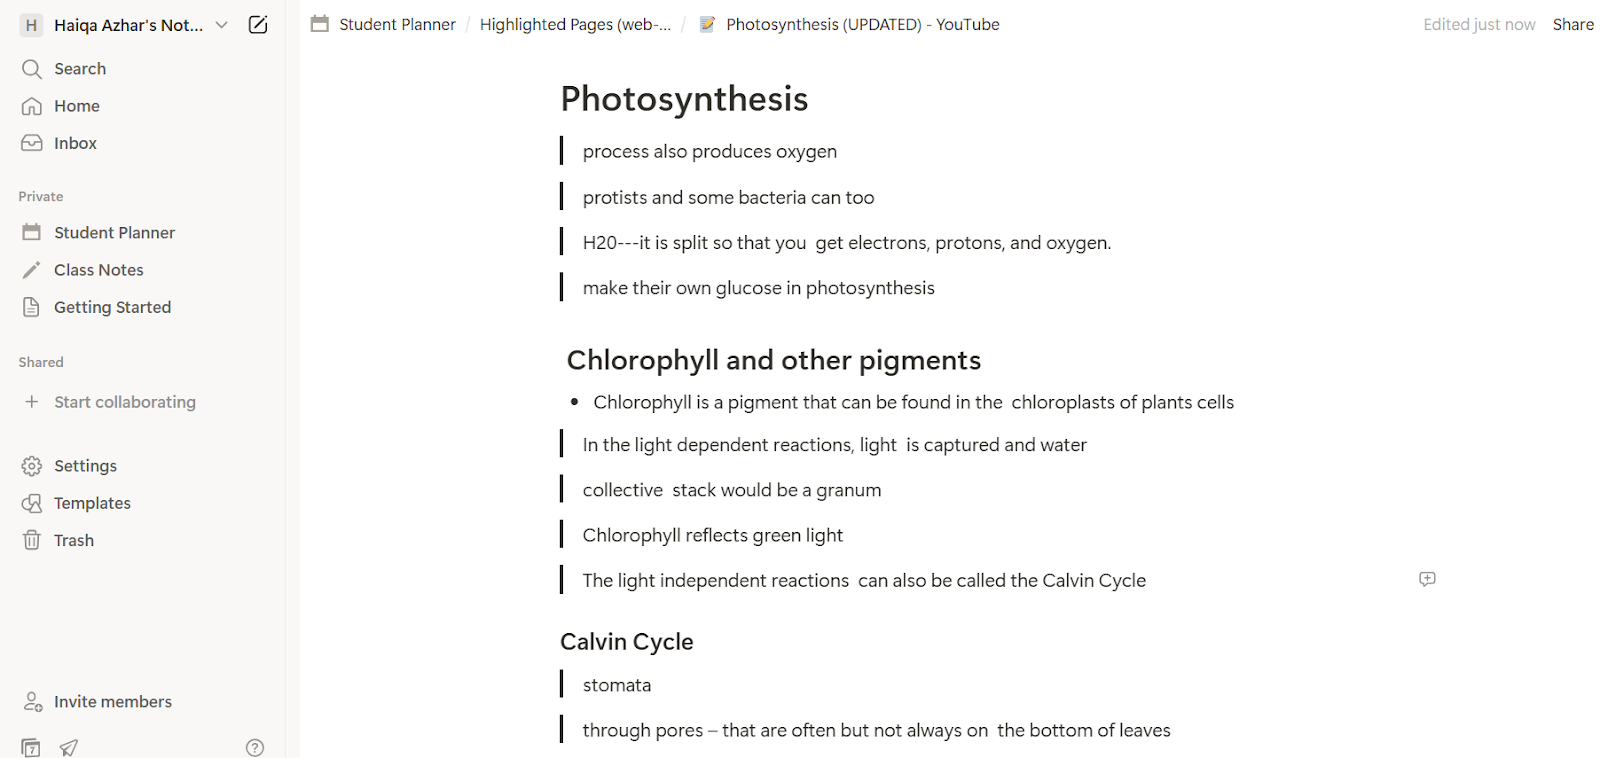
Tagging Important Points

To better organize your annotations, you can tag video segments with relevant labels. For example, you could categorize a section about the process of photosynthesis as “Photosynthesis Process” or a segment explaining the light-dependent reactions as “Light Reactions.” Tagging helps you easily sort and retrieve specific information, making your annotations more structured and accessible. This is especially helpful when you have multiple annotations on different aspects of the video.
Use YouTube AI Summary Before Annotating
Before diving into highlights and notes, Web Highlights also offers a YouTube AI Summary feature that helps you understand a video quickly before committing to full annotation.
Instead of watching the entire video first, you can generate structured summary formats such as:
- Key Points – a clear breakdown of the main ideas discussed
- Headline – a short, focused description of what the video is about
- TL;DR – a condensed version for quick scanning
- Teaser – a short preview-style summary for rapid context
These formats allow you to choose how deeply you want to engage. If you only need a quick overview, the TL;DR may be enough. If you are studying in detail, the Key Points format gives you a structured outline to annotate against.
Using the summary first creates a smarter workflow:
Preview → Identify important sections → Highlight transcript → Add notes → Tag and organize
This approach prevents over-highlighting and helps you focus only on the parts that support your learning objective.
Using the “Add Content” Button
One of the standout features of Web Highlights is the “Add Content” button. This feature allows you to paste any URL or video transcript into the tool.
The content is then opened in reader mode for further annotation and reading. This feature turns your entire YouTube video into an actual article. It is particularly useful if you want to annotate the video’s transcript directly, turning the text into an editable learning resource. You can highlight, add notes, and engage with the content more effectively, without distractions from other elements on the page.
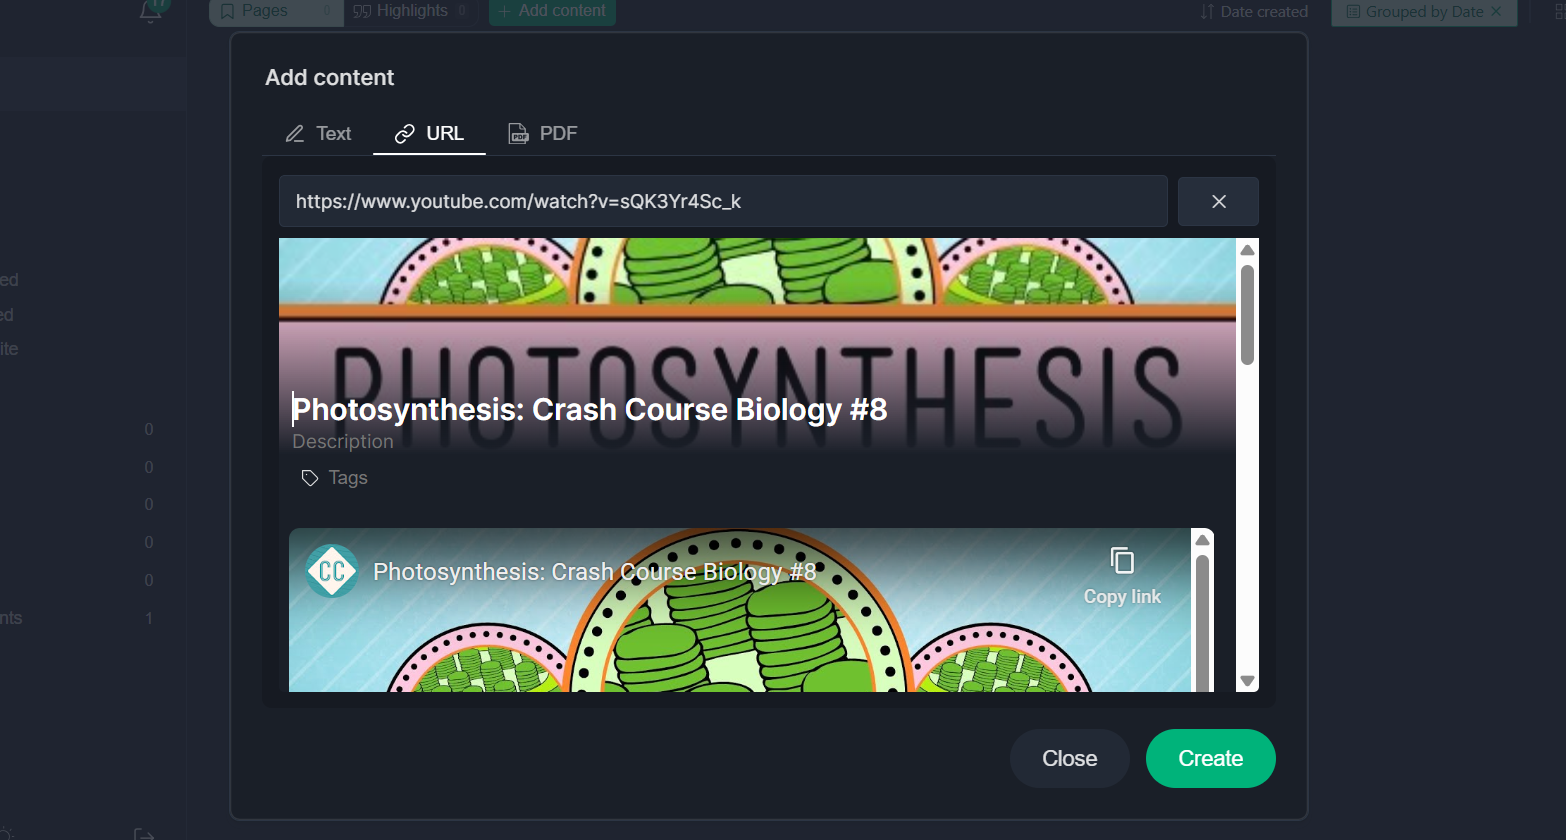
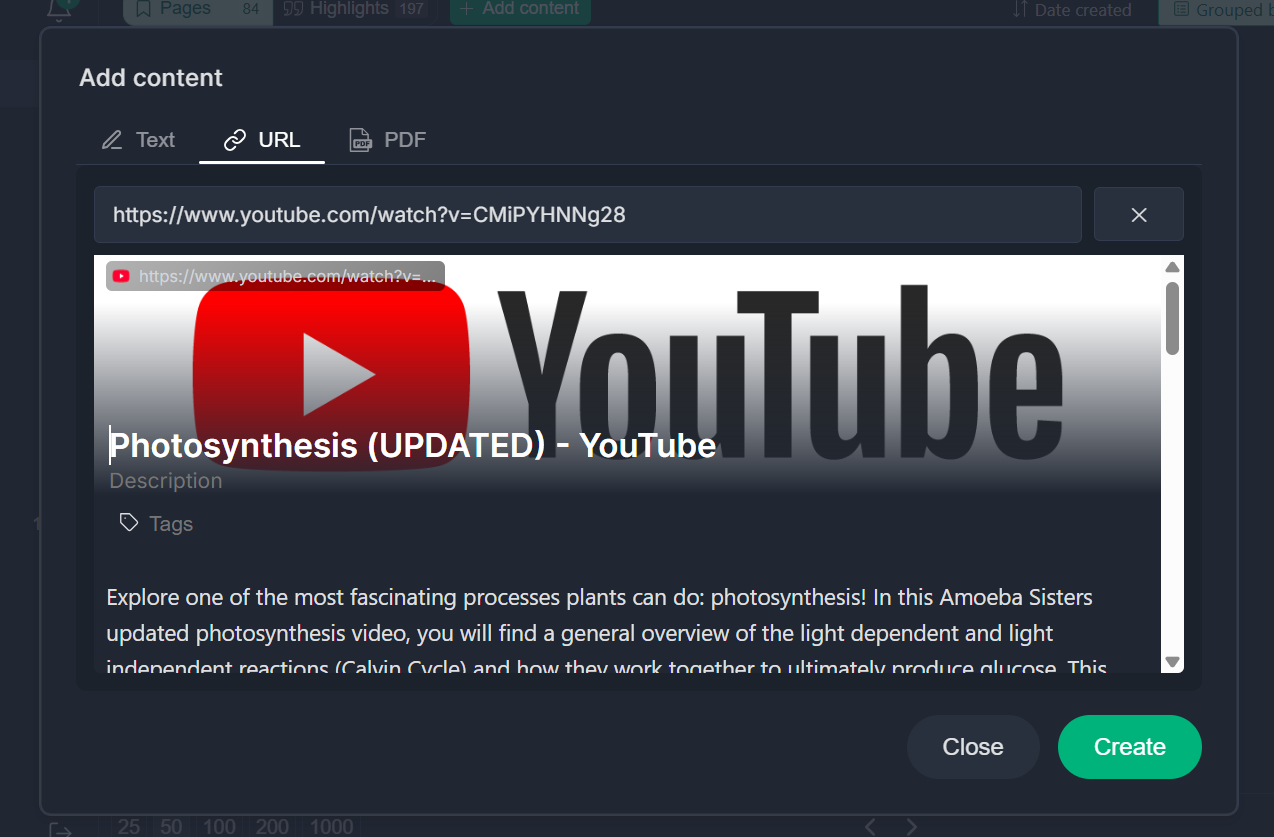
- To get started with this feature, simply open your web app and click on the “Add Content” icon that appears at the top.

- Next, paste the URL of your YouTube video to get started.
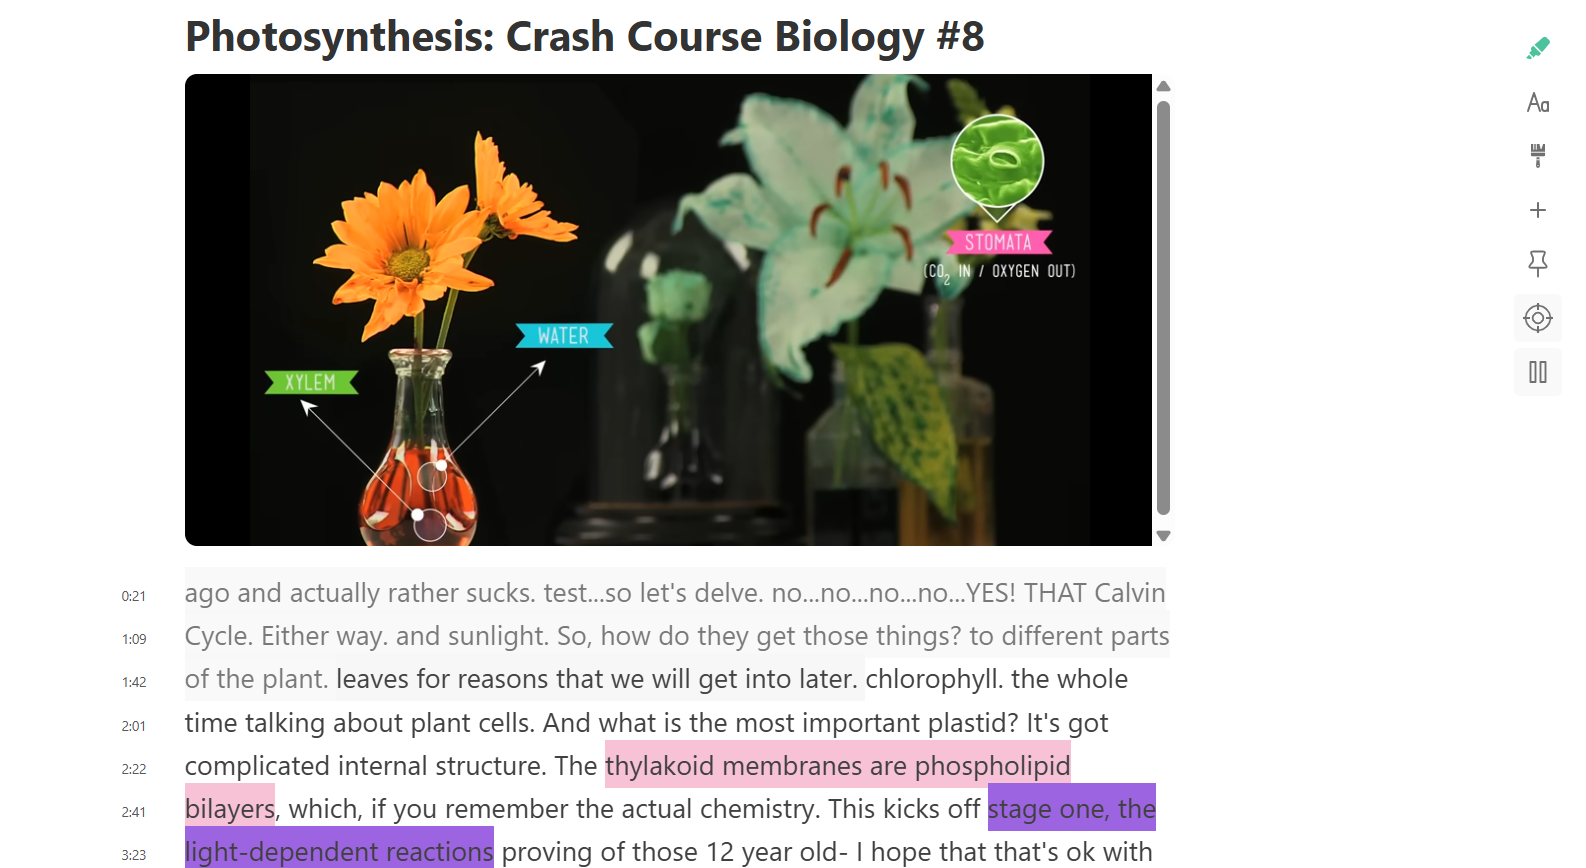
- This opens your YouTube video in the Reader Mode, so you can access it like a structured article instead of a standard video page. The transcript becomes clean, readable text, making it easier to focus on the actual content rather than distractions. Inside Reader Mode, you can adjust layout colors, change fonts, and customize the reading experience to match your preference. The video audio continues to play with visible timestamps, so you can follow along in sync. As the audio progresses, you can highlight specific lines, add notes directly next to key explanations, and annotate important moments without pausing or switching tabs.
Lastly, all your annotations are automatically saved within the Web Highlights interface.
Whether you are using the tool on your desktop or mobile devices, your annotations will sync across all devices. This ensures that your highlights and notes are always available, no matter where you are. You can easily search for specific tags or keywords to quickly access the content you've annotated, making your review process more efficient.
Organizing Your Annotations for Easy Access
Once you've annotated your YouTube videos, keeping everything organized is essential to make the most out of your notes. Web Highlights offers several tools to help you sort and access your annotations with ease.
Creating Collections
You can create collections to group video annotations by themes or projects. For example, you might create collections such as “Basics of Photosynthesis” or “Extensive Vocabulary” to keep your annotations organized by topic. This is especially useful if you're annotating multiple videos or creating a series of notes on a particular subject. Having everything in one place makes it easy to retrieve the information when needed.
Search and Filter
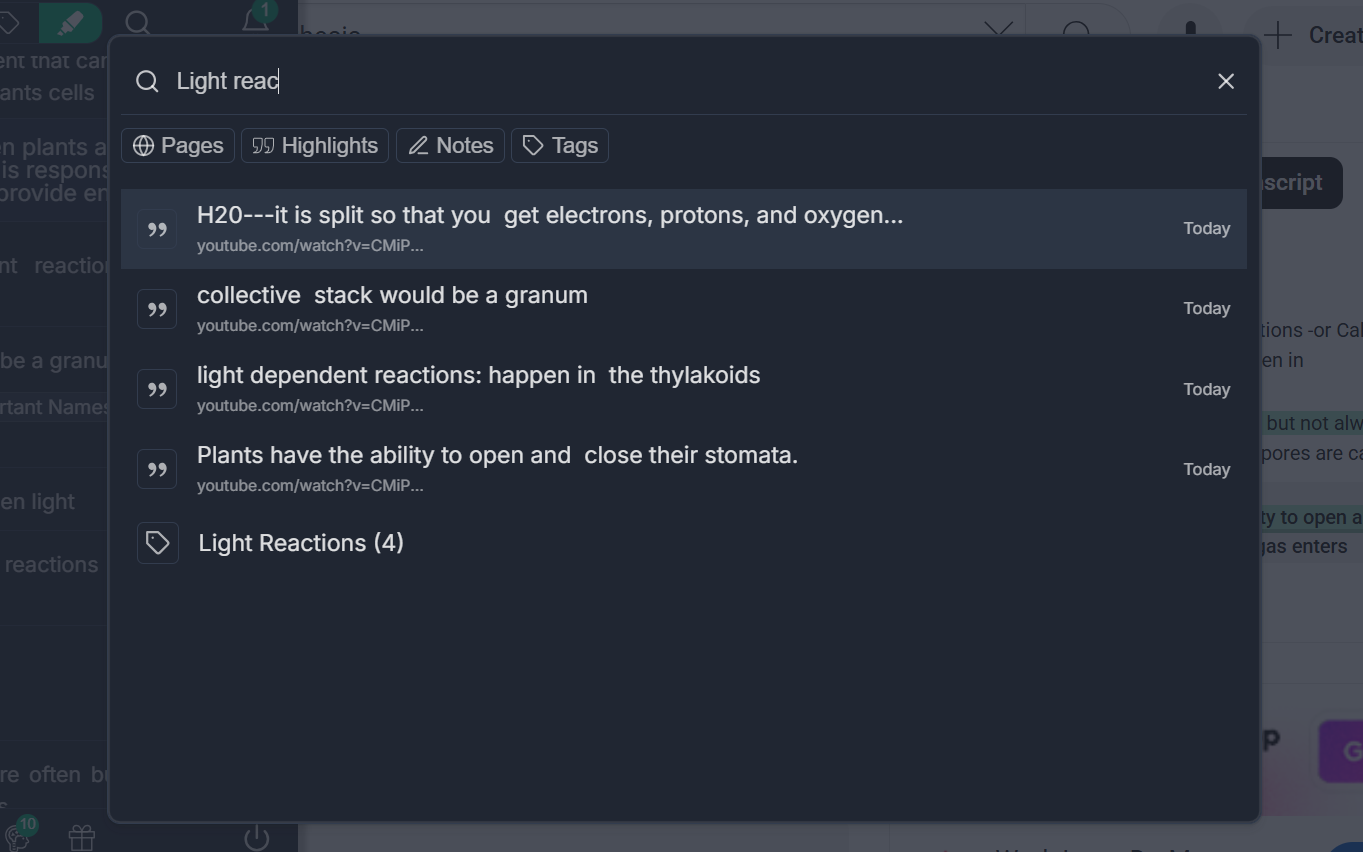
With Web Highlights, you can easily search and filter through your annotations. Using tags and the search function, you can quickly find key moments in the video.
For instance, if you’ve tagged a segment as “Light Reactions,” you can search for this tag and jump directly to the relevant part of the video. This feature allows you to save time by avoiding the need to manually scroll through your annotations to find specific points.
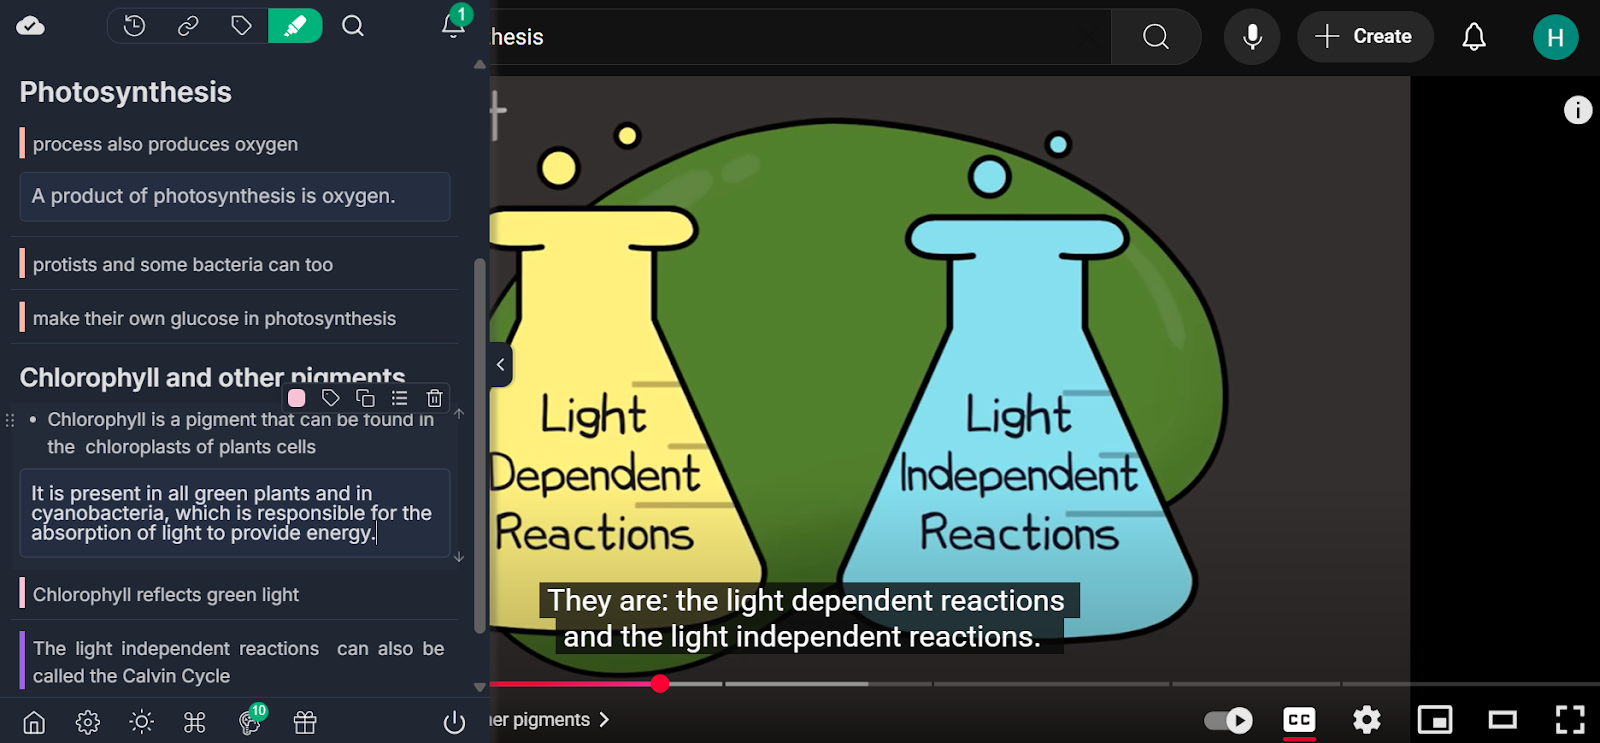
Color-Coding
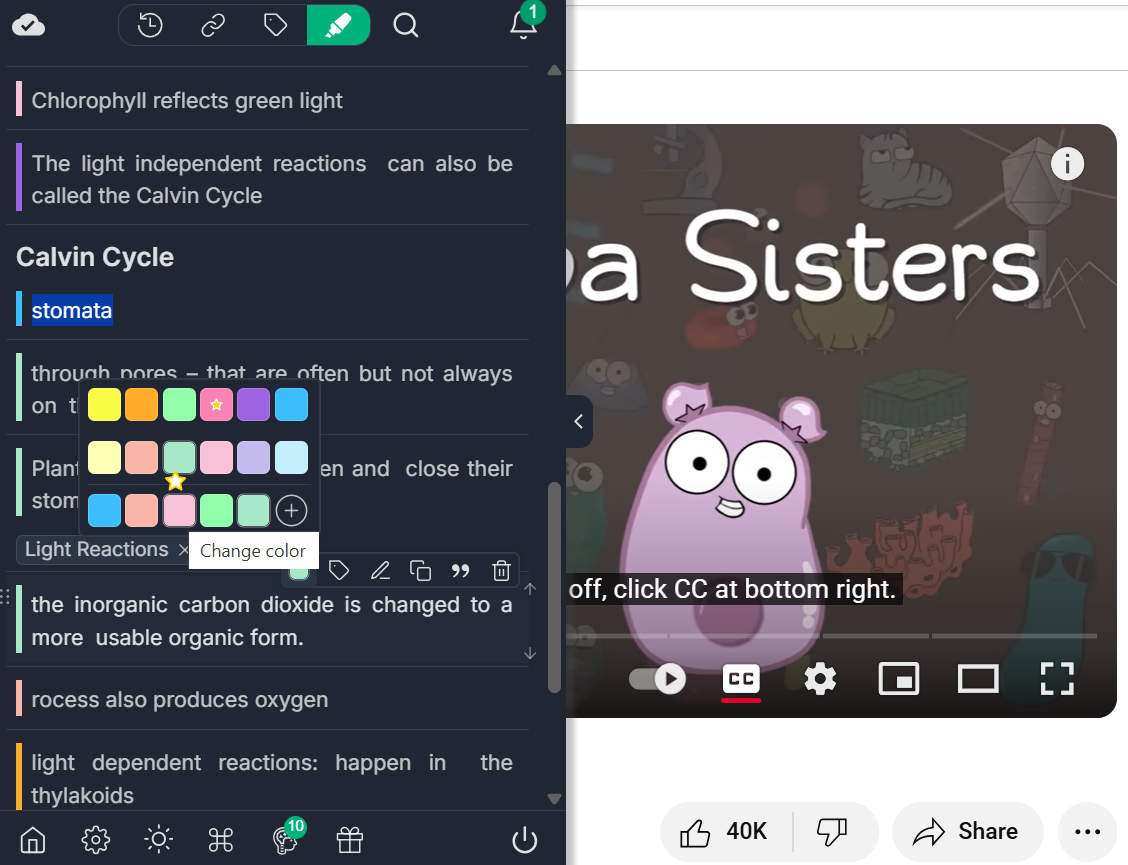
Another great feature of Web Highlights is the ability to color-code your notes.
Using different colors for various types of annotations can help you create interactive content. For example, you could use green for important vocabulary, yellow for ideas to explore later, and blue for important reminders. This system not only makes it easy to differentiate between various types of notes but also helps visually categorize your thoughts, making the annotations more effective for quick reference.
With these features, Web Highlights makes it easy to organize and access your YouTube video annotations, so you can stay efficient and focused while reviewing and studying.
Exporting Your YouTube Annotations to Knowledge Platforms
Once you are done with your YouTube video annotations, Web Highlights makes it easy to export your annotations to popular knowledge platforms for further organization and use.
With Notion export, you can send your annotated video highlights directly to Notion, making it perfect for research purposes. This allows you to keep all your video insights in one centralized, organized space.
For users who prefer a more flexible format, Obsidian, Capacities and Markdown export let you convert your annotated YouTube videos into permanent resources. This includes links, notes, and timestamps, allowing for seamless integration into your knowledge management system.
These platforms support further organization, categorization, and efficient knowledge management, helping you stay on top of your learning and research.
Tips for Efficient YouTube Video Annotation
To make the most of your YouTube video annotations, here are some tips that will help you stay organized and efficient:
1. Watch in Segments
Instead of annotating a long video all at once, try breaking the video into 1-3-minute chunks. This helps you focus on smaller sections of the video, making it easier to highlight key moments and add concise notes. By doing this, you’ll also avoid feeling overwhelmed and ensure that your annotations are more detailed and precise.
2. Write Concise Notes
When adding annotations to your YouTube video, aim to keep your notes short and relevant.
Focus on summarizing the key points or takeaways from each segment. For instance, instead of writing long paragraphs, jot down the main idea or concept discussed. This makes it easier to revisit your notes later and quickly find the essential information.
3. Use Timestamps Effectively
To make it easier to navigate through your annotations, add specific time stamps in your notes or highlight the time stamps and then add notes.
This way, you can jump directly to the relevant part of the video when reviewing your annotations. For example, if you're watching a tutorial, you can add a timestamp to a segment that explains a specific step, so you don’t have to search through the entire video to find it again.
4. Sync Across Devices
One of the great features of Web Highlights is the ability to sync your annotations across multiple devices. Whether you're working on your desktop at home or reviewing notes on your mobile device while on the go, your highlights and notes will be automatically synced, this ensures that you have access to your annotated video content whenever and wherever you need it.
5. Use Email Reminders
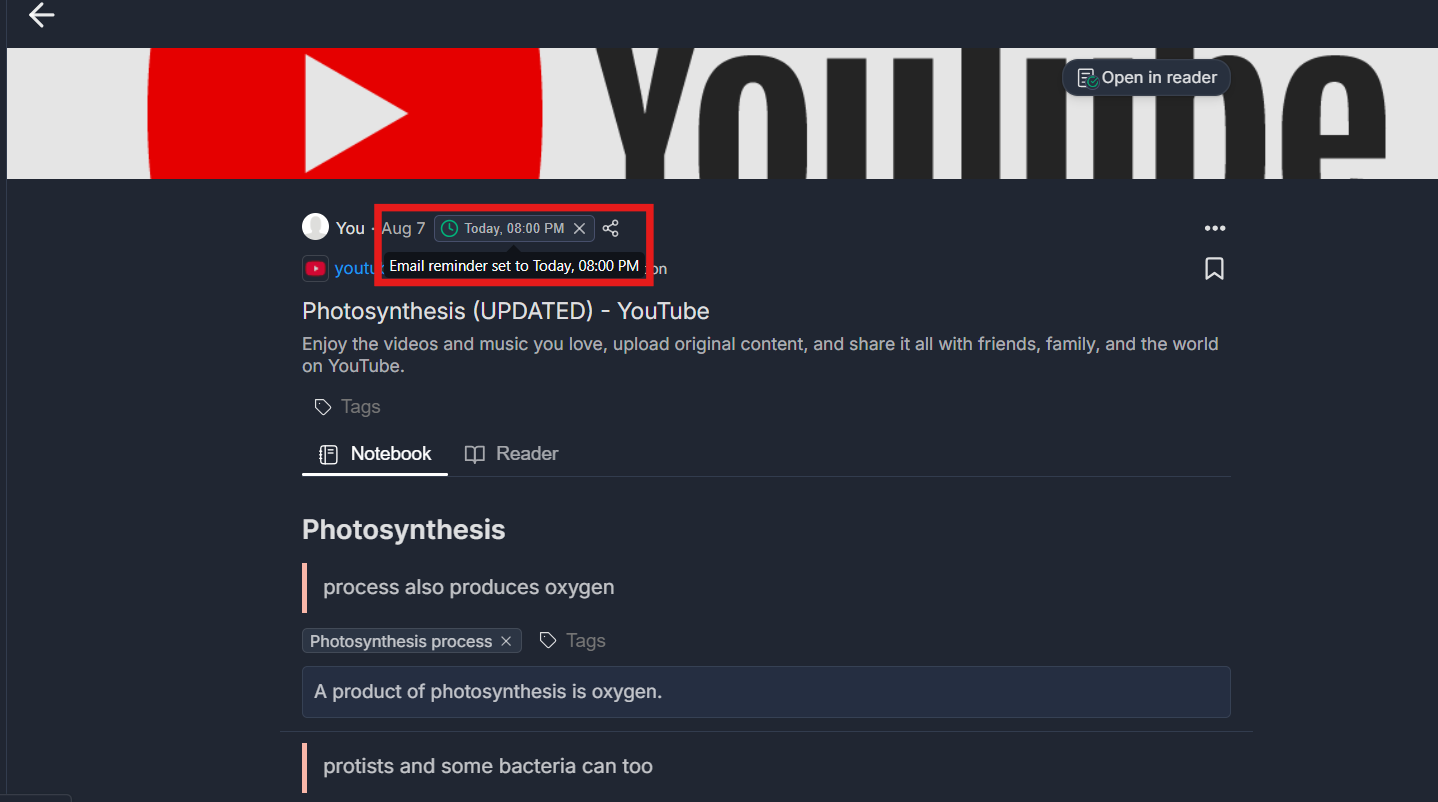
To stay on top of your learning, set reminder notifications within Web Highlights.
If there is a video you have annotated and want to revisit, you can set a reminder to help you stay organized. This feature allows you to keep track of important videos and annotations, making sure you never forget to review critical content.
By following these tips, you can make your YouTube video annotations more efficient and ensure you stay organized while learning or conducting research.
Key Takeaways
By using video annotations YouTube with Web Highlights, you can turn passive content into interactive, actionable learning. With time-stamped notes and the ability to organize your insights, you can capture key moments and make them easy to revisit whenever needed. This approach allows you to actively engage with the content and retain information better.
Ready to get started? Install Web Highlights, begin to add annotations to YouTube videos, and organize your insights for better retention today!
Frequently Asked Questions
Q. What Are Annotations in YouTube Videos?
Annotations in YouTube videos are clickable text or notes that appear during the video on transcripts or descriptions, used to provide additional information, context, or links. With Web Highlights, annotations refer to highlighting text in the YouTube transcript, adding time-stamped notes, generating AI summaries, and organizing those insights with tags. This transforms videos into structured, searchable learning resources.
Q. How Do You Add Annotations to YouTube Videos?
Adding annotations to YouTube videos using Web Highlights is simple and enhances your viewing experience. You can then use the highlighter tool to mark key sections of the video transcript, add time-stamped notes, and tag important moments. This allows you to capture critical points in the video and revisit them later.
Q. How to Disable Annotations and Pop-ups on YouTube Videos?
If you want to disable annotations and pop-ups on YouTube videos, you can turn off Web Highlights’ Chrome extension from the extension bar. To avoid any third-party pop-ups, you can disable YouTube's built-in annotations feature in your account settings.
Q. Can I add annotations to live-streamed videos on YouTube?
Yes, you can add annotations to YouTube videos after the stream has finished, but live-streamed videos are typically not available for annotation in real-time. Once the stream is over, you can go back and annotate it using Web Highlights.
Q. How do I export my YouTube video annotations to Notion?
You can easily export your YouTube video annotations to Notion by selecting the export option in Web Highlights. This will send your highlighted sections and notes directly into your Notion workspace for future use and organization.
Q. Are annotations saved automatically on YouTube videos, or do I need to re-annotate every time?
With Web Highlights, your annotations on YouTube videos are automatically saved and synced across devices. You don’t need to re-annotate the video each time you return, making your learning more efficient.
Q. Does Web Highlights work on other video platforms like Vimeo?
Currently, Web Highlights is designed to work specifically with YouTube video annotations. However, we are constantly working to expand support for other platforms, so stay tuned for future updates!
Q. How can I sync my annotations across multiple devices?
With Web Highlights, your annotations are automatically synced across all devices where you're logged in. Whether you’re using your phone, tablet, or desktop, your highlights and notes will be accessible on each device. Just make sure you have logged in with the same account.