Formatted Highlighting Will Change Your Highlighting Experience
Discover how formatted highlighting transforms your reading experience. Learn tips and techniques to make your highlights more effective and organized.

Imagine if this article didn’t have any headlines or was just plain text. It would be much harder to read, right? Well, that’s what most highlighters do — they just highlight text in plain form.
So, I had this idea: Why not highlight text in the same format as it appears on the page? The new formatted highlighting mode of Web Highlights does just that — it allows you to highlight in various styles, such as headings, paragraphs, quotes, bullet points, or code blocks.
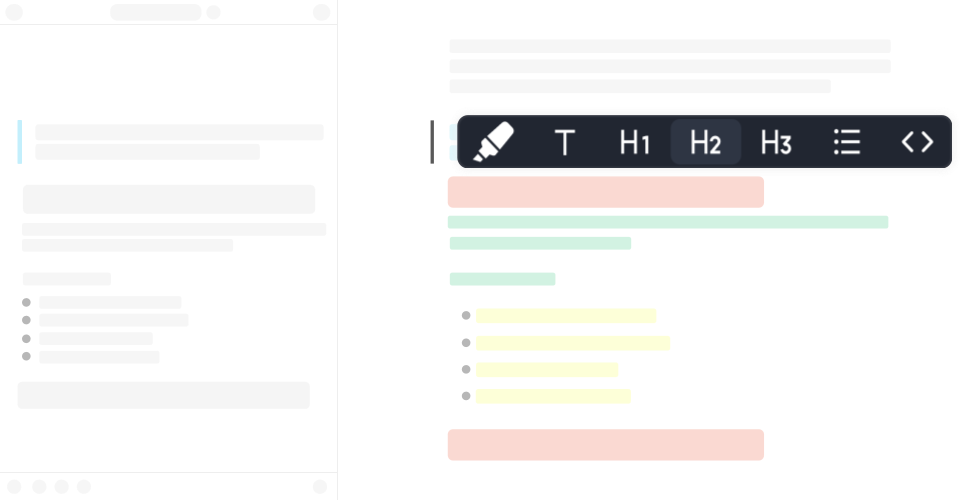
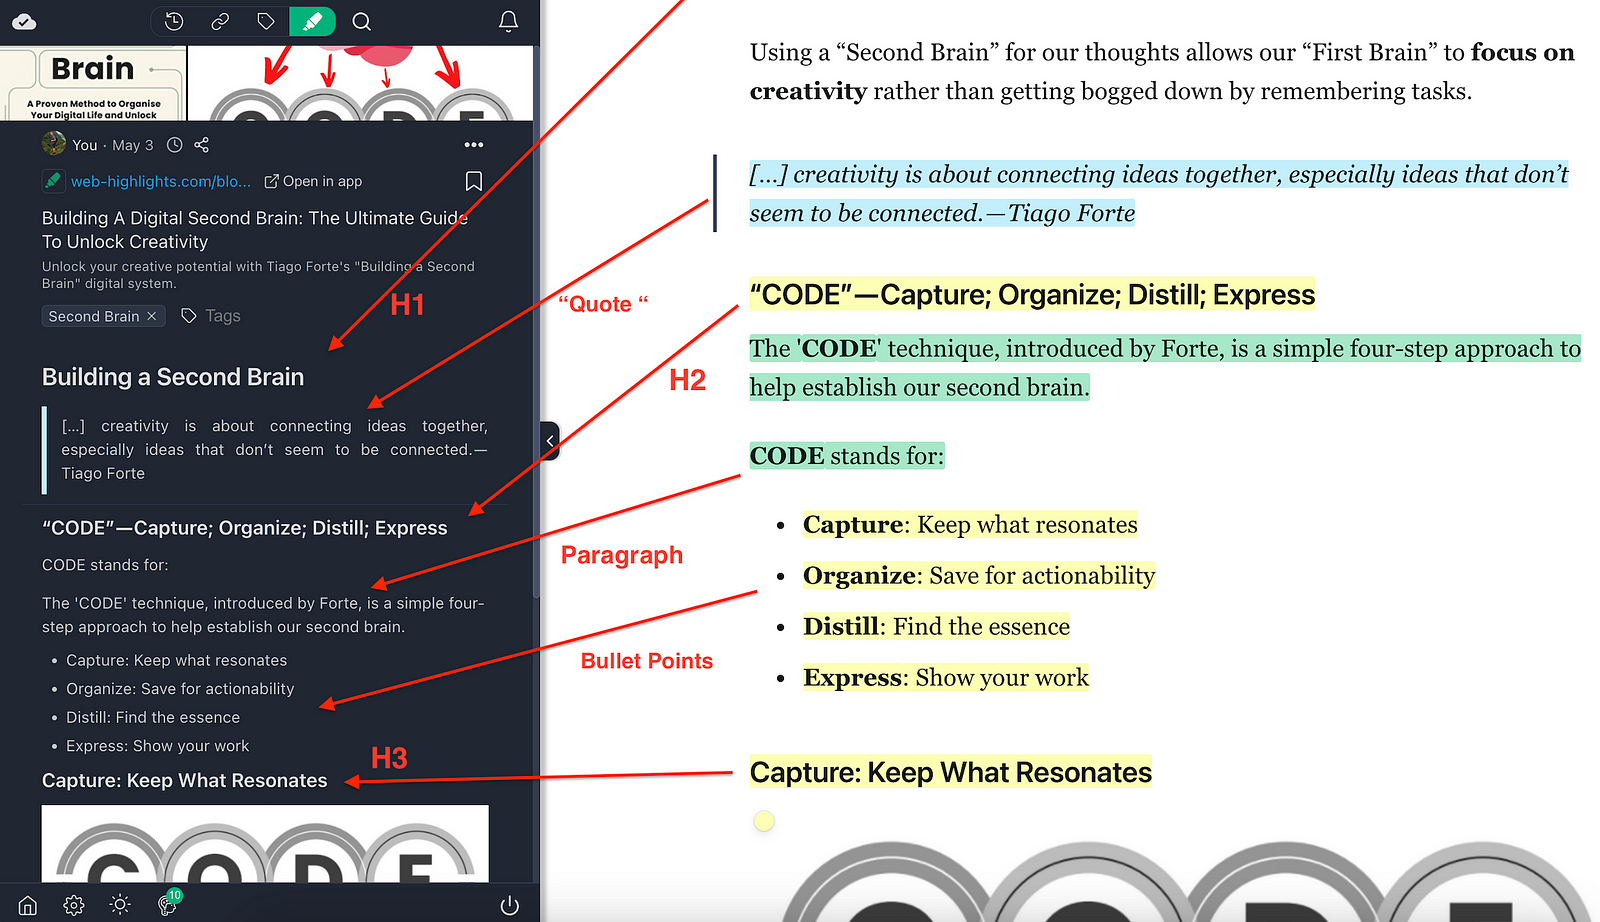
Here is how the advanced highlighter mode looks like in action:
Advanced Highlighter Mode
Comparison of Highlighter Modes
Let’s look deeper at how the new highlighter mode solves a problem I have had when I went through my highlights & notes of a large article or book.
Here is how a highlighted article with many highlights looked like in the past:
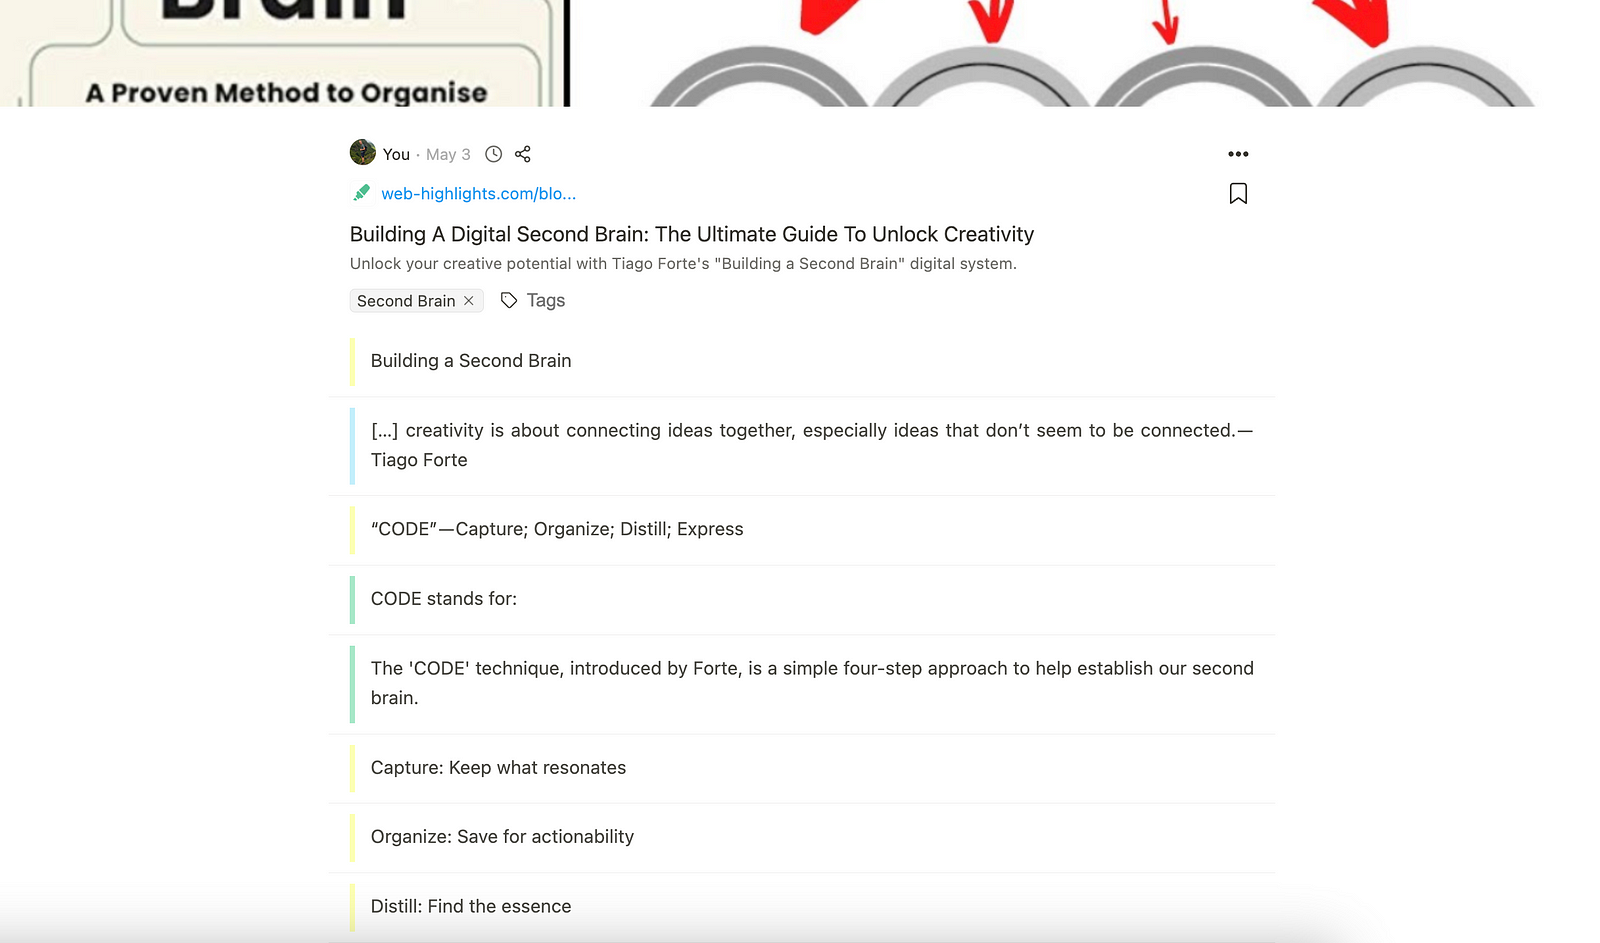
The points are not so fun to go through because they are challenging to read. Some of the highlights were headlines or bullet lists in the original article but they are formatted as plain text.
There is a reason why articles and books have headings, bullet points and quotes.
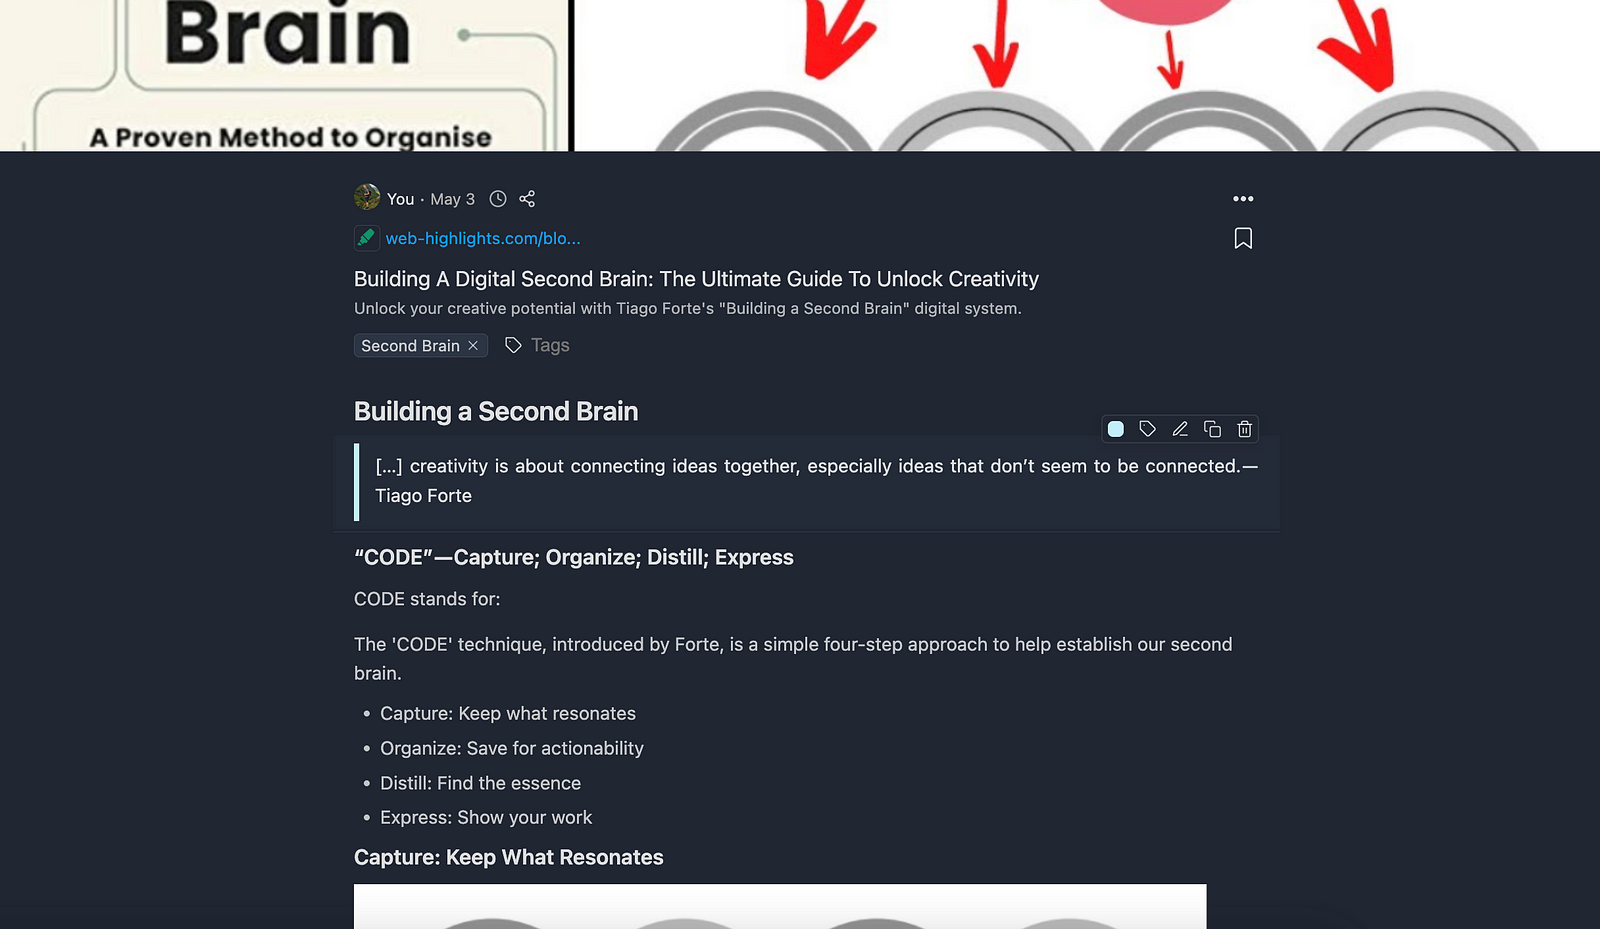
Here is how the article looks like when using the new formatted highlighting feature:
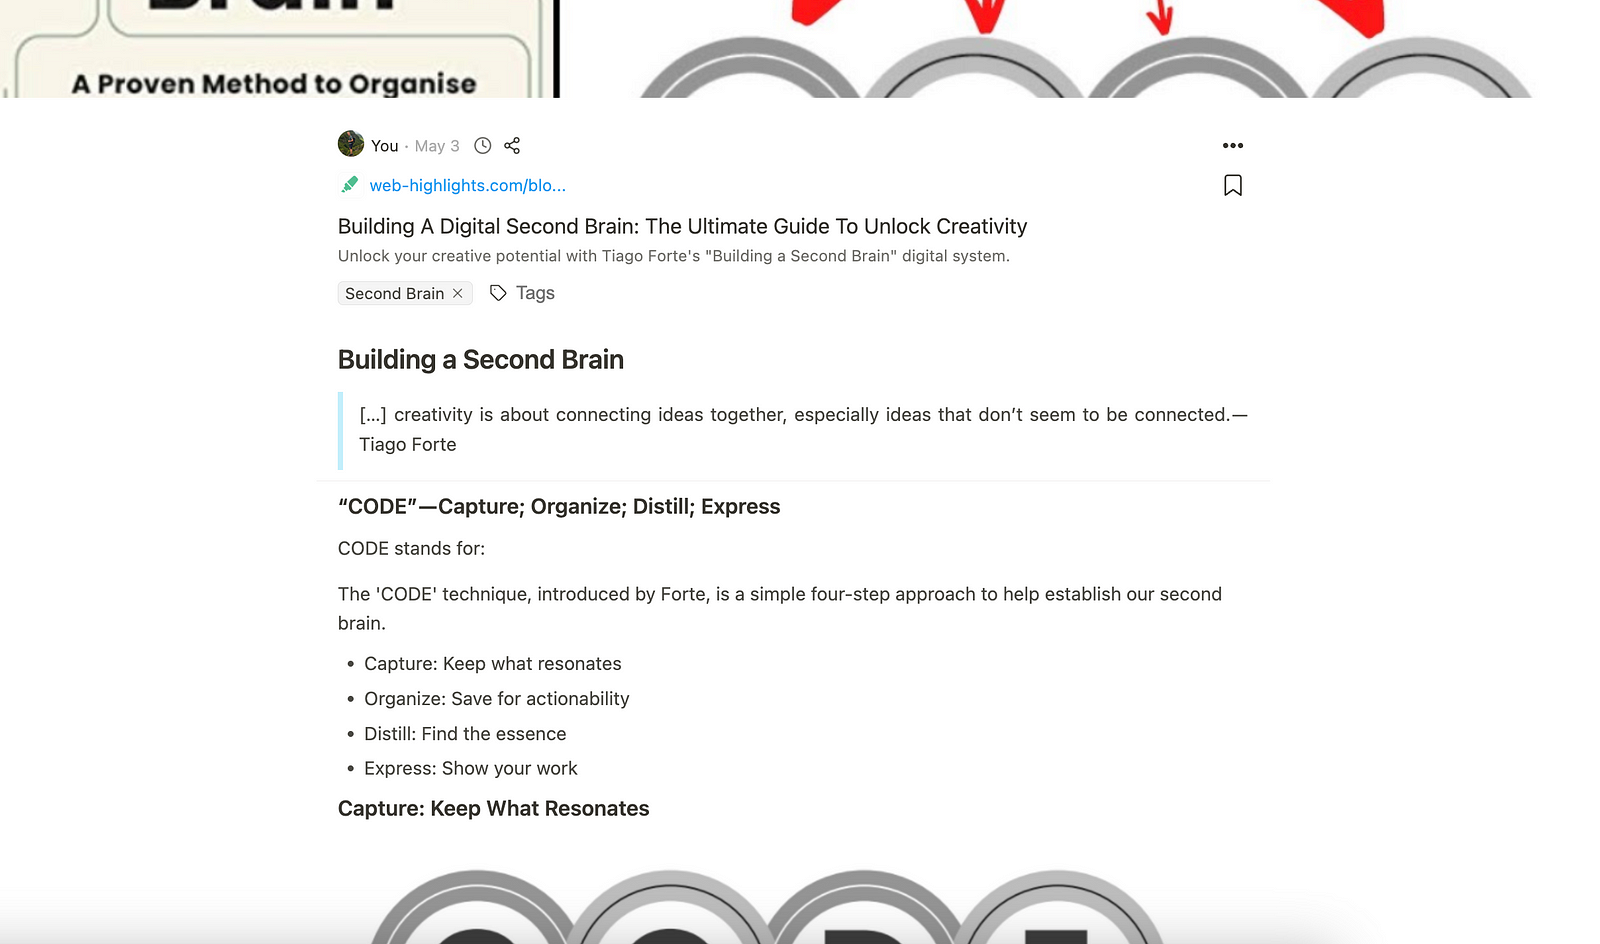
Much easier to read, right?
Using headlines, quotes, paragraphs, and bullet lists in our highlights makes the article much easier to read. It provides a clear structure for our minds, similar to what we’re used to in articles.
How To Use Formatted Highlighting
First of all, you need to install the Web Highlights Chrome Extension. Then you can find an option in the settings to switch between the two highlighter modes:
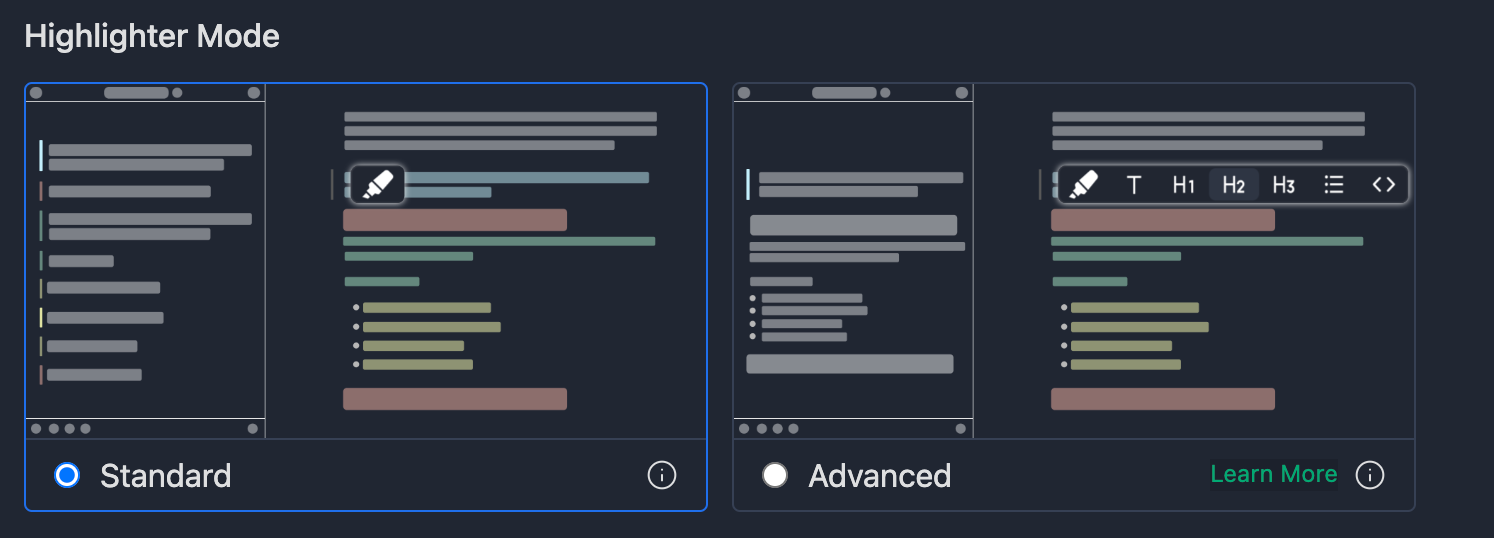
- Standard: This is the standard highlighter mode, designed for simplicity and ease of use. It allows you to highlight any text, which will then be displayed in the sidebar in the color of your choice. This mode is perfect for those who prefer straightforward, color-coded highlighting.
- Formatted: This mode offers a more advanced highlighting experience. It allows you to use various formats such as headings, paragraphs, quotes, bullet points, or even code blocks. This helps you to better organize and structure your highlights in the sidebar, making it ideal for those who want more control over their highlighting process.
Once you have enabled the advanced mode, you can start using the formatted highlighter.
ℹ️ The new formatting feature is available to users during the 7-day free trial or with an active Ultimate subscription. You can check out the current prices for the Web Highlights plans here.
How does it work?
There is no need to explain the basic mode as it is the standard highlighter. Let’s zoom in on the Advancded Mode. Just make sure you’ve turned on Advancded Mode in your settings, as explained in the last section.
Then, you can easily highlight any text on any website. Once you do that, a regular highlighter will appear. When you hover over it, you’ll notice a new formatting toolbar that lets you highlight your text in different styles.

Here are the different formats to choose from:
- Quote: When you click the standard highlighter icon, your text will turn into a quote in the sidebar. That’s just what happens by default with the standard highlighter mode.
- Paragraph: Click the “T” icon, and your text in the sidebar will look like a regular paragraph.
- H1: Your text will become a bold and big headline.
- H2: It’ll be bold but a bit smaller.
- H3: It’ll be bold but the smallest.
- Bullet List: Your text will show up as a bullet list item.
- Code: This options transforms your text into a code block.
Here’s what each of those formats looks like in the sidebar when you’ve highlighted text in different ways:
The highlighted texts are much more structured and easier to read in the sidebar. Here is how the highlighted article looks like in the web app:
That’s it. Enjoy this cool new addition!
If you haven’t already, be sure to install the Web Highlights Chrome Extension and give this new feature a try for free during the 7-day trial.
Thanks for reading!
Want to learn more about how I scaled my Chrome Extension to almost 100,000 users as a solopreneur? Subscribe to my stories or follow me on LinkedIn and Twitter.