Welcome To Web Highlights
Hey, I’m Marius 👋 I created this Chrome highlighter to help me better organize my online research. In this article, I want to make sure you get off to a great start – I hope you end up loving the app as much as I do ♥️


I'm sharing my journey of building this tool on Twitter and LinkedIn . I would be happy to connect 🙂 Or you can just email me at hallo@marius-bongarts.de ✉️.
Feel free to reach out with any questions—no app is perfect, and I’m open to feedback. I’ll make sure to respond!

Now, let's get started 🚀
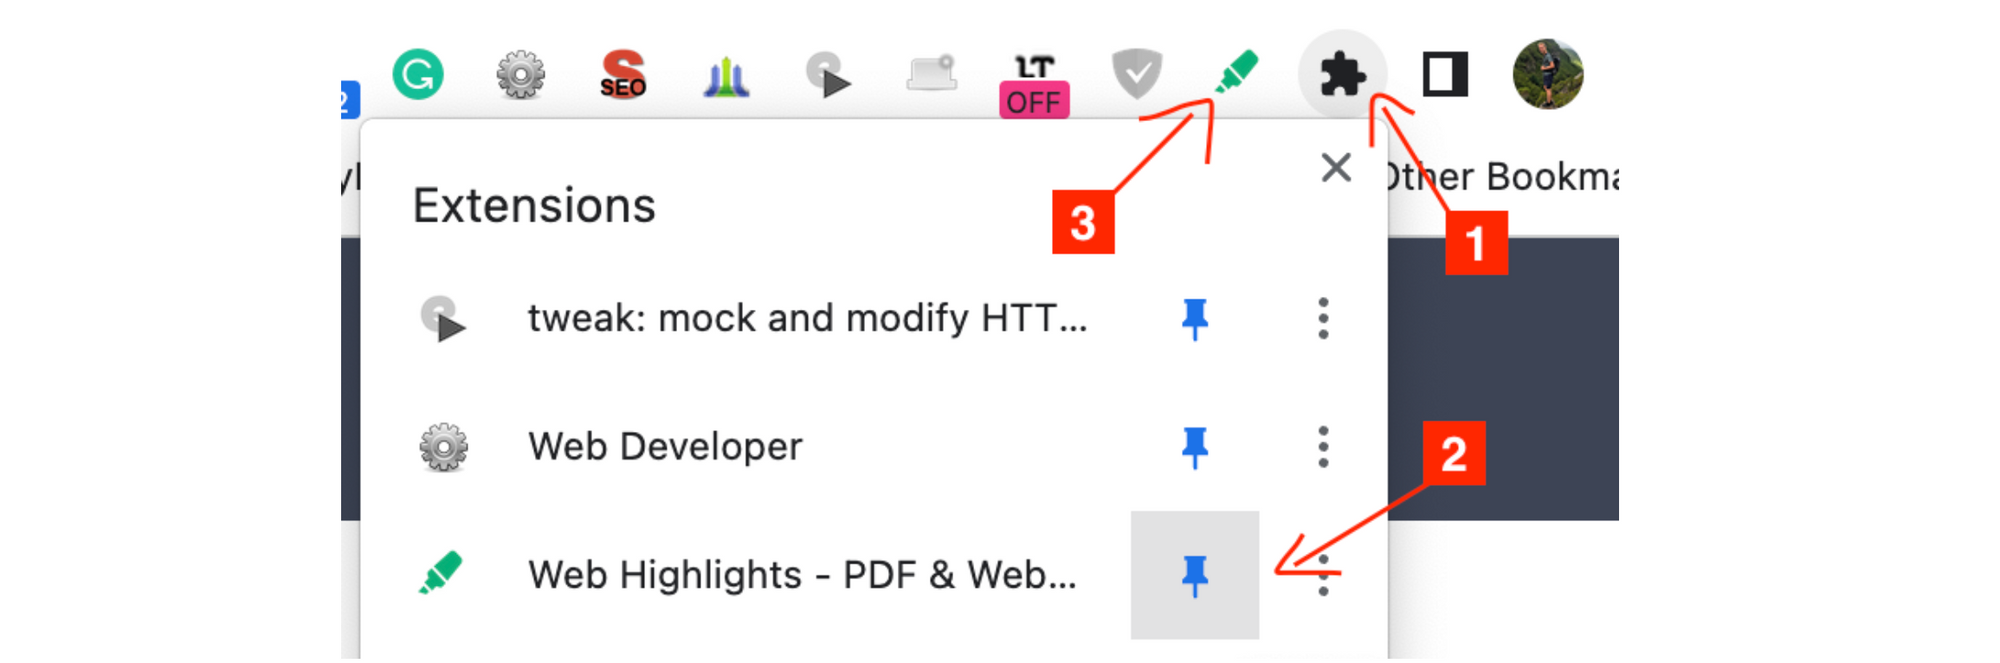
1. Pin Web Highlights Extension 📌
To start off, make sure to pin Web Highlights so you can easily access it whenever you need. Just click on the extension icon in the top right corner and choose "Pin" for Web Highlights.
2. Enjoy all features 🔥
Most of Web Highlights is free. It can even be used without signing up. The offline features are always available for free, and they are ad-free.
💡 Tip: If you mainly installed Web Highlights to highlight PDFs, check out this guide to help you get started.
The free version includes the following features:
- Highlight websites
- Highlight both online and local PDFs files in your browser
- Unlimited offline highlights 🎨
- Unlimited offline bookmarks 🔖
- Unlimited colors 🎨
- Unlimited note-taking ✍️
- Unlimited tags 🏷️
- Backup your research 💾
- Export to Notion, Obsidian, and more 📄
- Learning recap (10 per day) 🧠
- Import your Kindle highlights & notes 📚
- Explore what others shared 👥
- Powerful full-text search 🔍
- Keyboard shortcuts for highest efficiency ⚡
To fully enjoy the benefits of Web Highlights, including accessing your highlights and bookmarks from anywhere you'll need to create an account.
During a 7-day trial, you can explore all the features including:
- Automatic cloud-sync to Web App 🔄
- Highlight images 📷
- Unlimited cloud highlights 🔄
- Unlimited cloud bookmarks 🔄
- Access highlights from anywhere 📱
- Export to PDF & HTML files 📁
- Learning recap (Unlimited) 🧠
- Set email reminders ⏰
- Share your highlights with others 🔗
Once the trial is up, the app will only offer its free offline features. If you want to keep syncing your highlights and access all the cool stuff, you can upgrade to the Premium or Ultimate version of the extension.
By upgrading to a paid plan, you will also support me in further making the app better for you 🙏🏻. You can find the current pricing here.

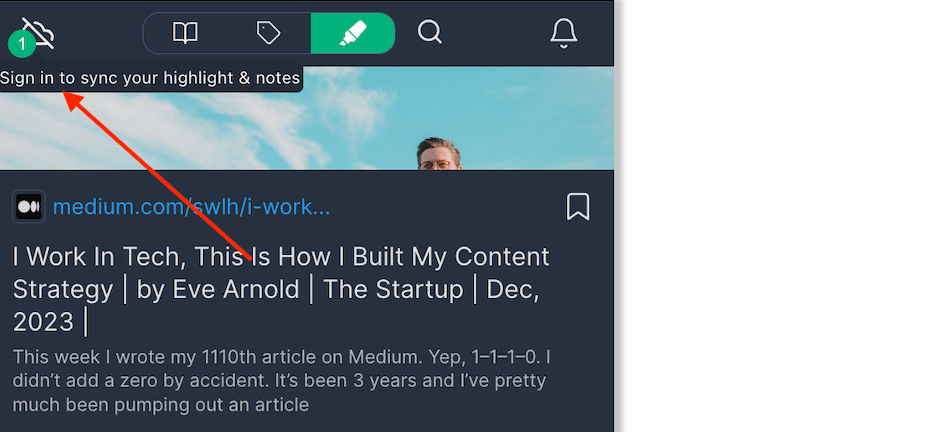
3. Create an Account 👥
Although you can start without an account, I recommend creating one to enjoy and test all the great features my tool offers.
To sign up, you can open the sidebar by clicking the extension icon, and a sidebar will appear. You can also use the keyboard shortcut (Mac: ⌥ + W, Windows: ALT + W).
Afterward, you can click on the "Cloud"-icon in the top right corner of the sidebar. This icon indicates whether your changes are successfully synchronized to the web app.
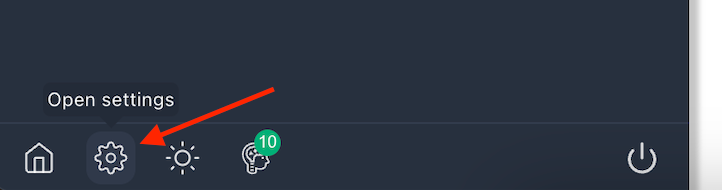
Alternatively, you can click the "Settings" icon in the bottom right corner and click "Sign In" in the popup. Furthermore, you can go to web-highlights.com/auth to create an account or to sign in.
Now you should see a login modal, which you can use to sign up. You can sign up using your email address or Google Sign in.
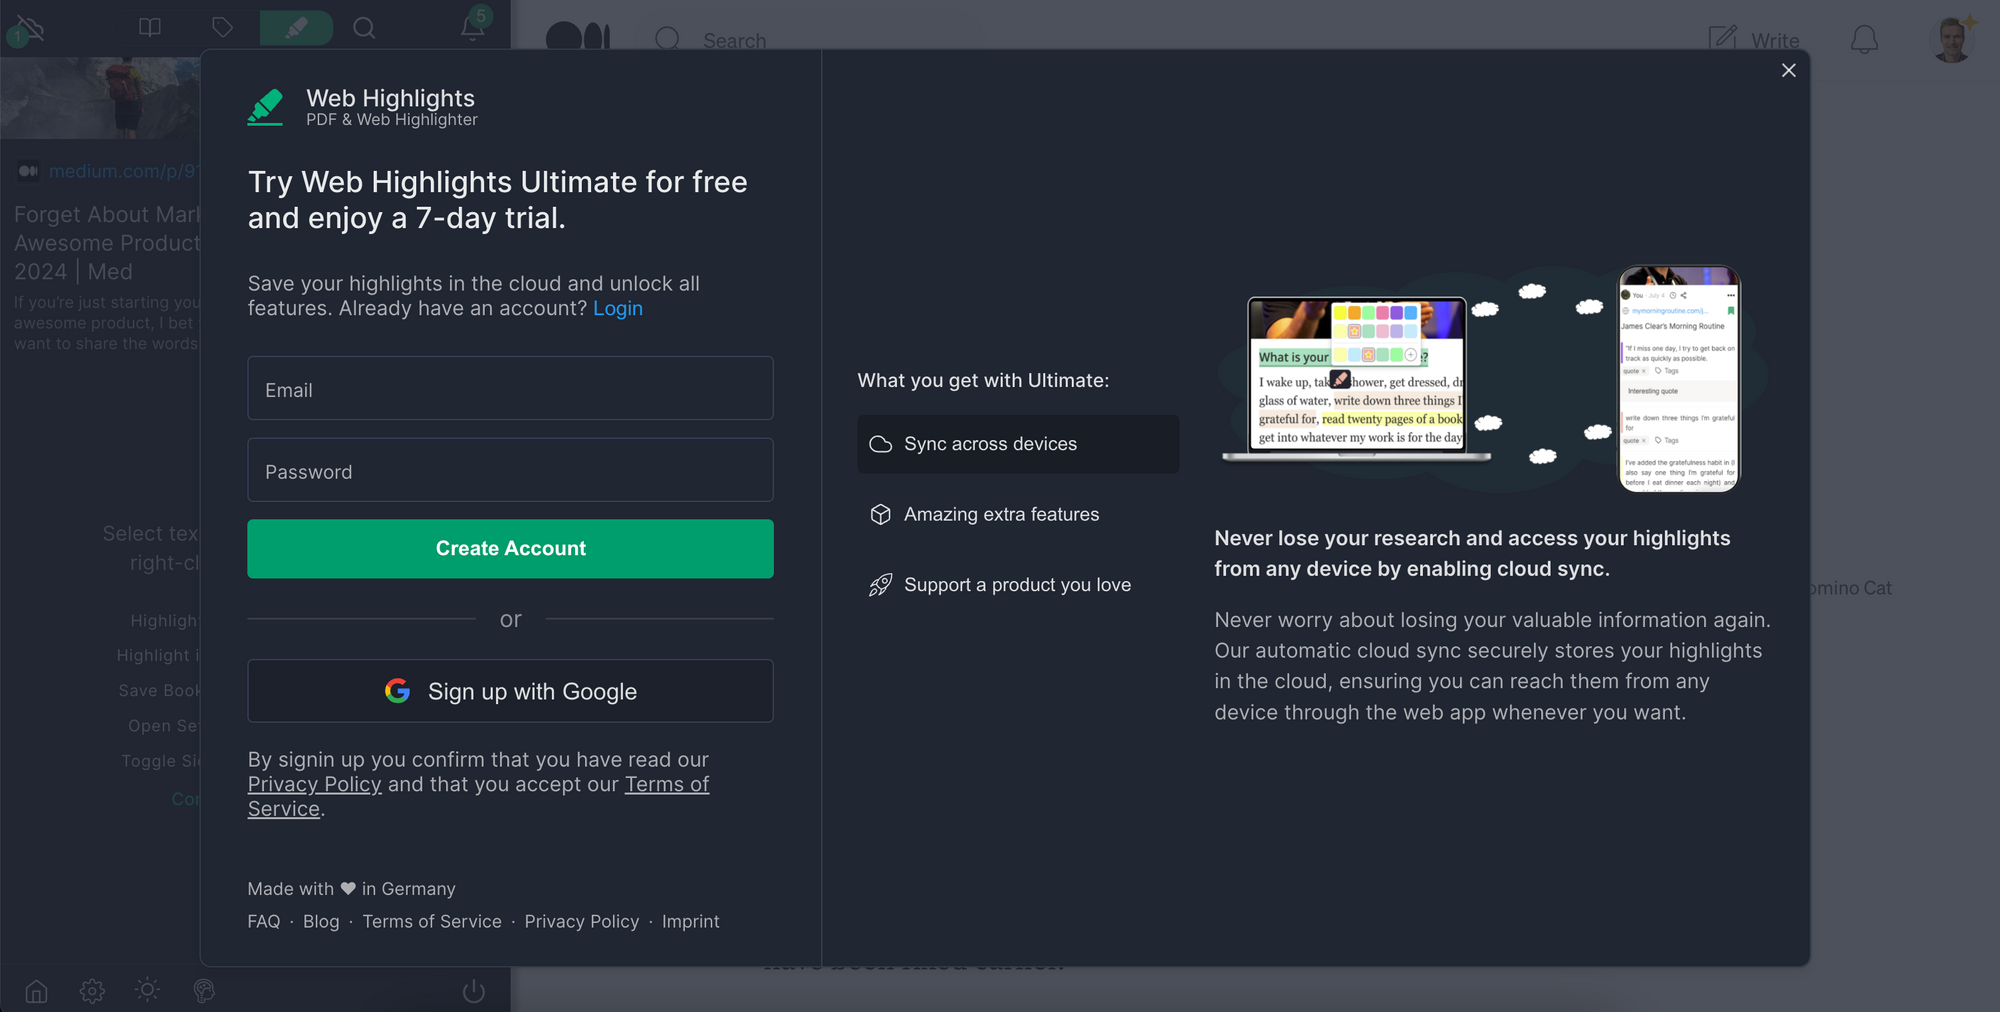
ℹ️ Google Sign-In might not function properly if AdBlockers are active, causing the "Sign up with Google" button to have no effect. If you encounter this issue, consider temporarily disabling your adblockers. If the problem persists, utilize the email/password login or reach out to me for assistance, and I'll do my best to help you.
New Web Highlights
4. Start Highlighting 🚀
Finally, you're ready to highlight 🎉
Select some text and create a highlight by either:
- clicking the highlighter popup
- right-clicking the selected text
- using a keyboard shortcut (Mac: ⌥ + S, Windows: ALT + S)
Highlight using the Popup
The most obvious way of highlighting text is using the floating popup, which appears when selecting text. Simply select your desired text with your cursor and click the highlight icon of Web Highlights. You can either click the icon to highlight using the selected default color or choose out of the three most recent colors you used.
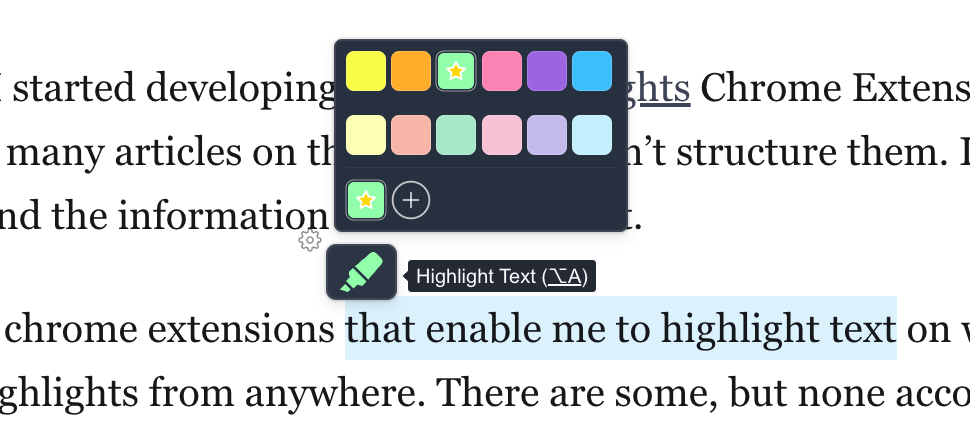
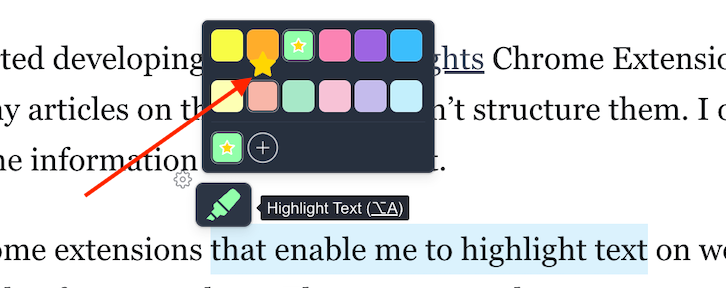
To change the default color, you can hover over one of the given colors and select the star icon:
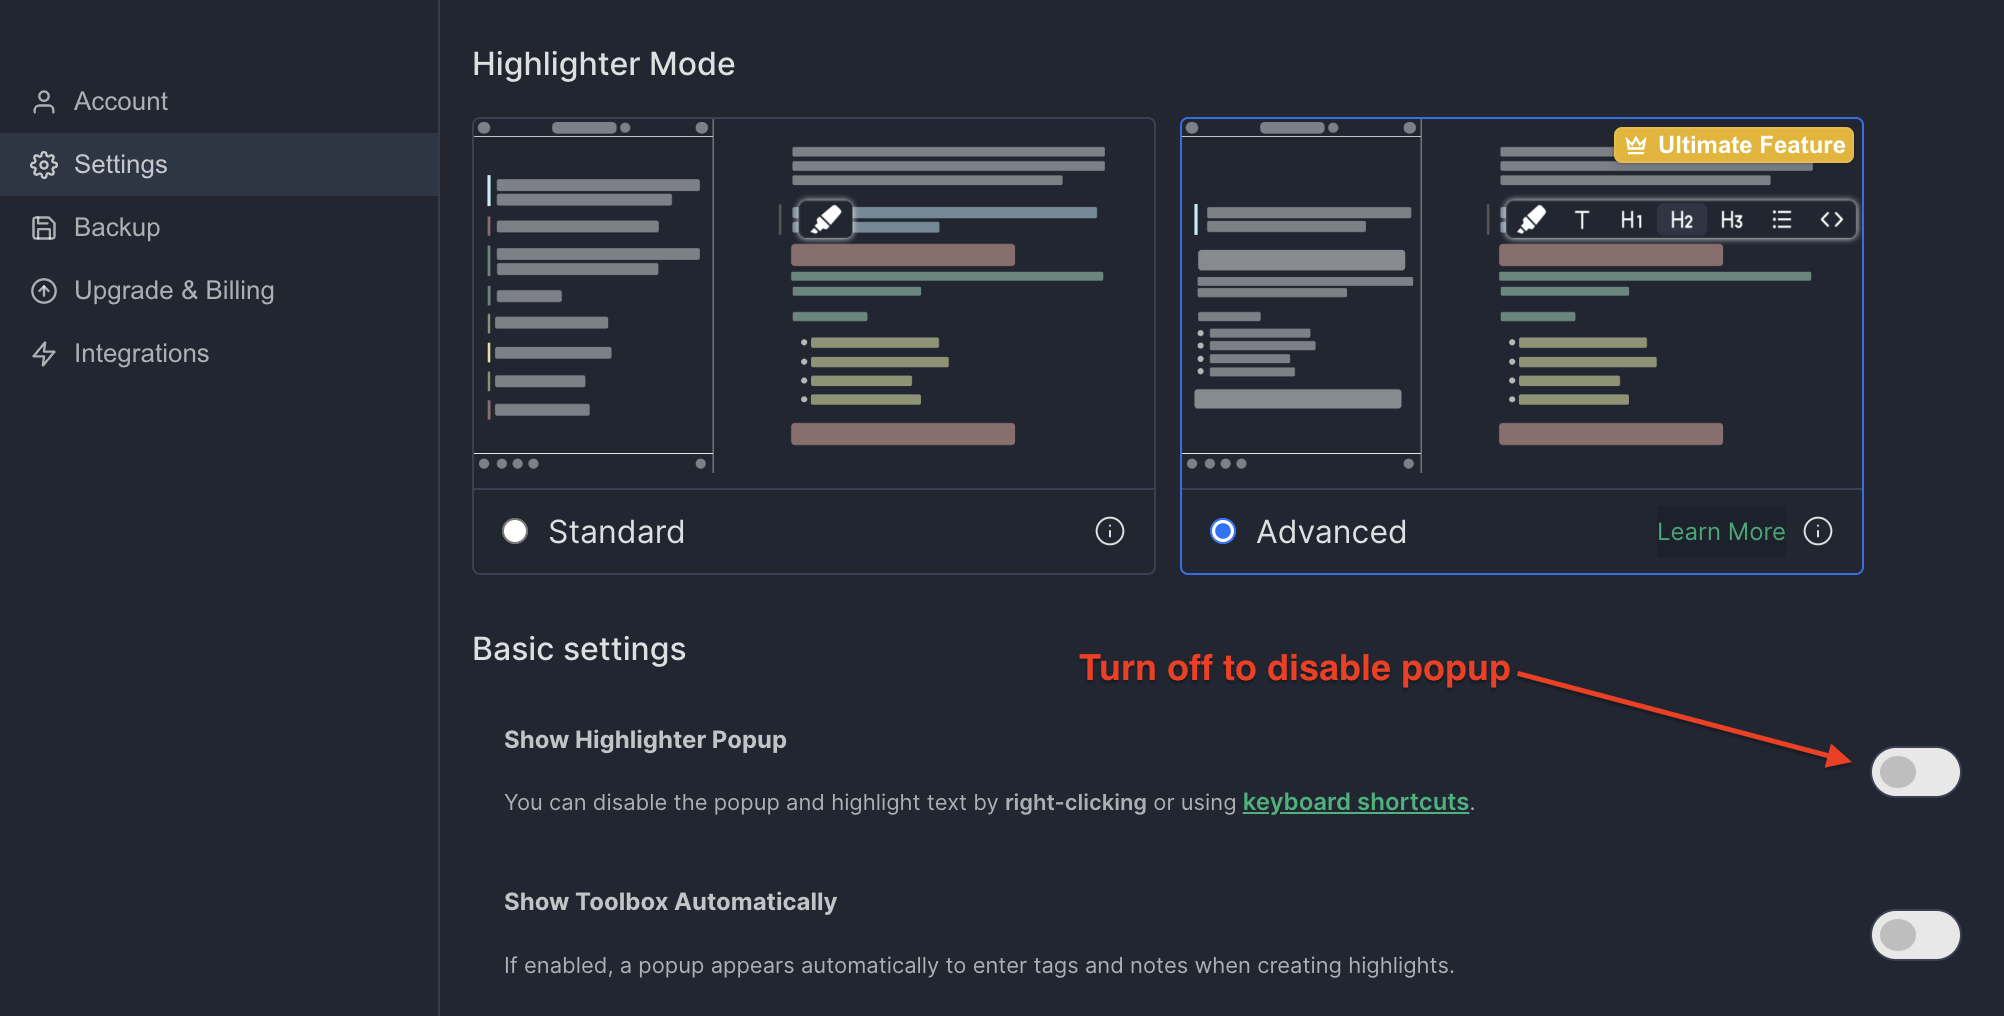
If you don’t like the popup or the sidebar widget or find it annoying, you can disable it at any time in the settings. The same applies to the sidebar widget on the left side of the screen. Simply go to the settings (Mac: ⌥ + Comma, Windows: ALT + Comma) and disable it:
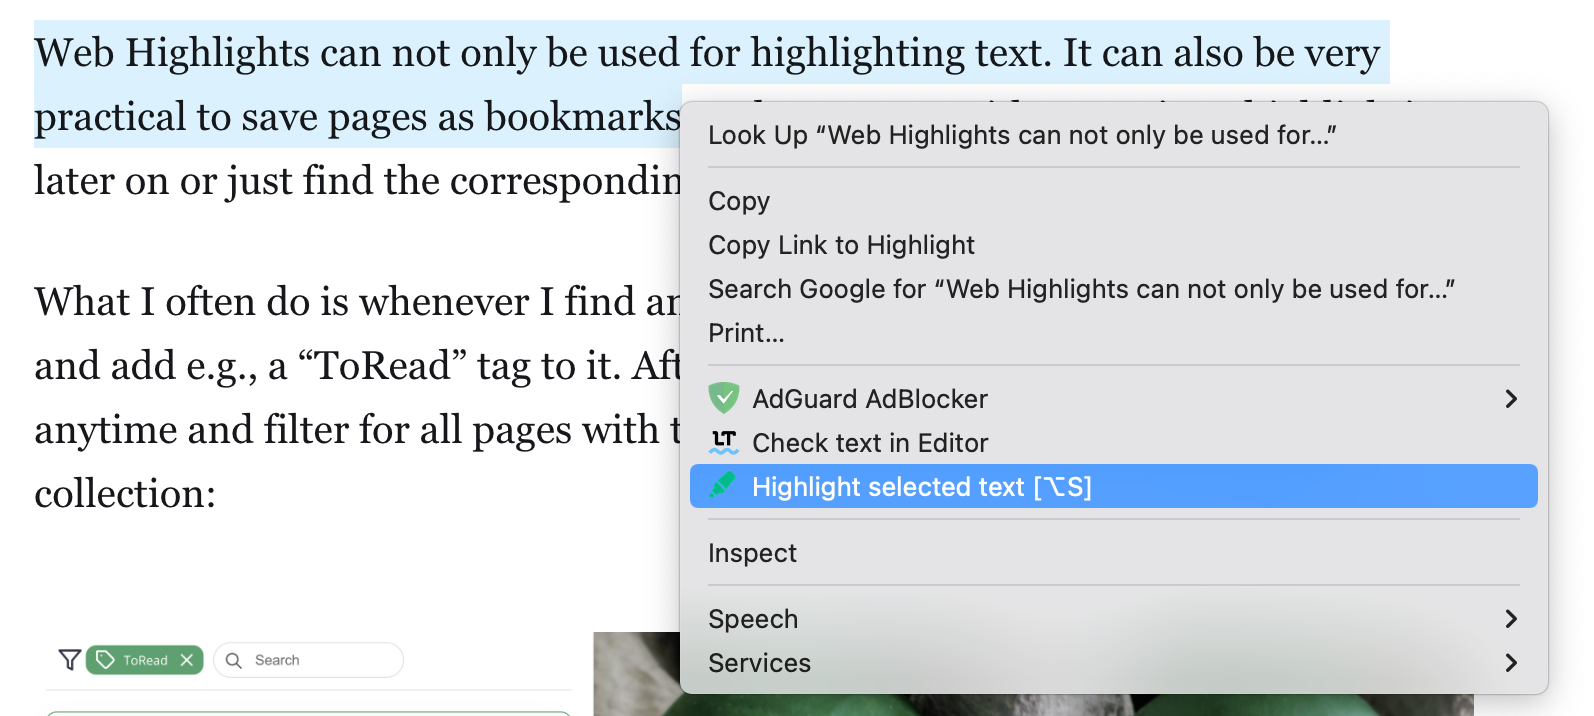
Highlight by Right-Clicking
If you prefer to use neither the popup nor shortcuts, then you can still highlight text by right-clicking it. You will see the Web Highlights icon in the dropdown, which you can click to highlight the selected text:
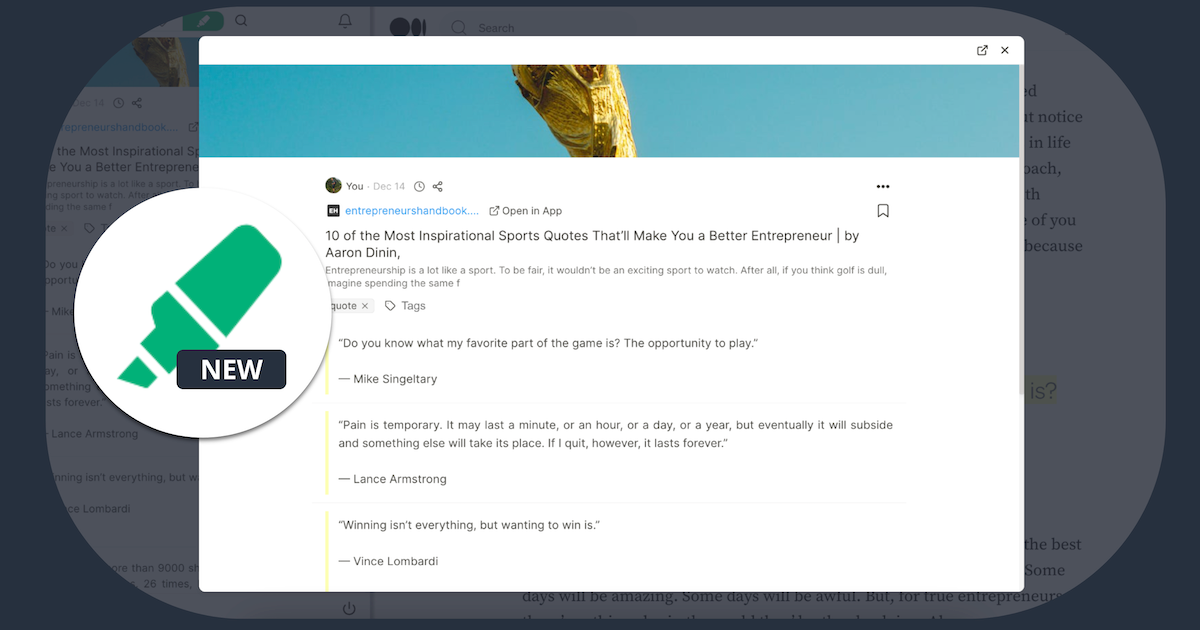
You can also highlight images by right-clicking them. Simply right-click any image and select 'Save image'.

After you've saved an image, you'll notice a small dot in the top-left corner. Click on this dot to write notes, add tags, or delete the image if needed.
Highlight Images with Web Highlights
Highlight using Keyboard Shortcuts
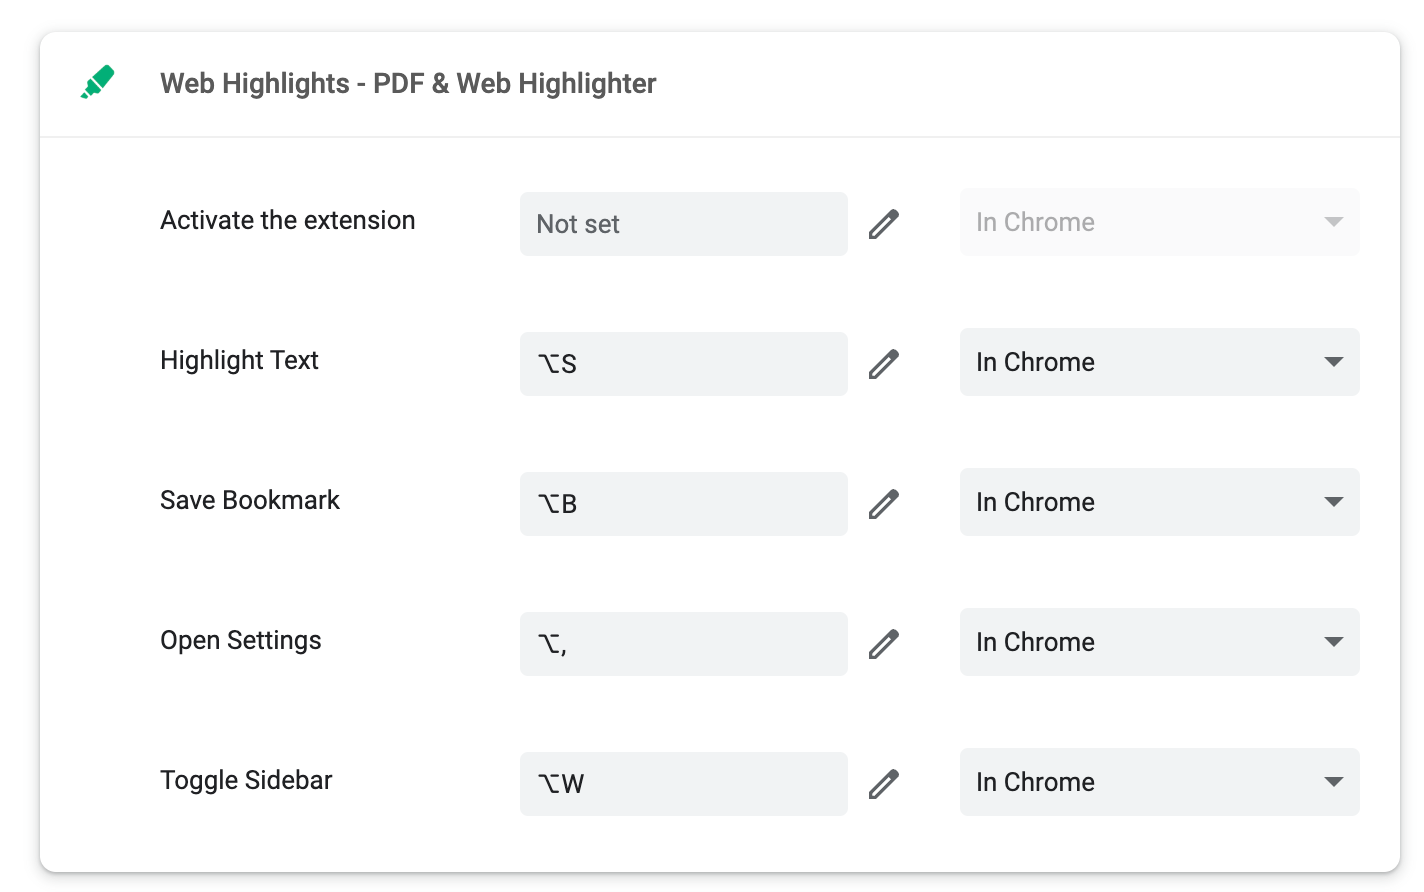
The most efficient way of highlighting is using a keyboard shortcut (Mac: ⌥ + S, Windows: ALT + S). Notice that you can adjust all keyboard shortcuts by either pasting this link (chrome://extensions/shortcuts) into the chrome address bar or clicking the three-dots menu in the top-right corner and choosing "More Tools" -> "Extensions". Then you can choose "Keyboard shortcuts"
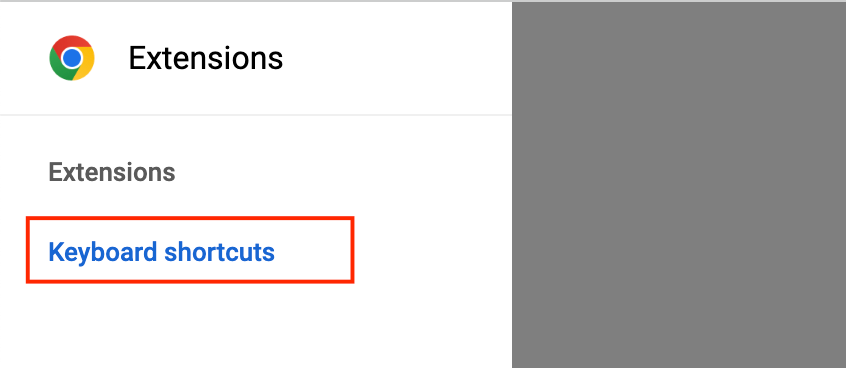
Afterward, you will see an overview of all Keyboard shortcuts for Web Highlights, which you can adjust to your own needs:
4. Find your Highlights in the App
Assuming you have created an account and have enabled the premium cloud sync feature, your highlights, web pages, notes, and tags will automatically synchronize with the cloud.
You can easily find your research on web-highlights.com by logging in to your account.
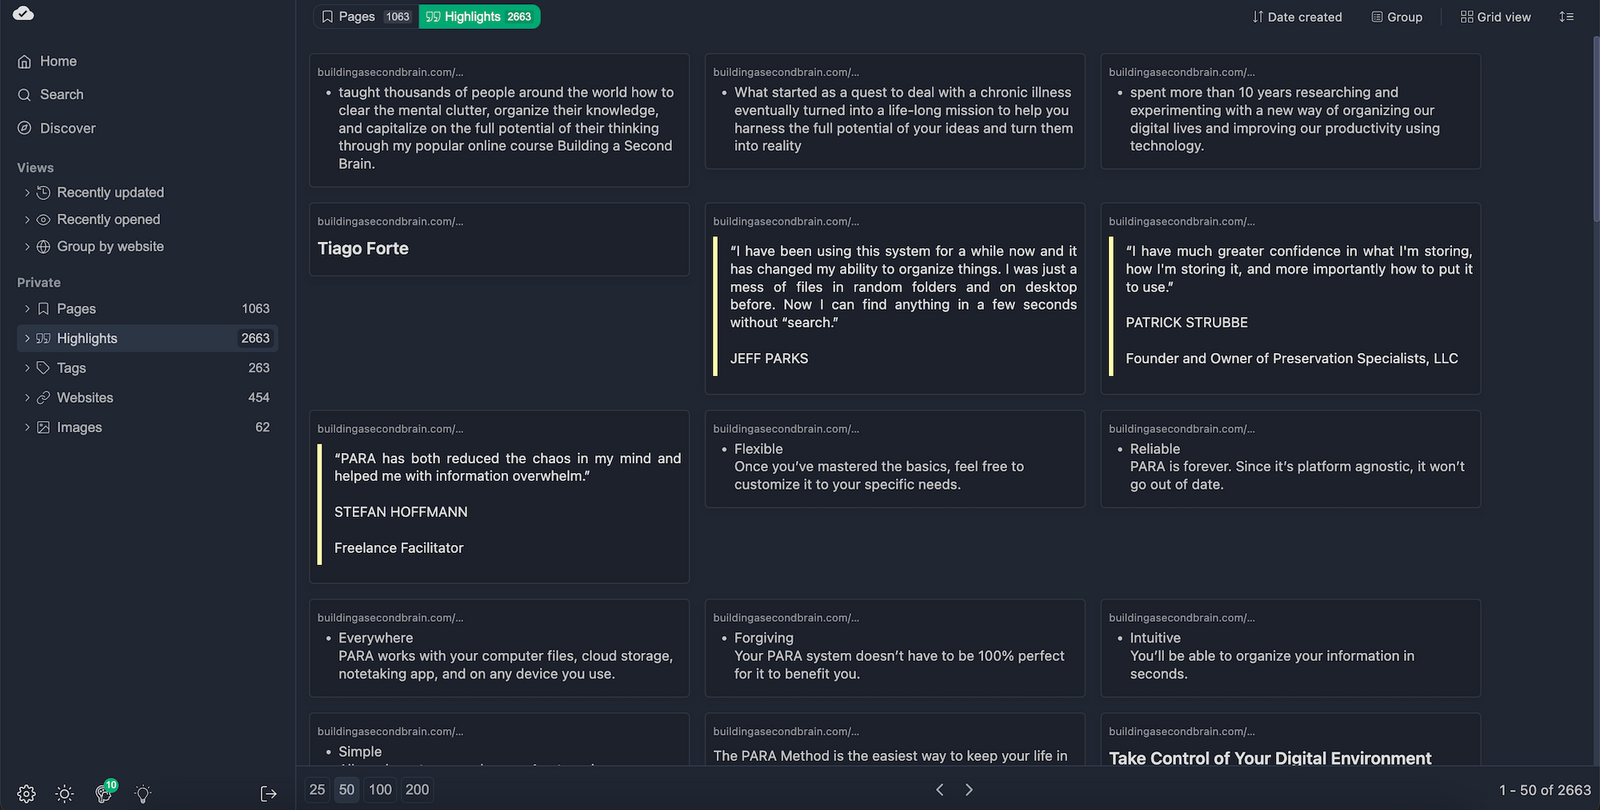
Here is how the overview of your latest highlights, tags, and notes looks like:
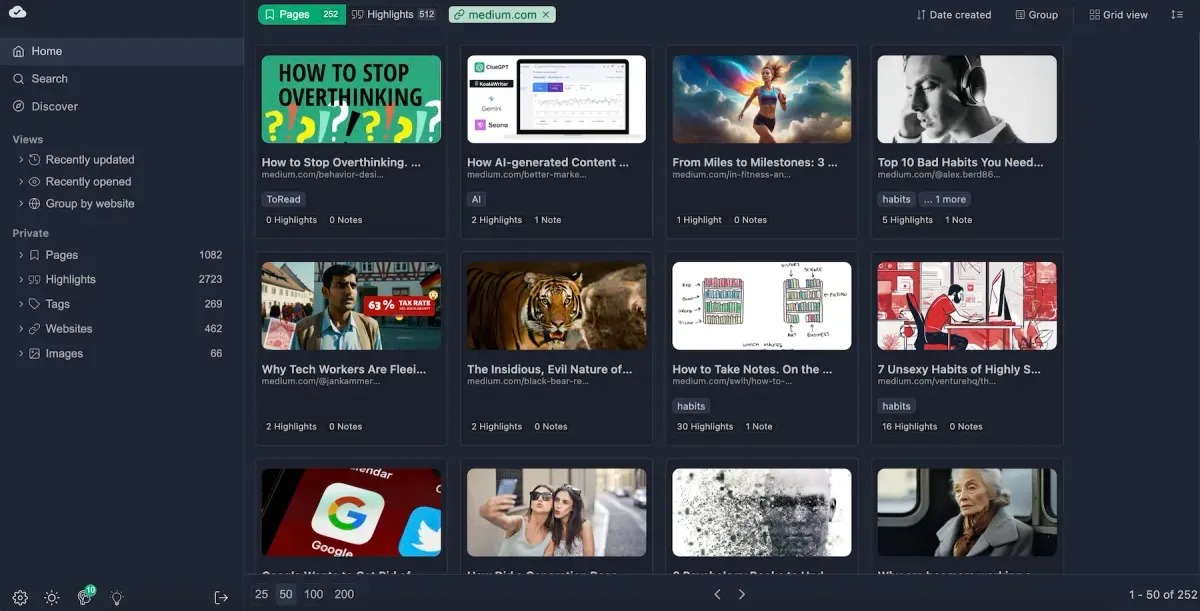
By default, it shows the highlighted pages, but if you switch to “Highlights,” you'll see all your highlights without having to open a page:
5. Organize your research
Web Highlights offers many functionalities for always staying structured on the internet. Here is an introduction to the most important features:
Create Tags & Take Notes
Tags are an essential part of Web Highlights to retrieve highlights and pages related to a specific topic. Let's say you are doing some research on mental health. You can now highlight different websites and provide the tag "mental-health" to easily group them later on:
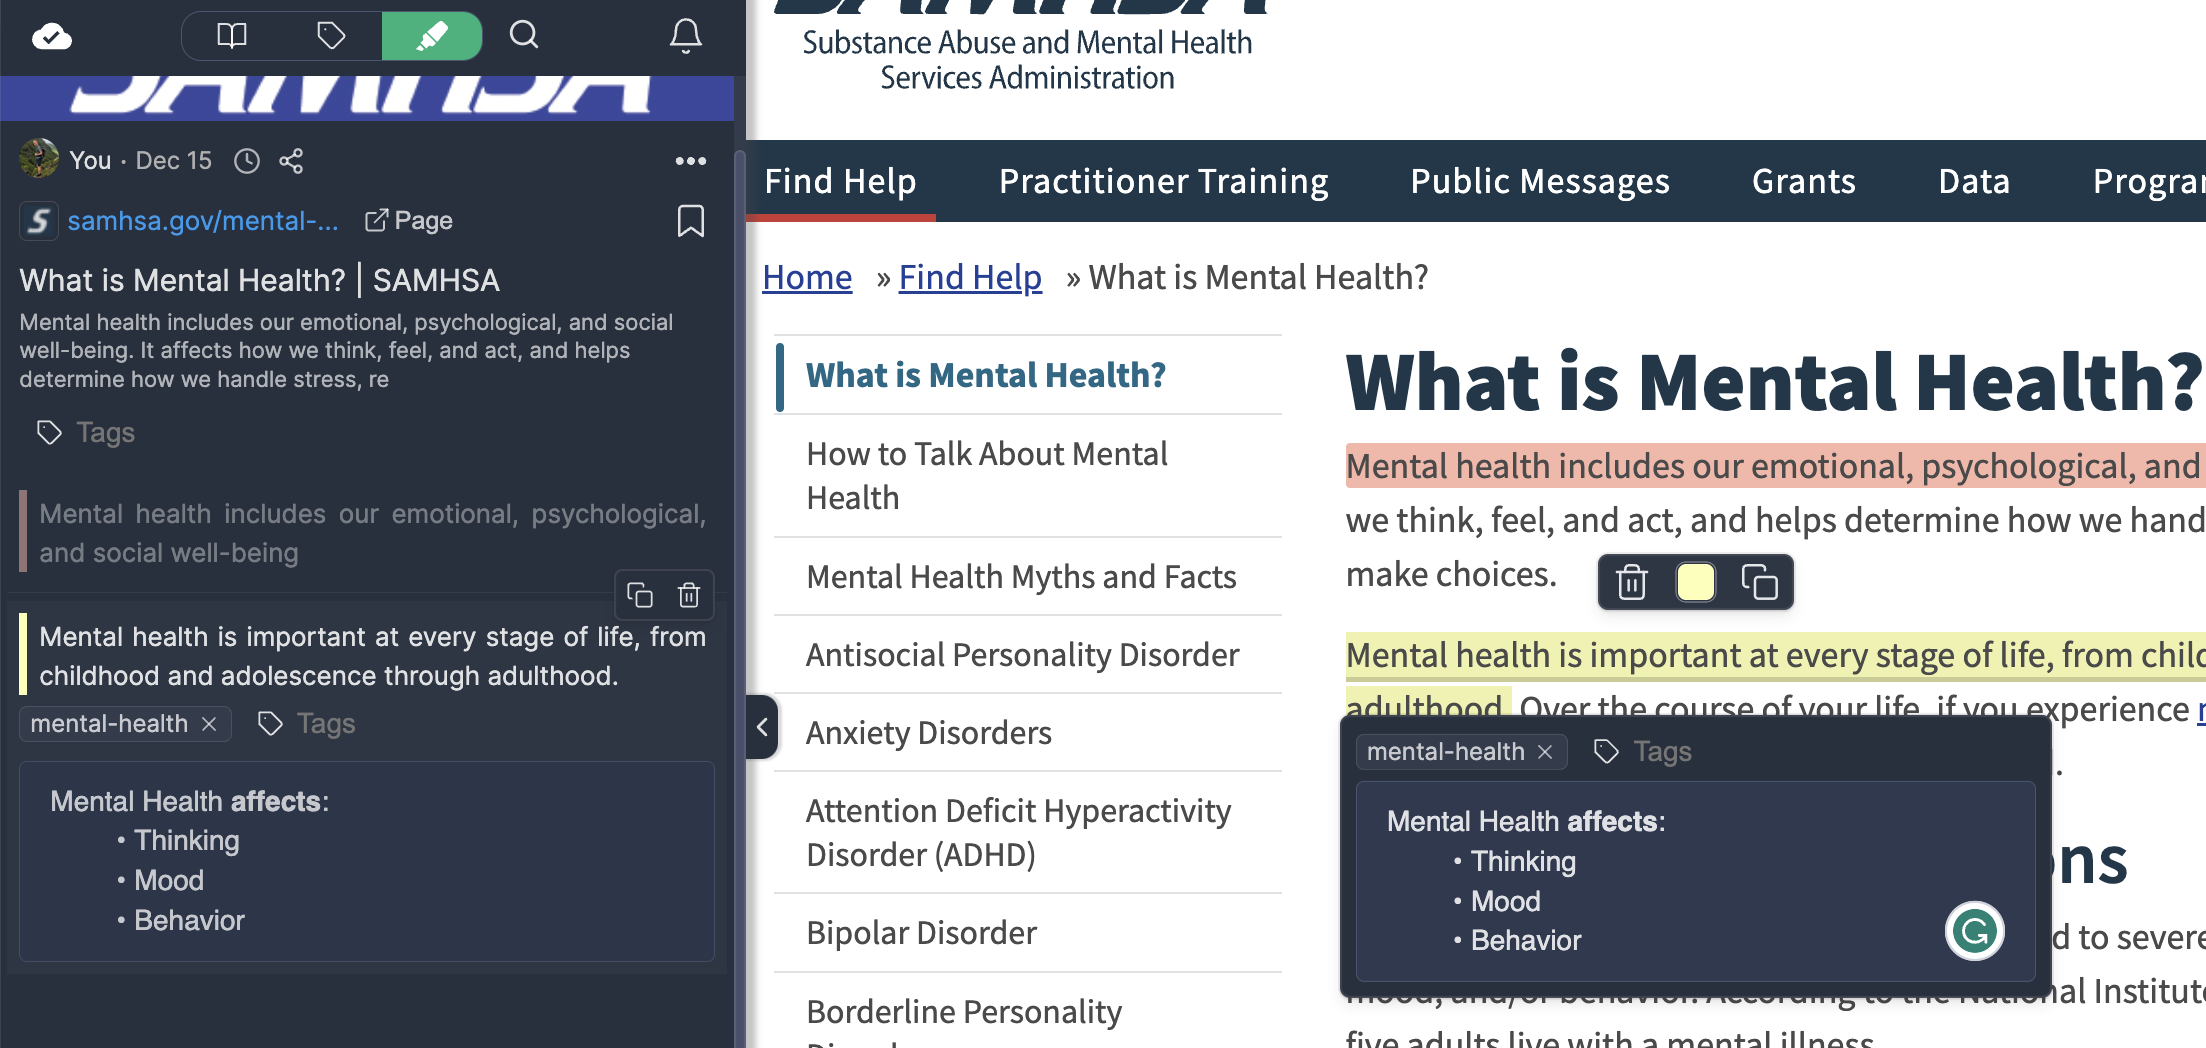
Furthermore, you can easily take notes and see them in the popup toolbox and the left sidebar.
If you now click on the "mental-health" tag, you will see all your other highlights and bookmarks related to this topic.
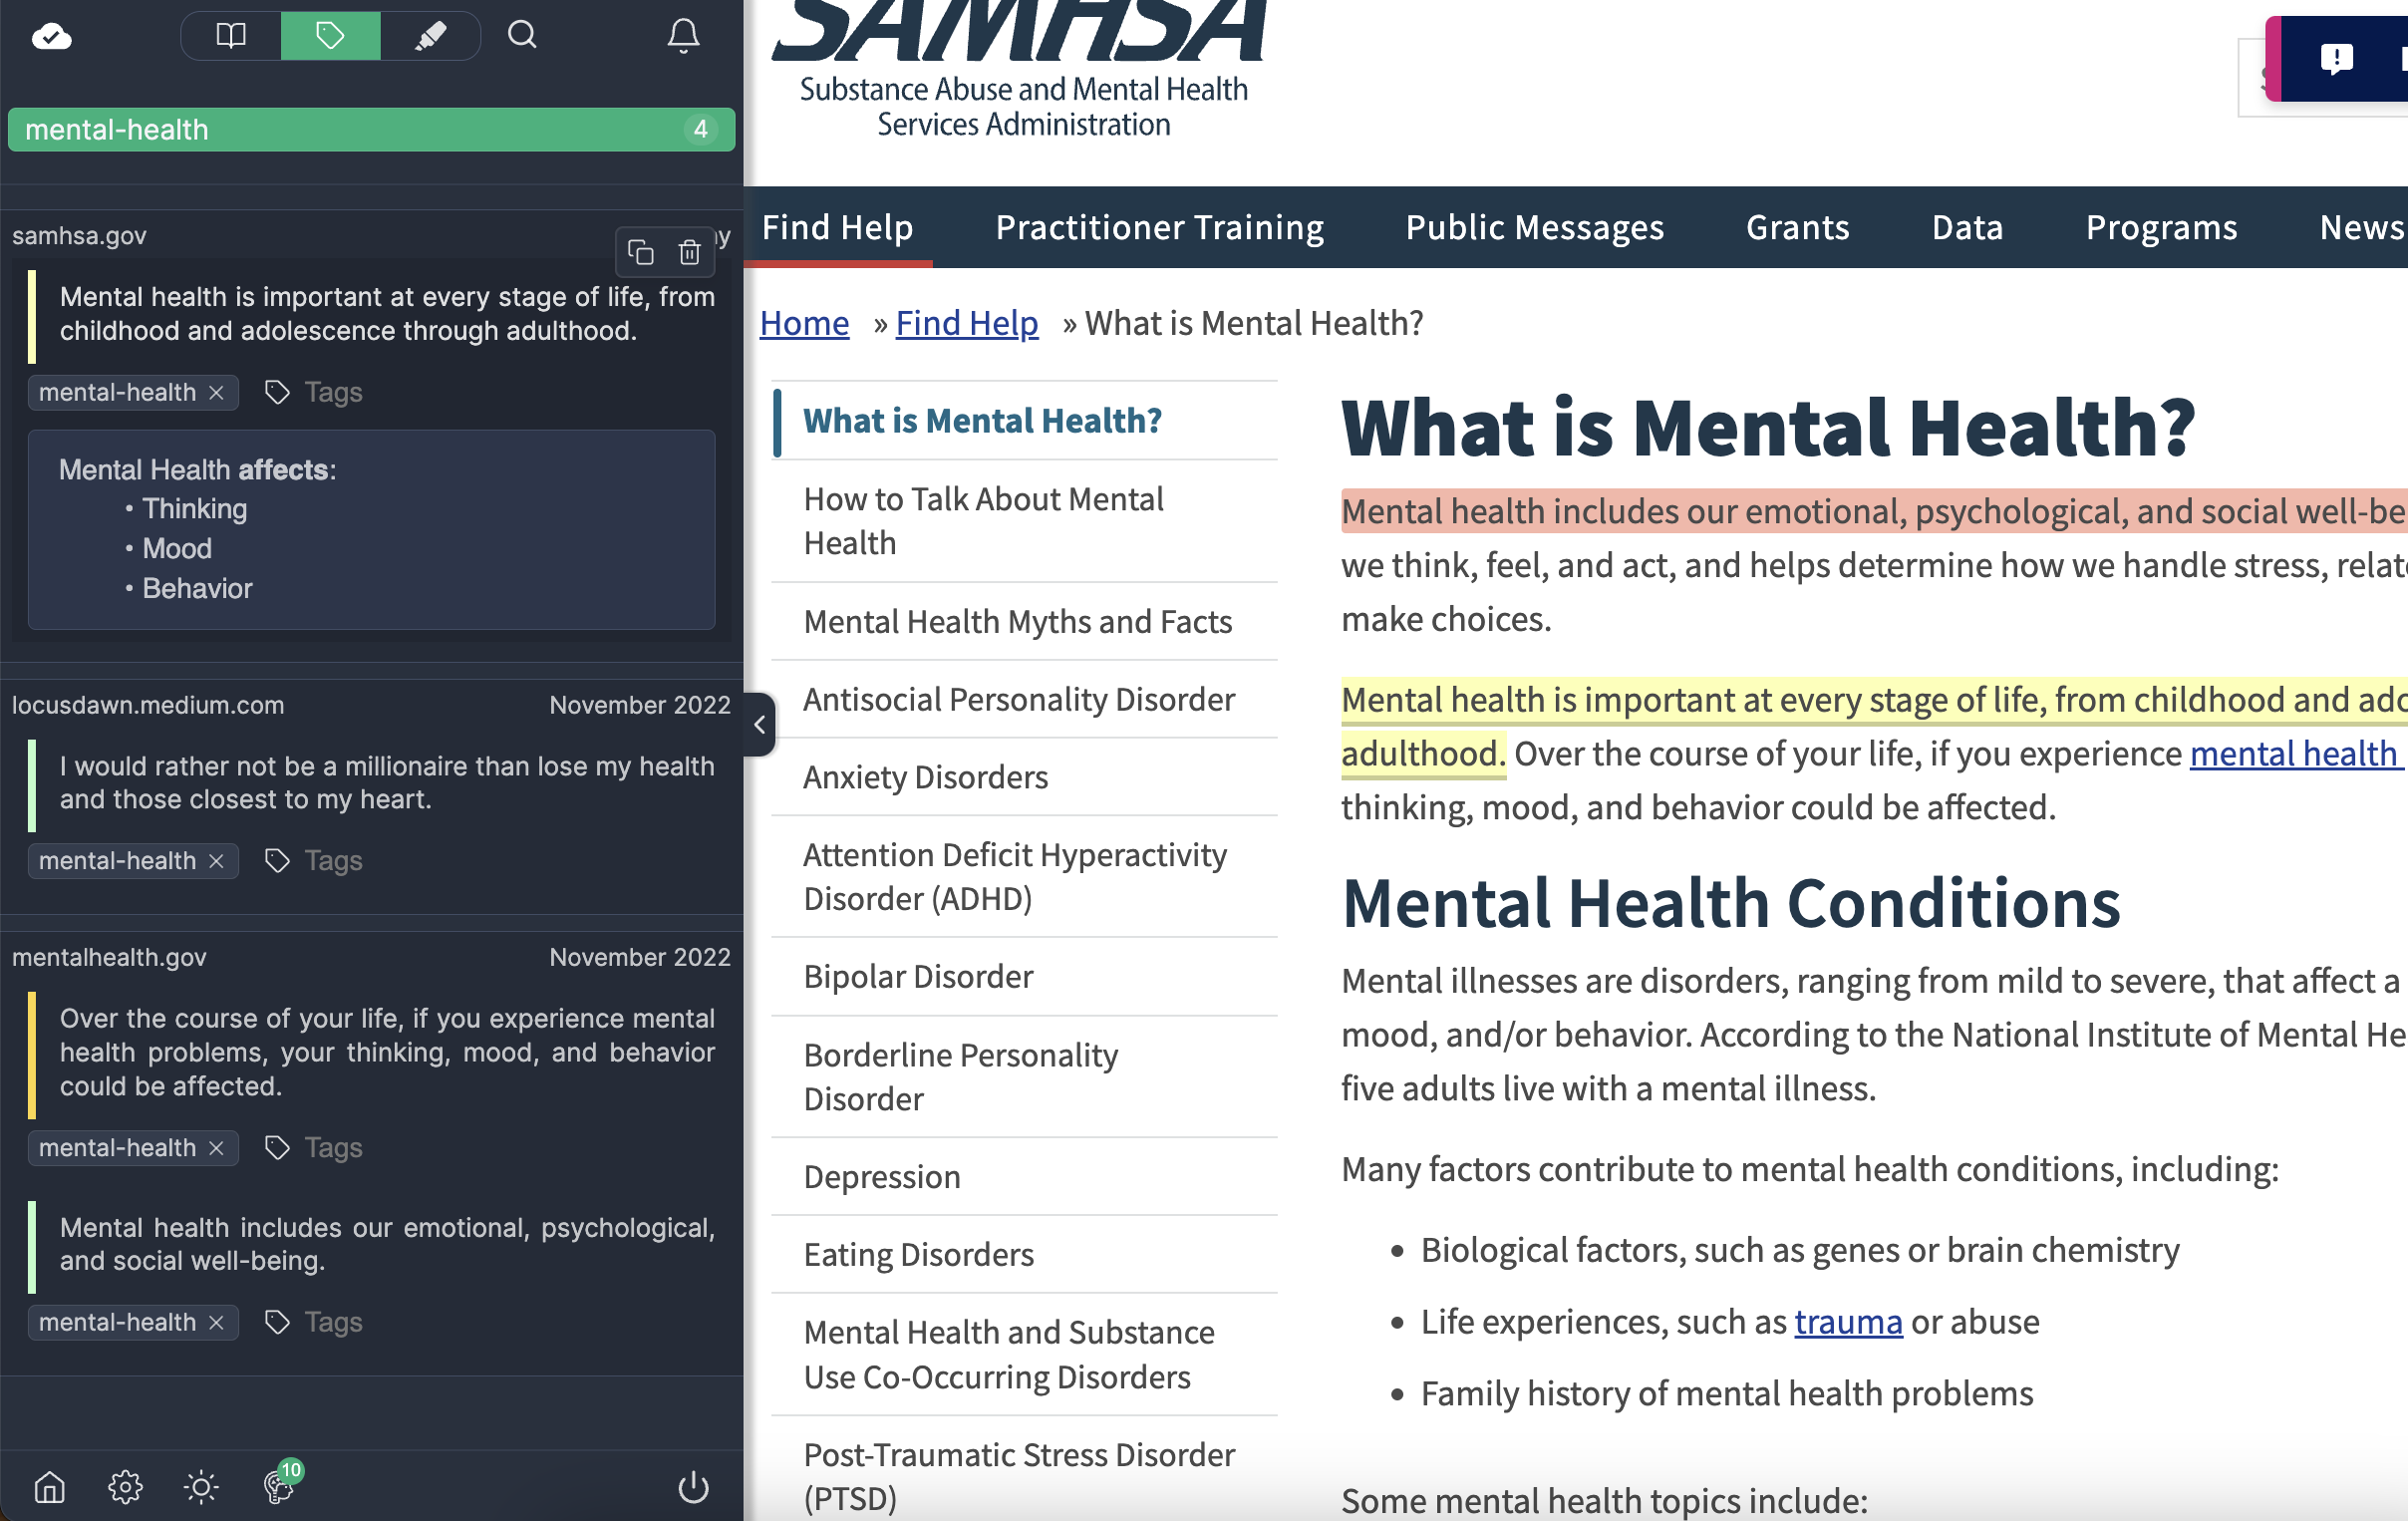
Notice that all the highlights displayed include the related mental-health tag.
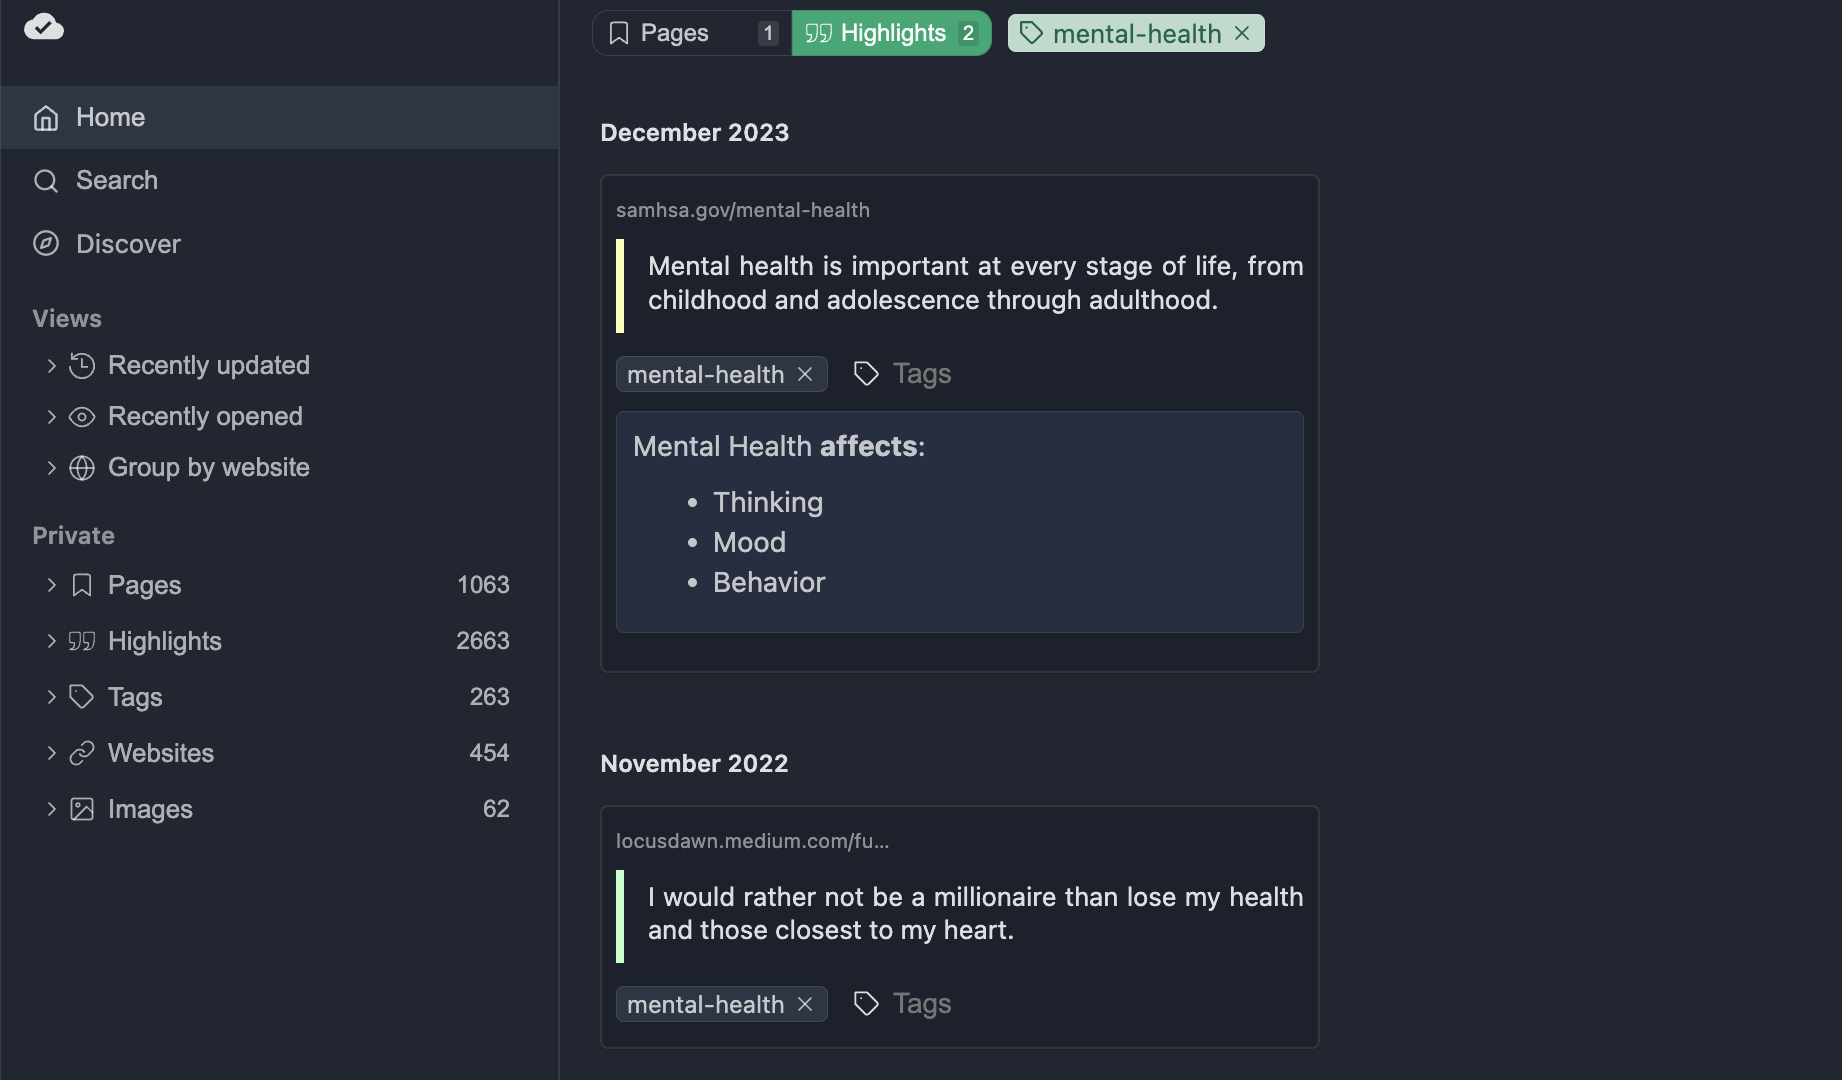
You can replicate this in the web app to view a summary of all highlights or pages along with their corresponding tags:
Create Bookmarks
Web Highlights can not only be used for highlighting text. It can also be very practical to save pages as bookmarks. To do that, either use the shortcut (Mac: ⌥ + B, Windows: ALT + B) or click the bookmark icon in the sidebar:
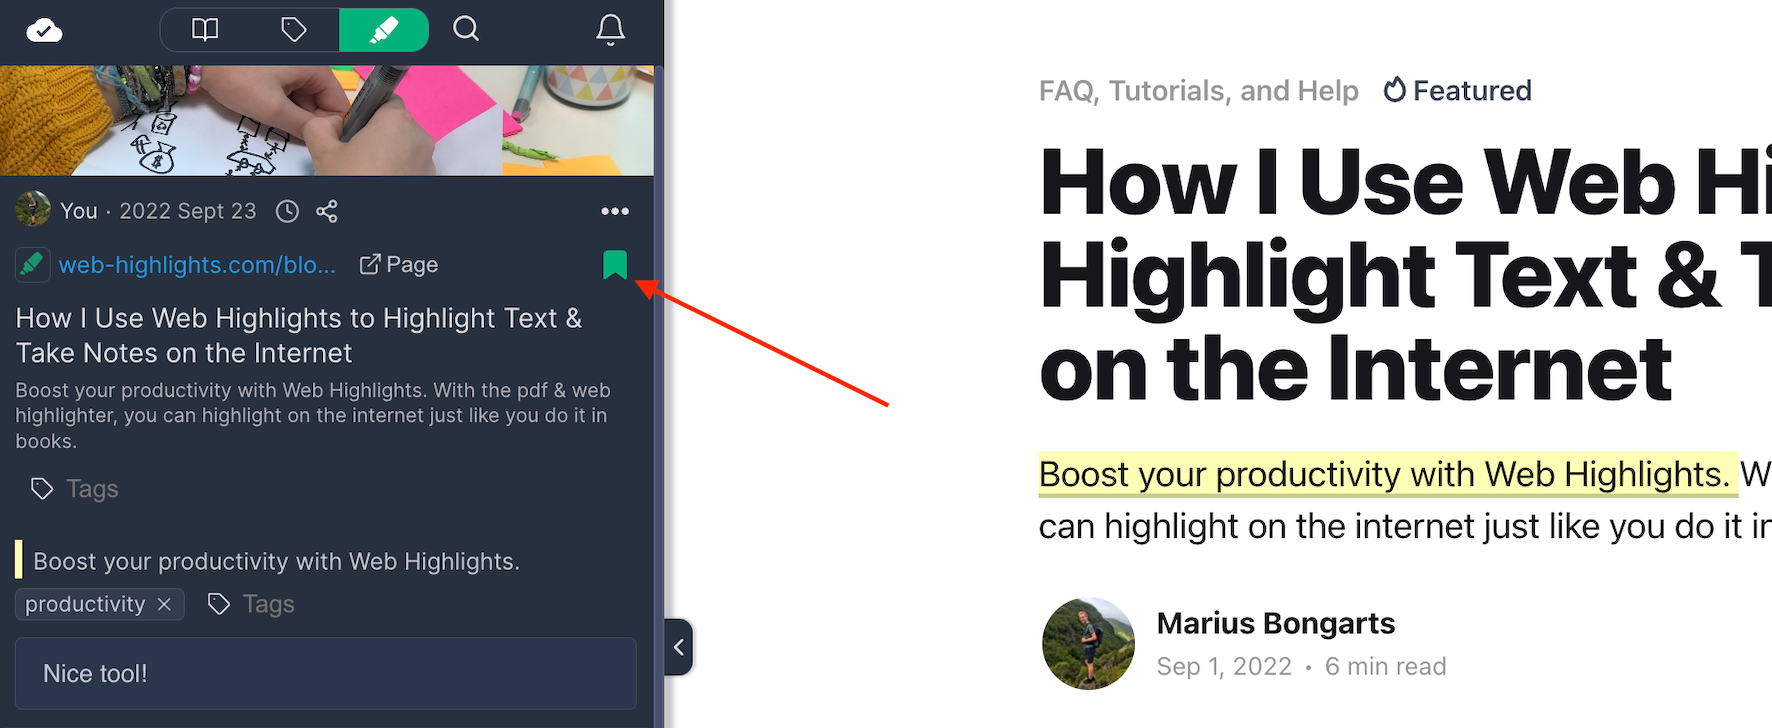
Whenever I find an interesting article, I often save it as a bookmark and add the tag “Reading List” to it. Afterward, I can quickly go back to my reading list in the web app by filtering for the tag.
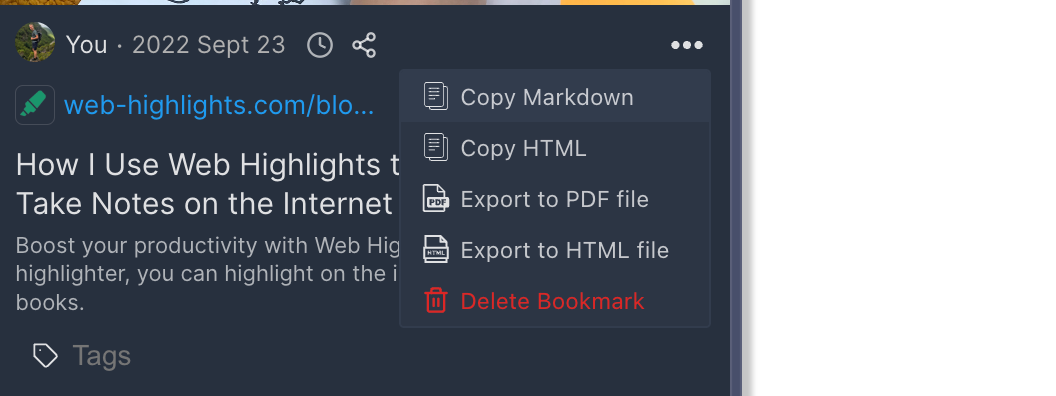
Export your Research
After you have made some highlights for your research, you may want to export them to other tools such as Notion or Obsidian. For this purpose, Web Highlights offers different solutions to synchronize your notes with your favorite research tools:
- Copy to Markdown
- Copy HTML
- Export to PDF file
- Export to HTML file
Simply click the three dot-menu and choose one of the options:
Afterward, you can synchronize it to a tool of your choice. There are more detailed articles on synchronizing your research to Notion or Obsidian. Check them out:
- How to Export Your Research to Notion with Web Highlights
- How to Export Your Research to Obsidian with Web Highlights
You are all set up 🎉🎊
I hope I could help you to get started with Web Highlights. Here are some more articles that might help you: