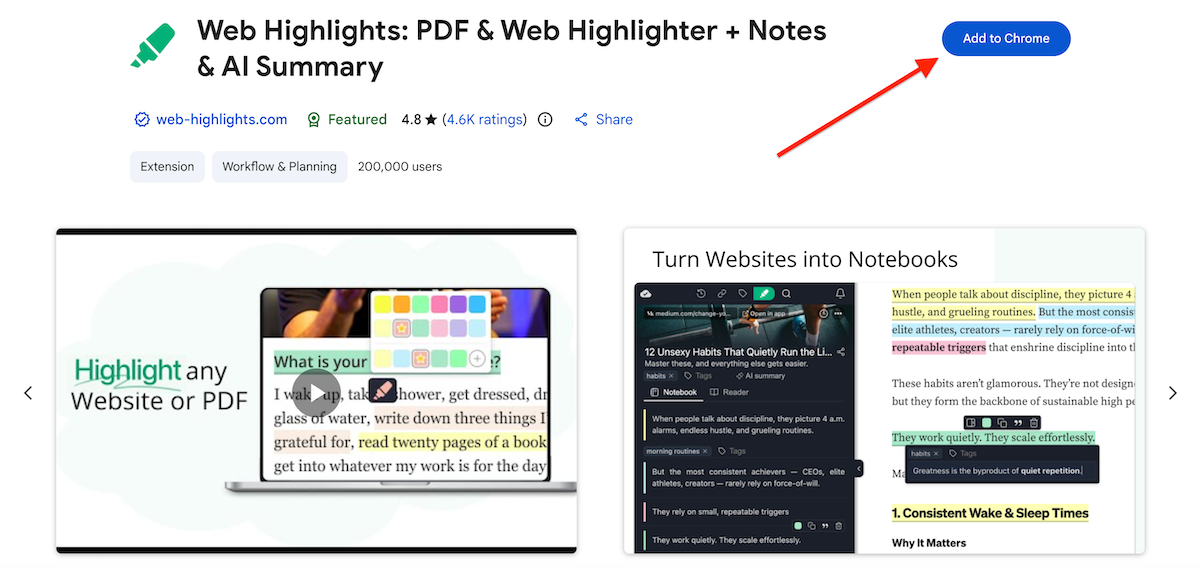
Guide to Using Web Highlights for Online Text & Notes
Boost your productivity with Web Highlights. With the pdf & web highlighter, you can highlight on the internet just like you do it in books.


A few years ago I started developing the Web Highlights browser extension. Back then I consumed many articles on the web but couldn't structure them. I often struggled to re-find the information when I needed it.
I was looking for a way to highlight text on websites and access the highlights from anywhere. There were some tools, but none fit my needs. That's why I built Web Highlights .
Today, more than 250,000 users (including me) are using the online highlighter every day, and I can't imagine my working day without it. In this article, I want to show you how to get started and how to work most efficiently with the tool — from basic highlighting all the way to advanced search and filters, AI-powered summaries, and spaced repetition learning.
Setup
Firstly, you need to install the browser extension. Web Highlights is available for Chrome, Edge, Brave, and other Chromium-based browsers — as well as Firefox.
You can find the Web Highlights extension in the Chrome Web Store , Microsoft Edge Store , or the Firefox Add-ons .
For a step-by-step walkthrough, check the installation guide in our documentation.
Simply click the "Add to Chrome" button in the top-right corner, and you will be redirected to a Welcome Guide that will guide you through the setup process.
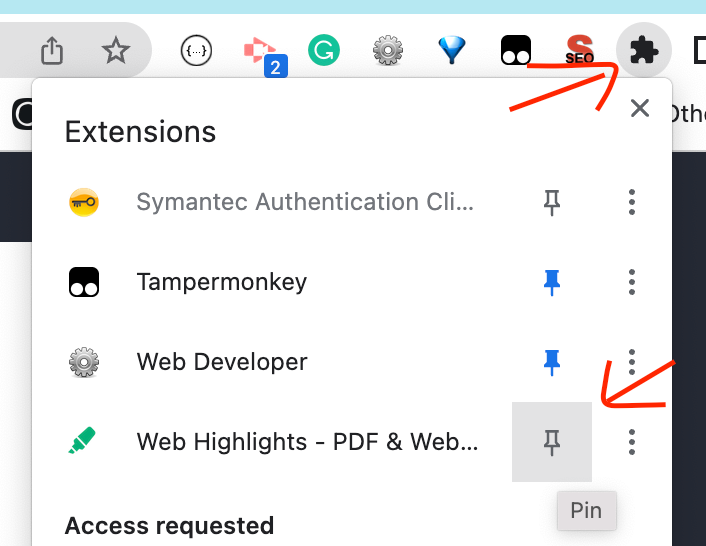
First, you might want to pin the extension symbol by clicking the "Extensions" symbol in the top-right corner of your browser and clicking the "Pin" icon to have it always reachable when using it.
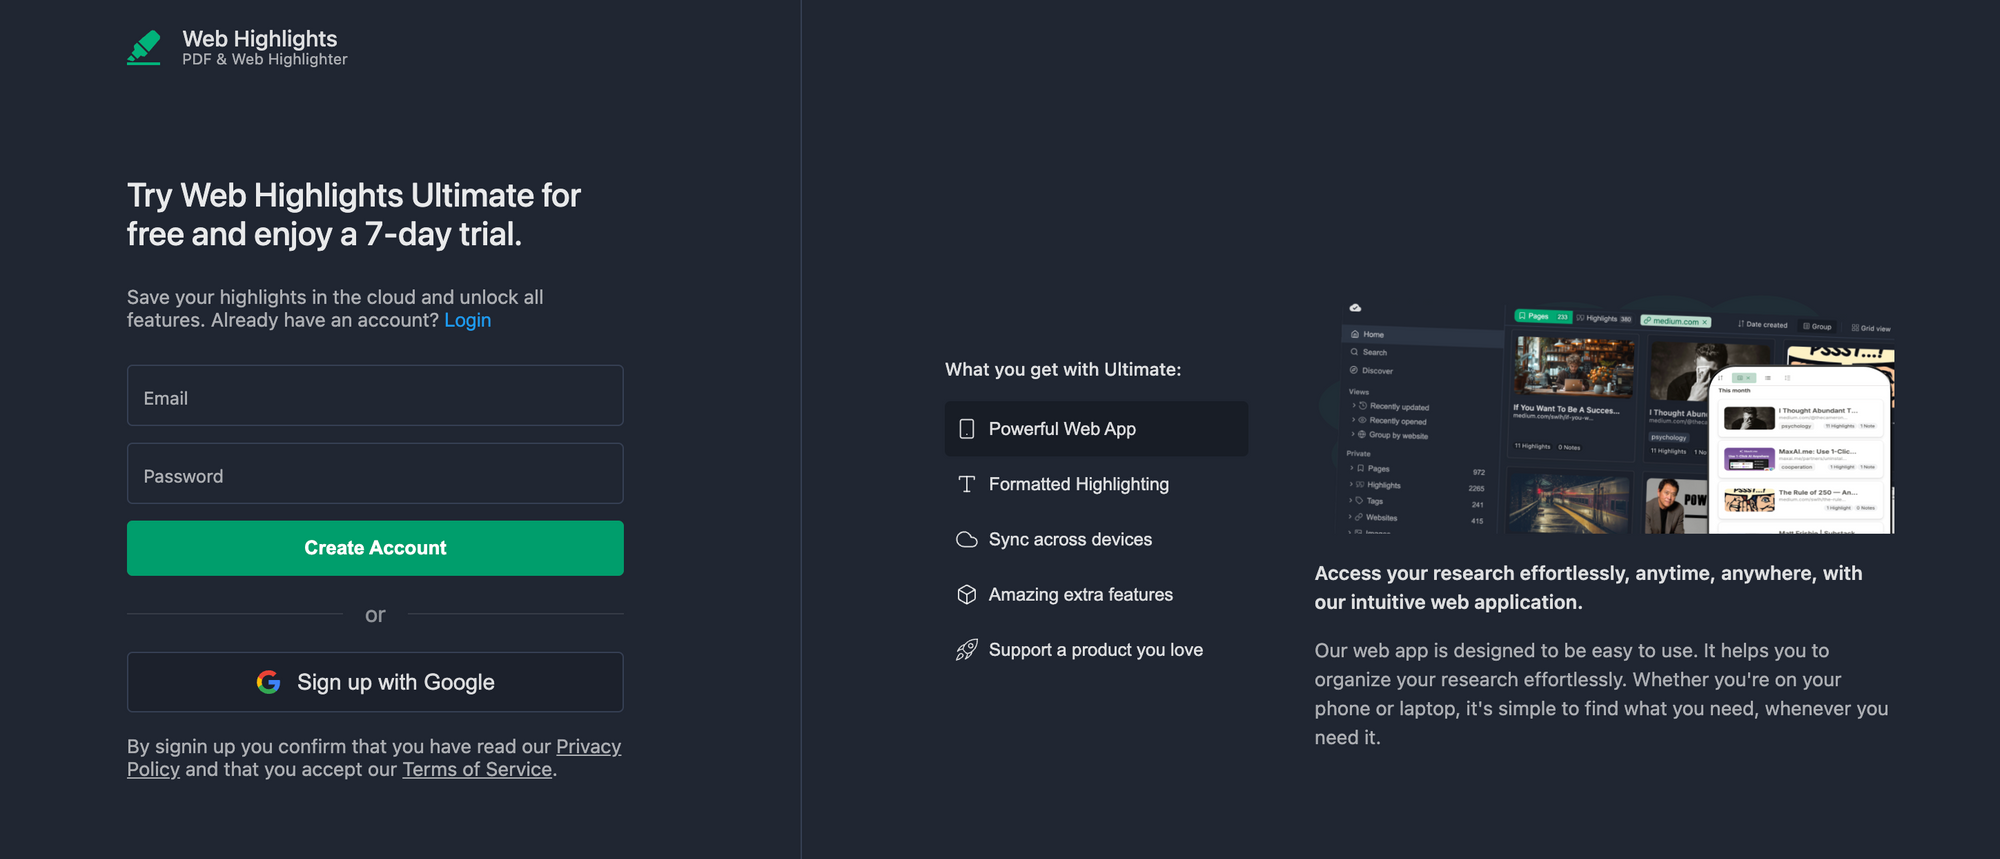
Optional Account creation
The great thing about the highlighter is that you can directly start using it even without creating an account. Most of Web Highlights features are free and can be used without creating an account. This includes:
- 🖋️ Highlight websites and PDFs
- 🎨 Multiple highlight colors
- 🔖 Save bookmarks
- ✍️ Take notes
- 🏷️ Create tags
- 📤 Export to Markdown
- 💾 Backup your research
However, some functionalities are only available if you sign up. Our different pro plans include many great features that can be tested for free for 7 days. For all the details, check the Getting Started guide in our documentation. Here are some highlights:
- 🔄 Sync your highlights and access from any device
- 👨🏼💻 Powerful Web App with grid, list, and masonry views
- 📷 Highlighting images
- 𝐓 Formatted highlighting — preserve headings, bullet points, code blocks, and more
- 🧠 Spaced repetition learning — turn your highlights into flashcards and remember what you read
- 🤖 AI Summary & AI Chat — generate summaries and chat about your content using Chrome's built-in AI
- ⚡ Keyboard shortcuts for highest efficiency
- 📄 Direct Export to Notion
- 📘 Export to Obsidian via Markdown
- 🔗 Export to Capacities
- 📑 Export to PDF and HTML files
- 📖 Reader mode — save pages as distraction-free documents
- 📱 Save pages as bookmarks from your mobile phone
- 🎬 YouTube highlighting — highlight and annotate YouTube video transcripts
- ⏰ Set email reminders
- 📚 Import your Kindle highlights & notes
- 🔎 Advanced filters with AND/OR logic, custom visible fields, and quick-filter syntax
- 🔗 Share your highlights
If you want to enjoy all those great features, you need to create an account. By that, your highlights are automatically backed up to the cloud and you can also access your research work from the powerful web app at app.web-highlights.com from any device.
How to Create Account
You can either sign-up using your email address or by clicking “Sign in with Google.”
Web Highlights places a significant high priority on Data Privacy and declares that your data is:
- Not being sold to third parties outside of the approved use cases
- Not being used or transferred for purposes that are unrelated to the item's core functionality
- Not being used or transferred to determine creditworthiness or for lending purposes
You can find more information about data privacy in Web Highlights' privacy policy or in the Chrome Web store .
Start Highlighting
It doesn't matter if you're using the tool offline or have created an account. You can start using it right away by highlighting text on any website or PDF.
Just visit any site, highlight the text, and a marker icon will appear, letting you choose from different highlight colors. For the full rundown on all the ways to highlight, check the official highlighting guide.
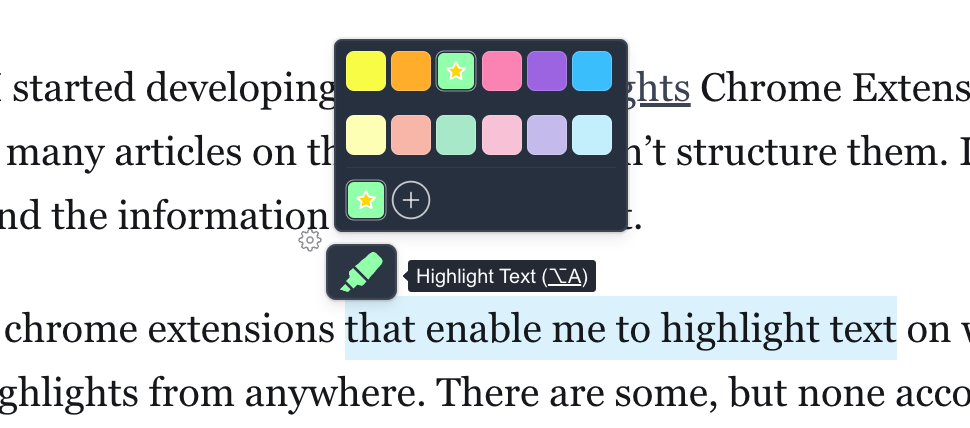
Suppose, like me, you want to write an article about a topic. One of my last articles was about Web Components. For this purpose, I search for sources on the Internet and mark text passages from articles. This can be done easily by selecting the desired text and clicking the highlight icon of Web Highlights. You can either click the icon to highlight your default color or by choosing from one of the last three most recent colors you used.
There might be times where you don't like the popup to appear, that's why you can always disable the automatic popup of the highlighter in the settings.

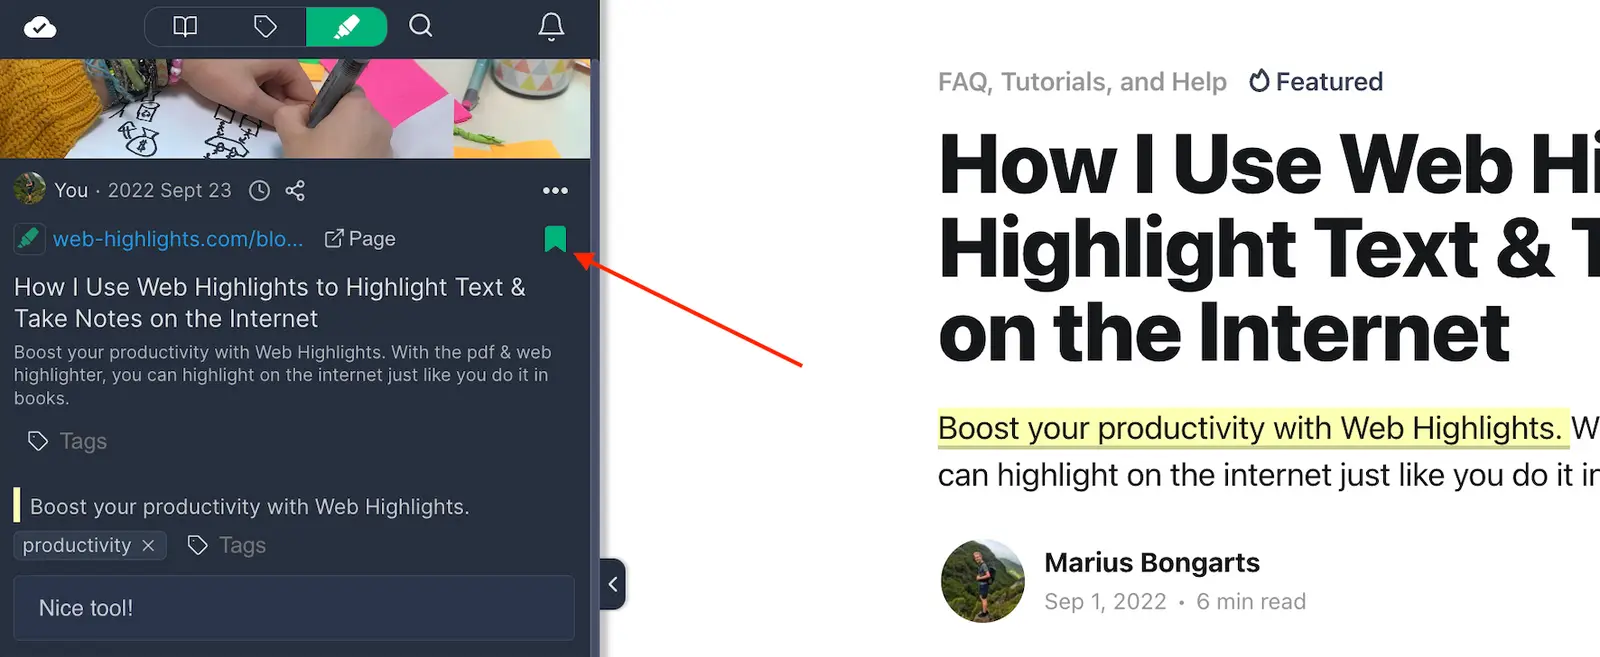
But don't worry. Even if you have disabled the highlight popup, you can still create highlights by highlighting text and right-clicking it. Then you will see the Web Highlights icon in the dropdown, and you can click Save 'YOUR_SELECTED_TEXT' :

You can also use keyboard shortcuts, which you can define by pasting this URL into your address bar: chrome://extensions/shortcuts.
Create Tags & Notes
After a highlight has been made, a popup appears where you can assign tags as well as make notes. In my use case, for example, I chose the tag "mental-health" to easily find my highlights and notes later in the web app. We can also see and edit our highlights in the left sidebar.
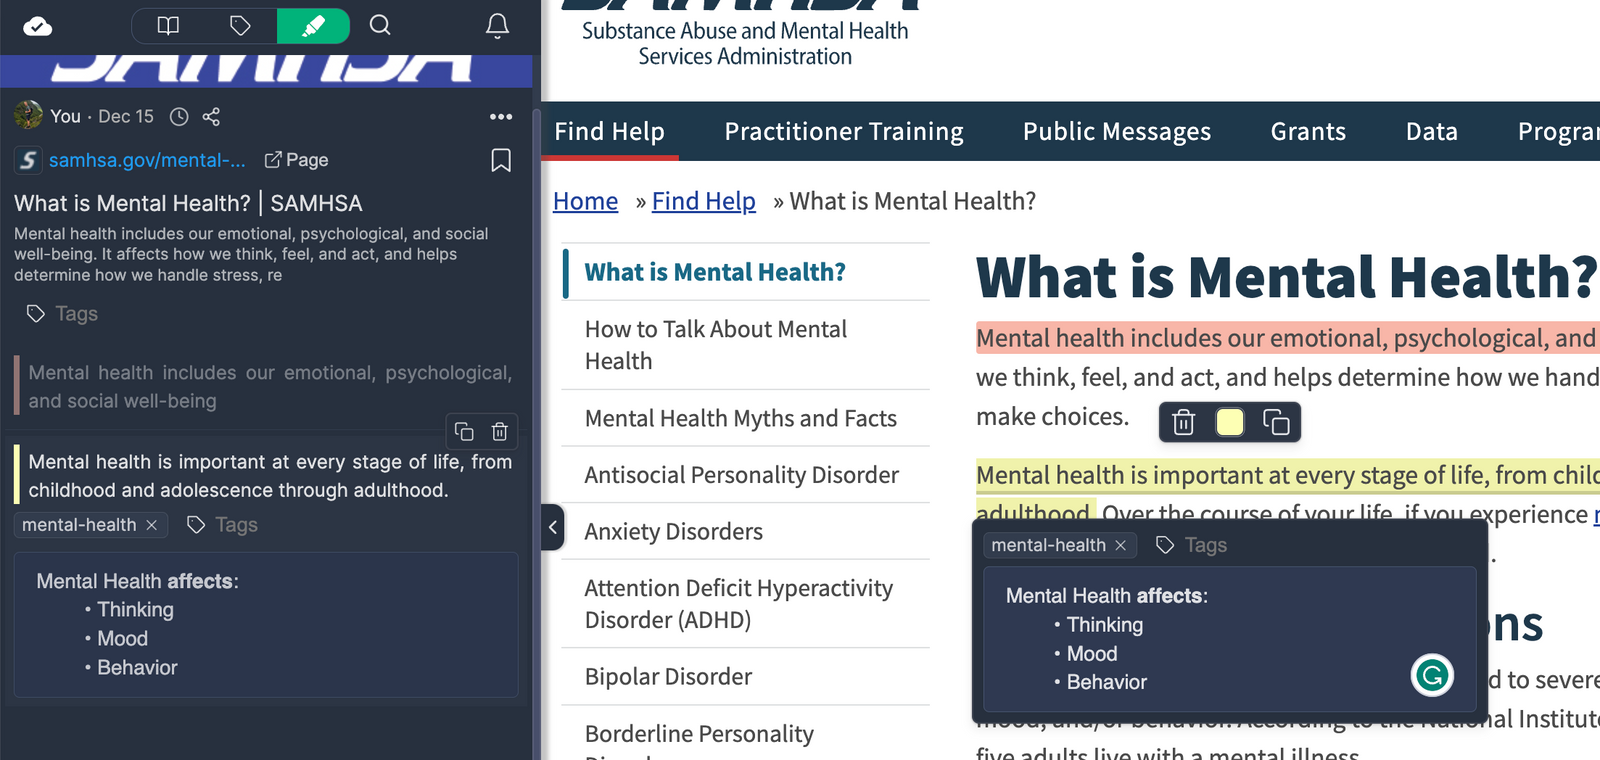
Also, you can always click on any tag to see all related highlights and pages to it. Here is how it looks like in the sidebar:
Find your Highlights in the Web App
After you marked different pages, you can log in to app.web-highlights.com with your credentials and find them at any time from anywhere.
ℹ️ Please note that the web app is only available for you if you have created an account as described above.
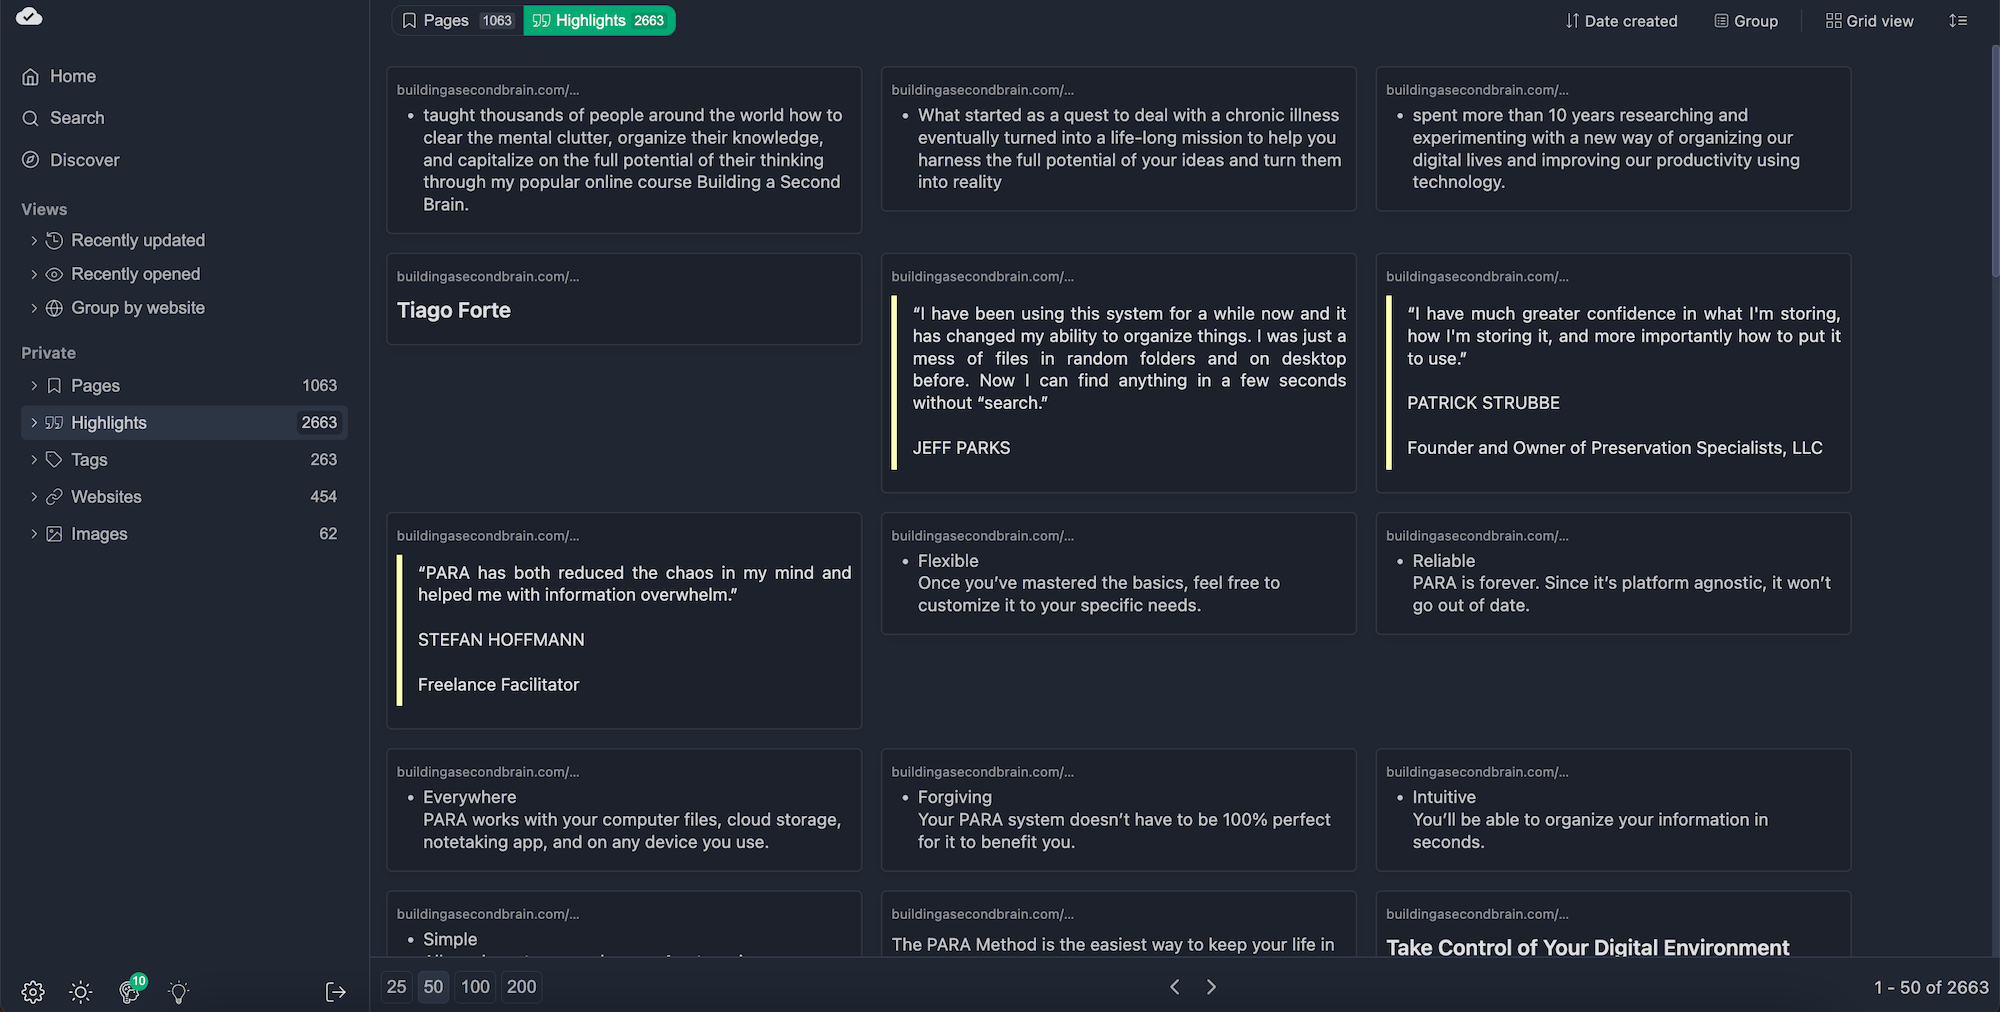
Here is what the dashboard looks like. You can see that I made quite some highlights already:
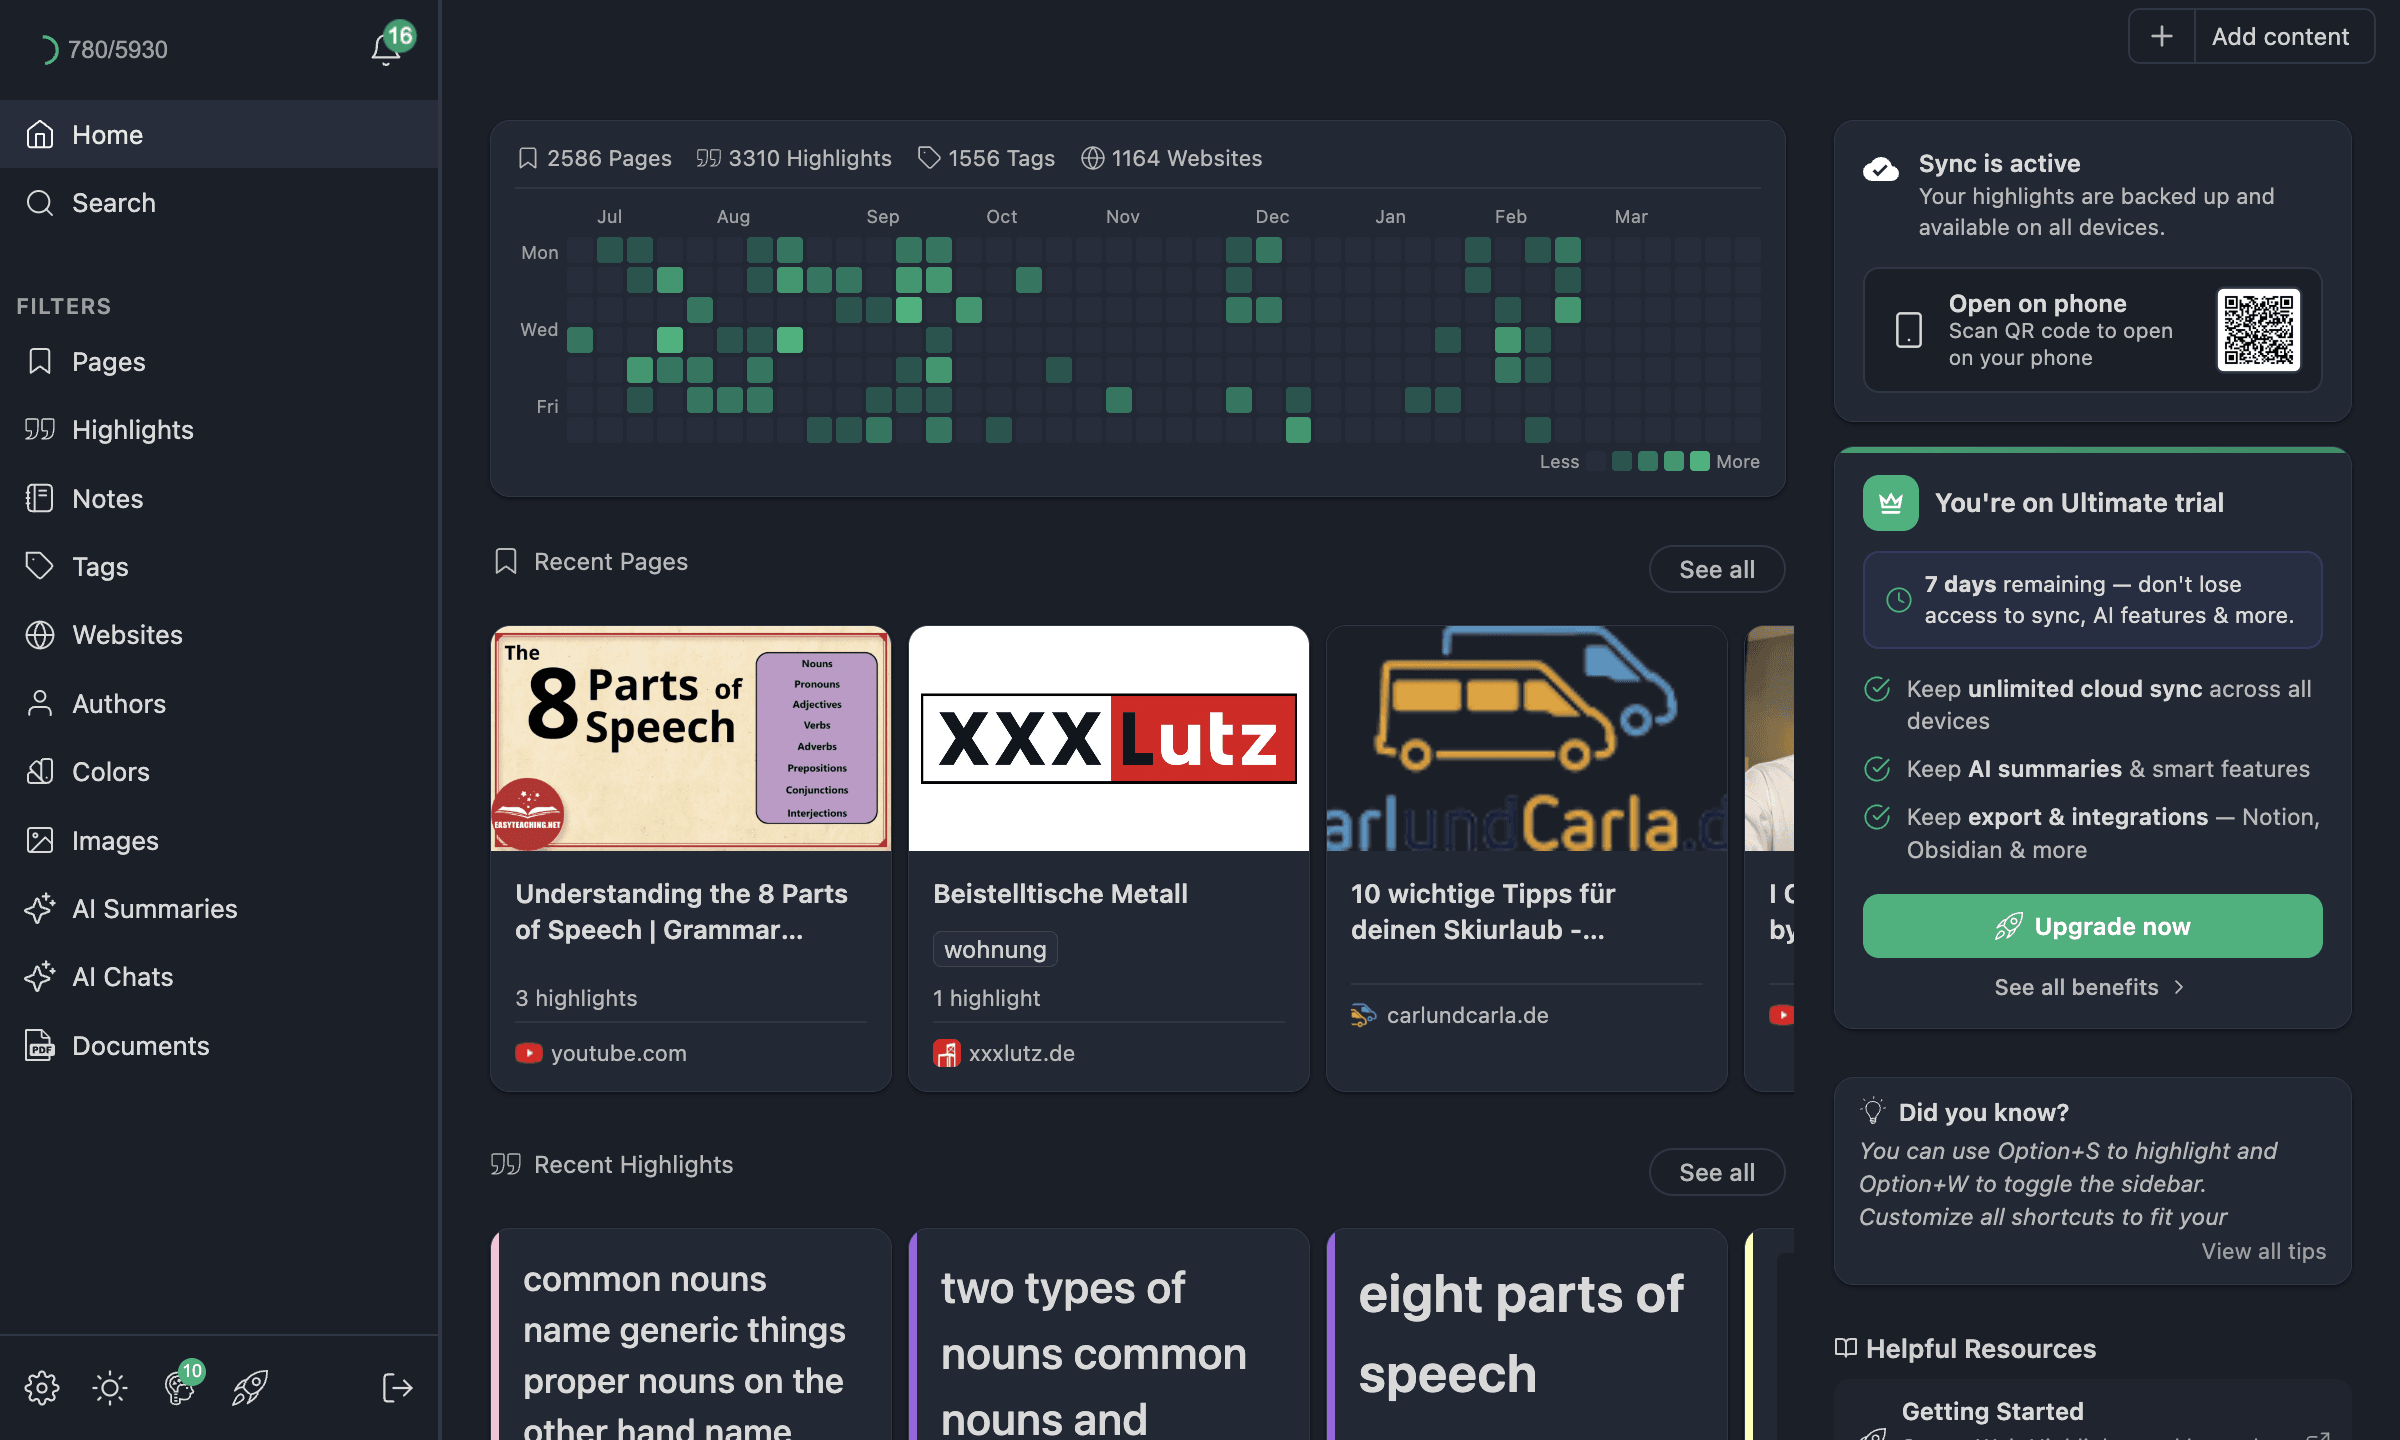
By default, your highlighted pages are organized by date and sorted by when they were created. You can also choose to group them by websites or turn off grouping altogether.
The web app supports Grid, List, and Masonry layouts — and your preferred view is remembered per section, so you can use a list for Pages and a grid for Highlights without reconfiguring each time. If you click on a highlighted page, you'll see all the highlights you've made on that page.
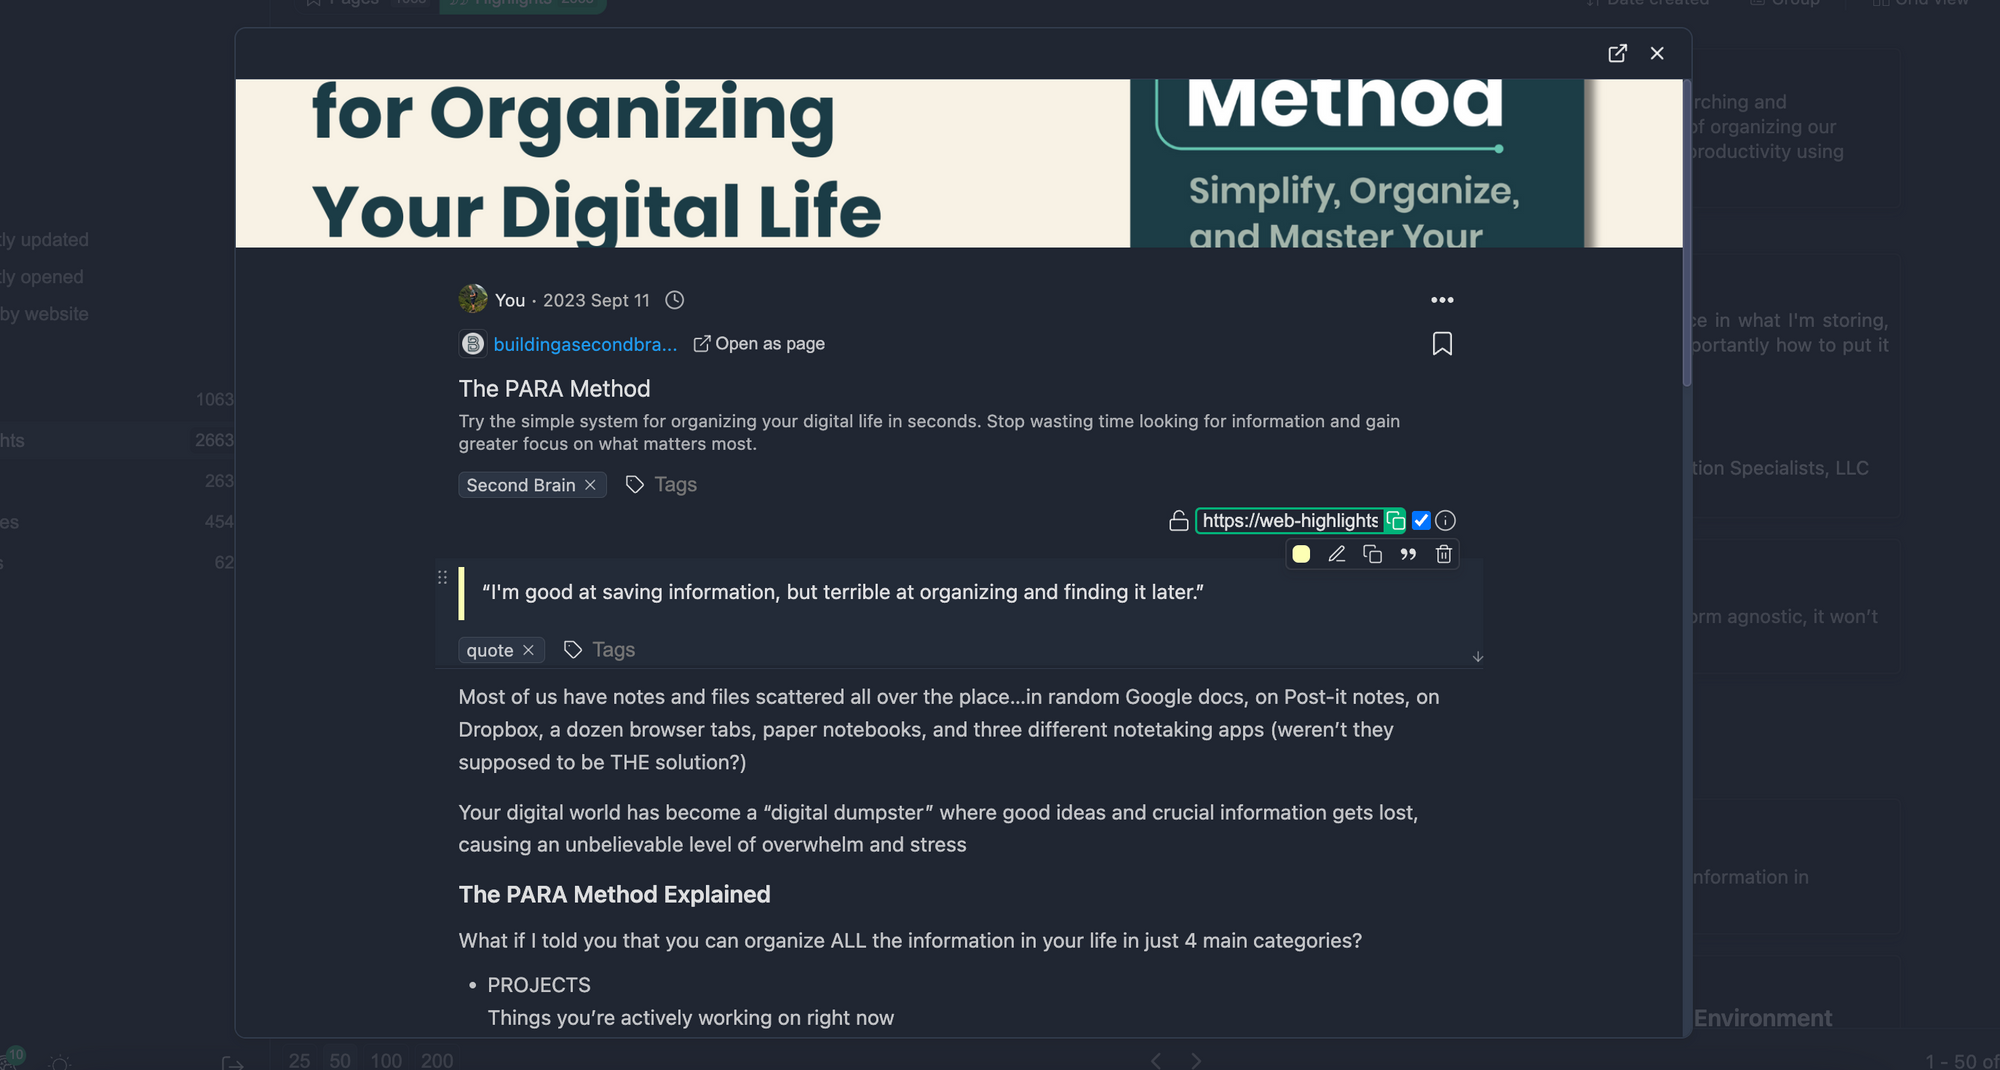
For example, here are some of my highlights on the PARA-method , a powerful organization technique developed by Tiago Forte:
There's also a toggle at the top of the dashboard that lets you switch between seeing your highlighted pages and your highlights.
By default, it shows the highlighted pages, but if you switch to "Highlights," you'll see all your highlights without having to open a page:
Beyond Pages and Highlights, the sidebar navigation lets you browse Tags, Websites, Authors, Colors, AI Summaries, AI Chats, Documents, and Images — each with their own view and sort options. For the full overview, check the web app grid & filters documentation.
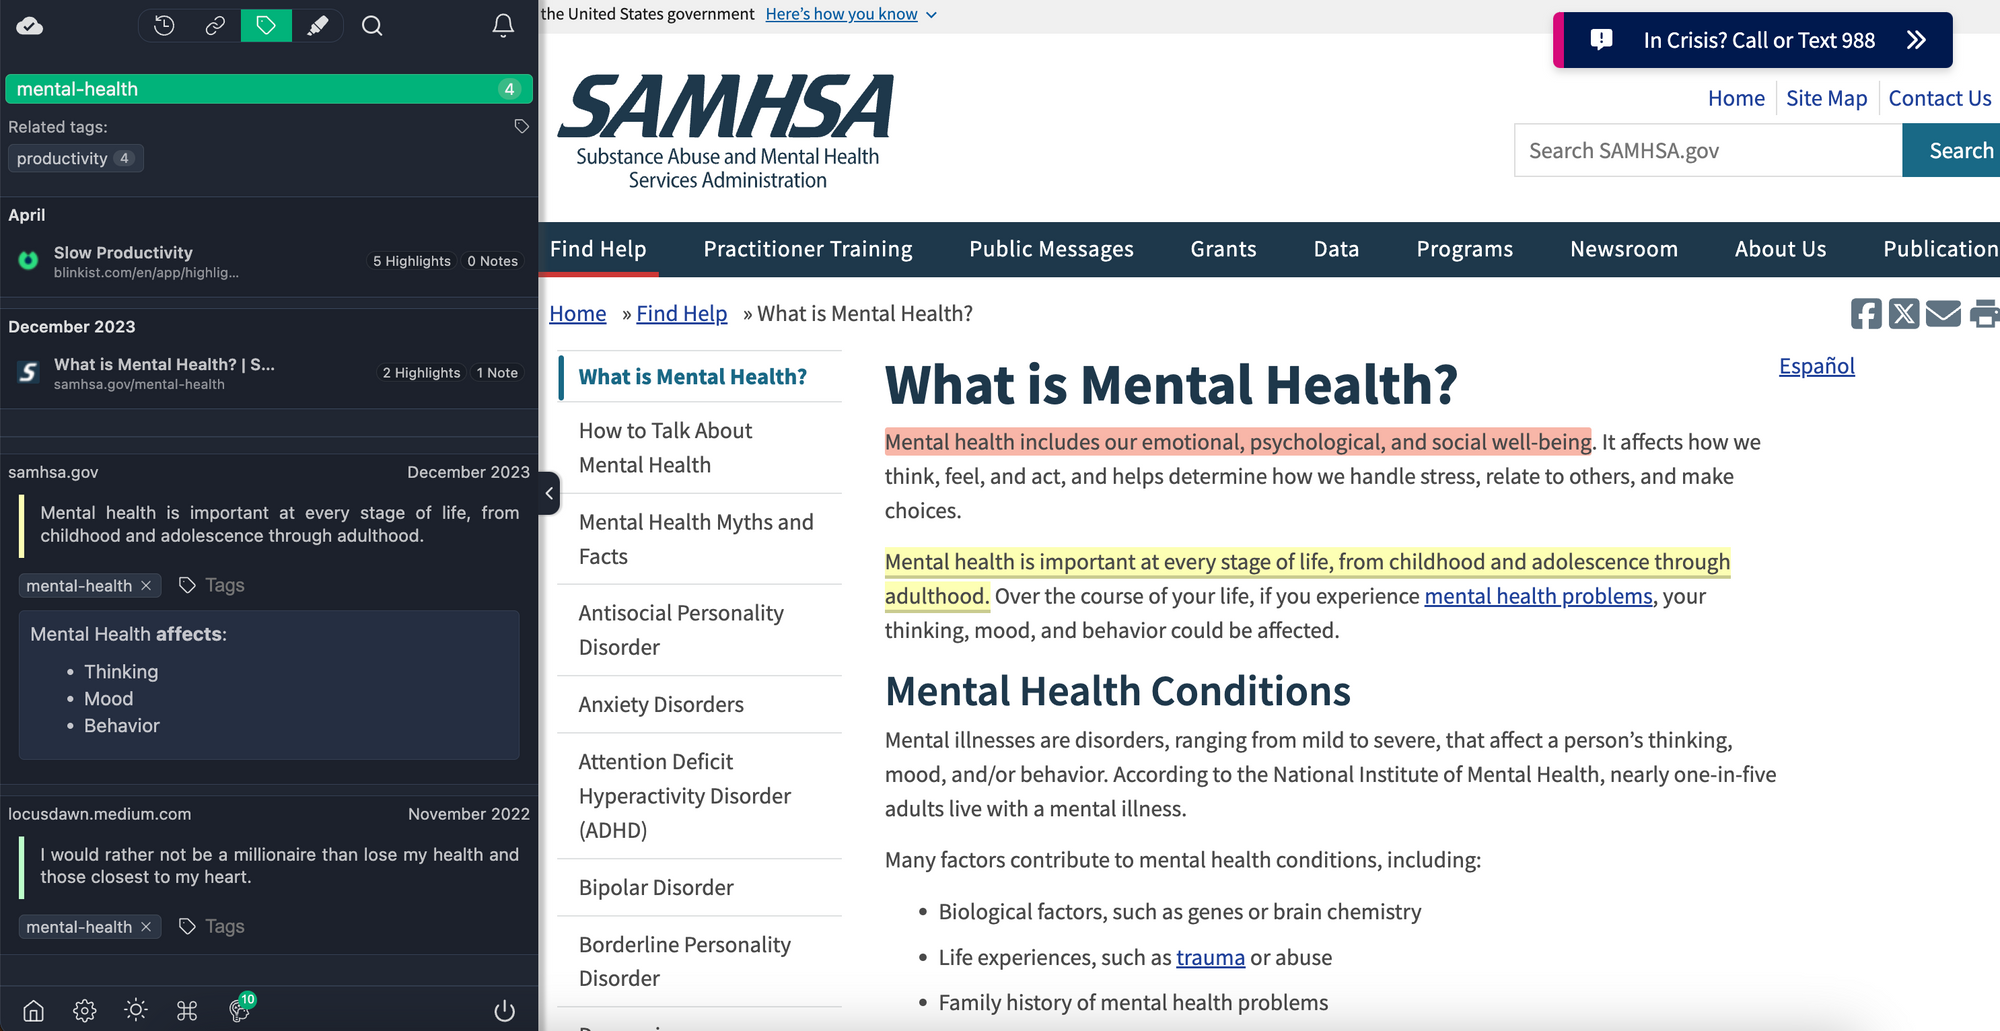
Find related highlights using Tags
Now, let's search for the "mental-health" tag we created earlier. When we filter for the tag, our feed will refresh and show only the pages/highlights where we used that tag. This makes it really easy to find the information again.
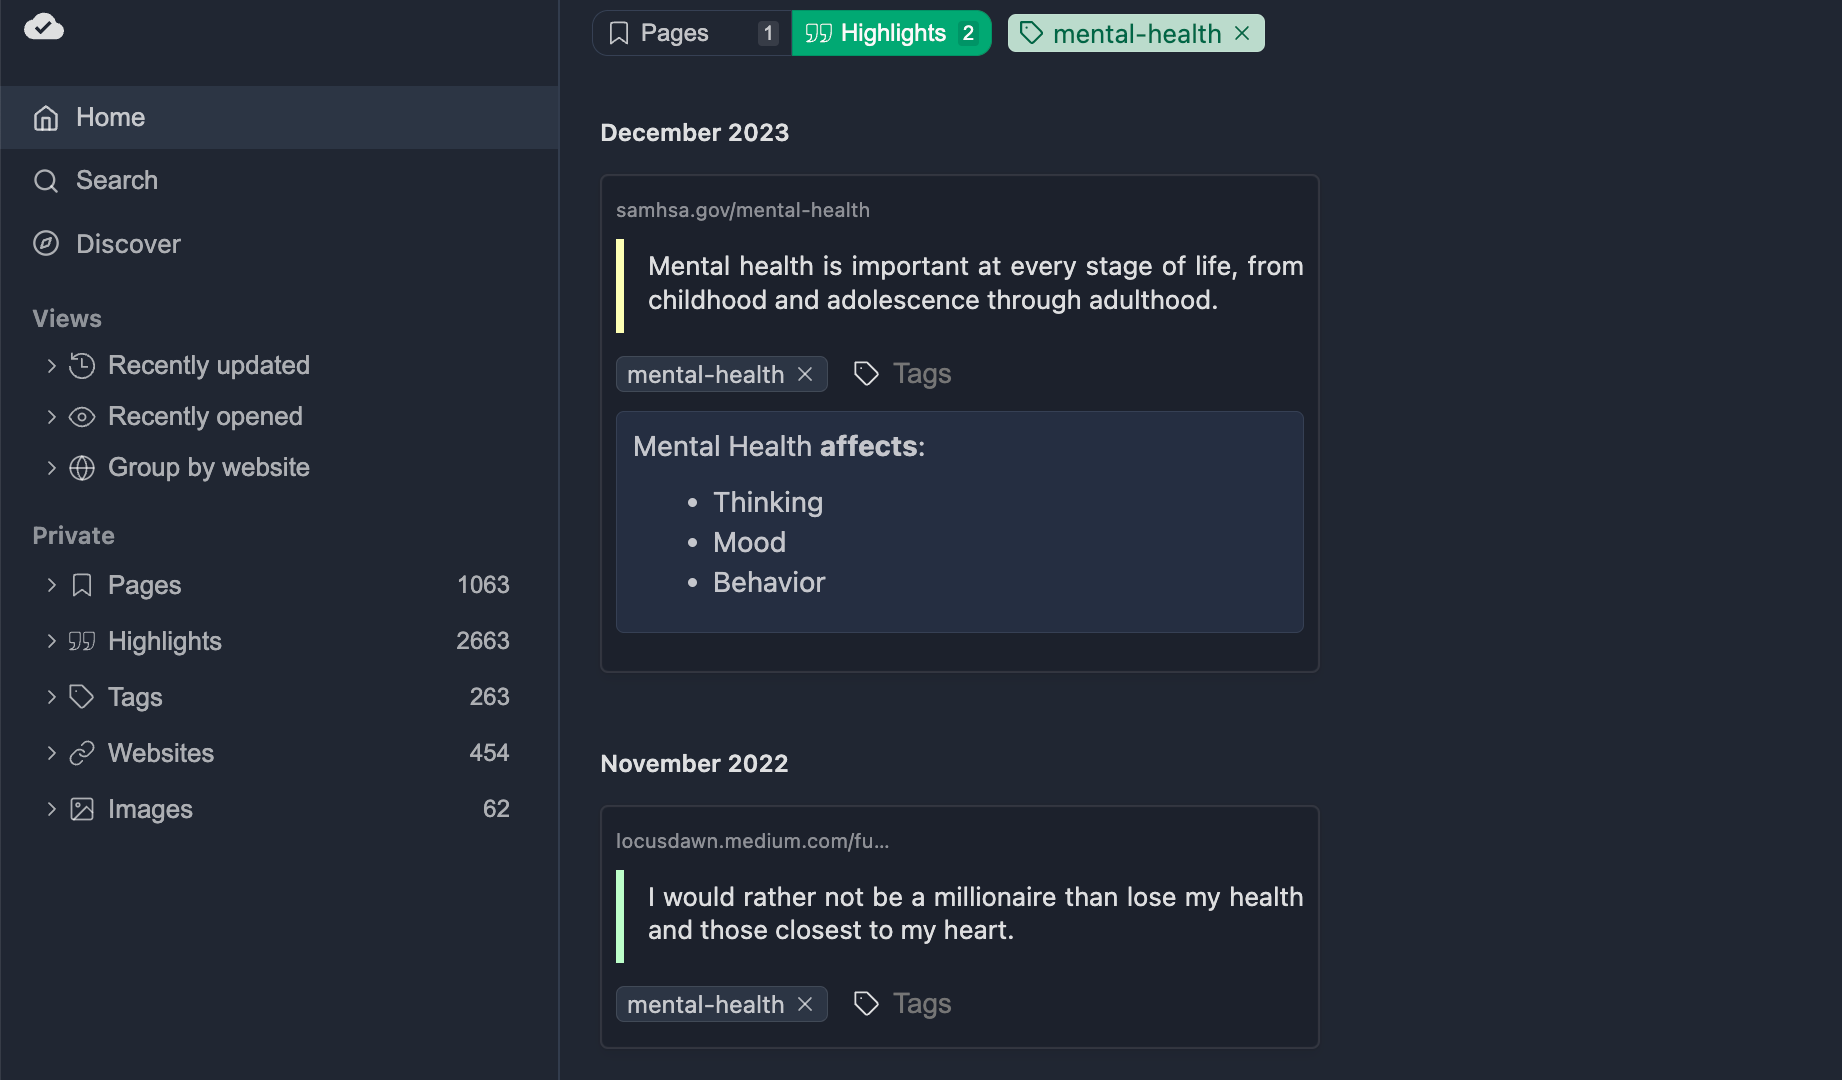
You can see that there are two highlights with the corresponding "mental-health" tag.
Advanced Filters with AND / OR Logic
Tags are great, but sometimes you need to combine multiple criteria to narrow down your research. That's where advanced filters come in.
In the web app, you can open the filter bar and add criteria like tag, website, author, color, date range, and more. What makes it really powerful is the ability to combine filters using AND or OR logic:
- AND — an item must match all active filters (narrows results)
- OR — an item can match any of the active filters (broadens results)
For example, I often filter for two tags at once using AND logic to find exactly the intersection I need. You can also use the quick-filter syntax directly in the search input — just type something like tag:mental-health and hit enter. It's a huge time-saver.
On top of that, custom visible fields let you control which metadata columns appear in the grid — so you can focus on titles and dates or show more detail depending on what you need.
Page Filter
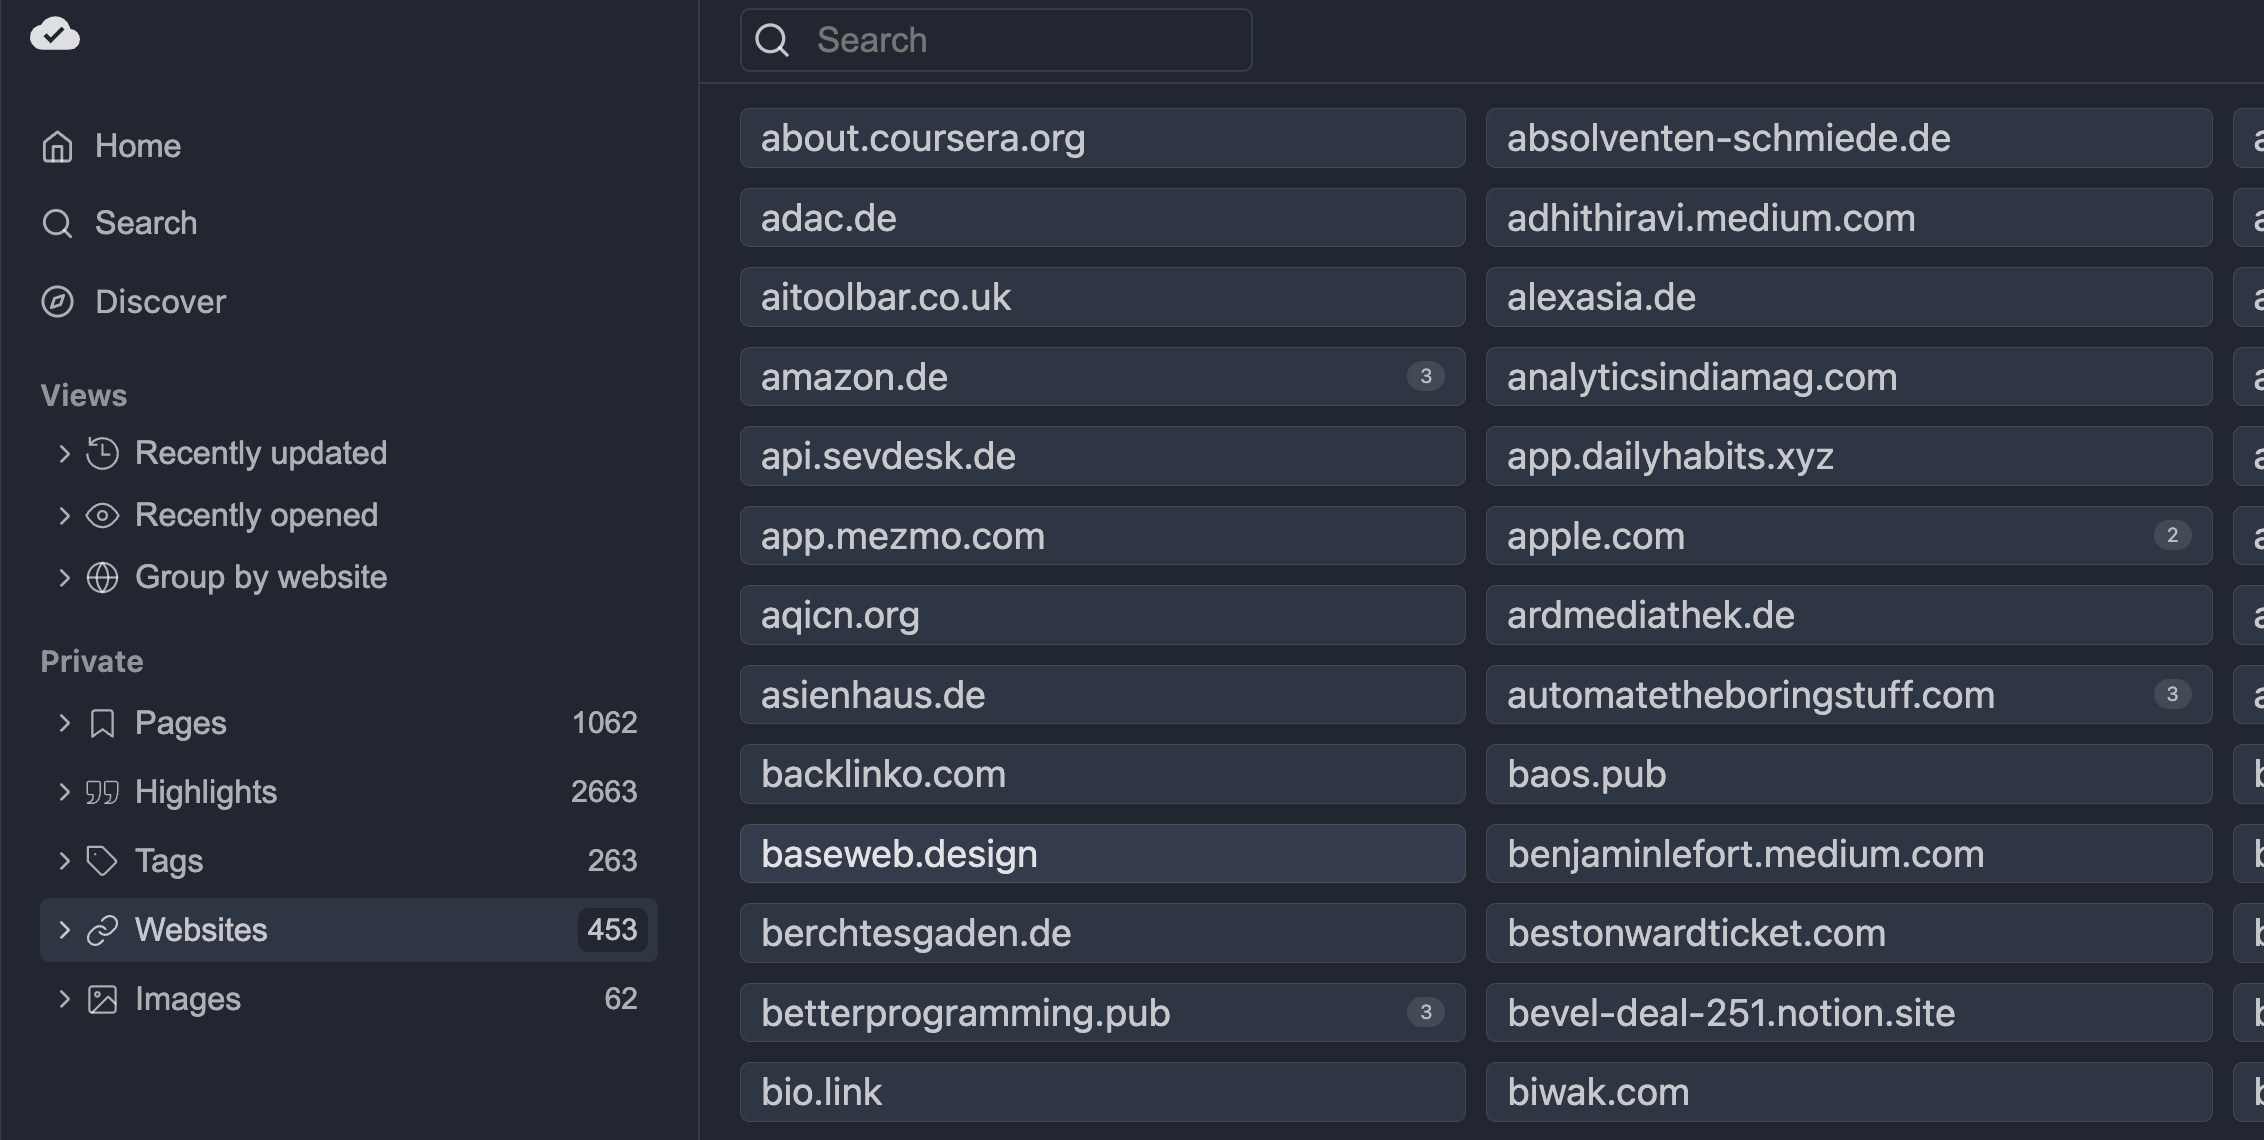
In addition, we can also filter for specific pages. If you navigate to "Websites" in the left sidebar, you can find an overview of all websites you have highlighted in the past:
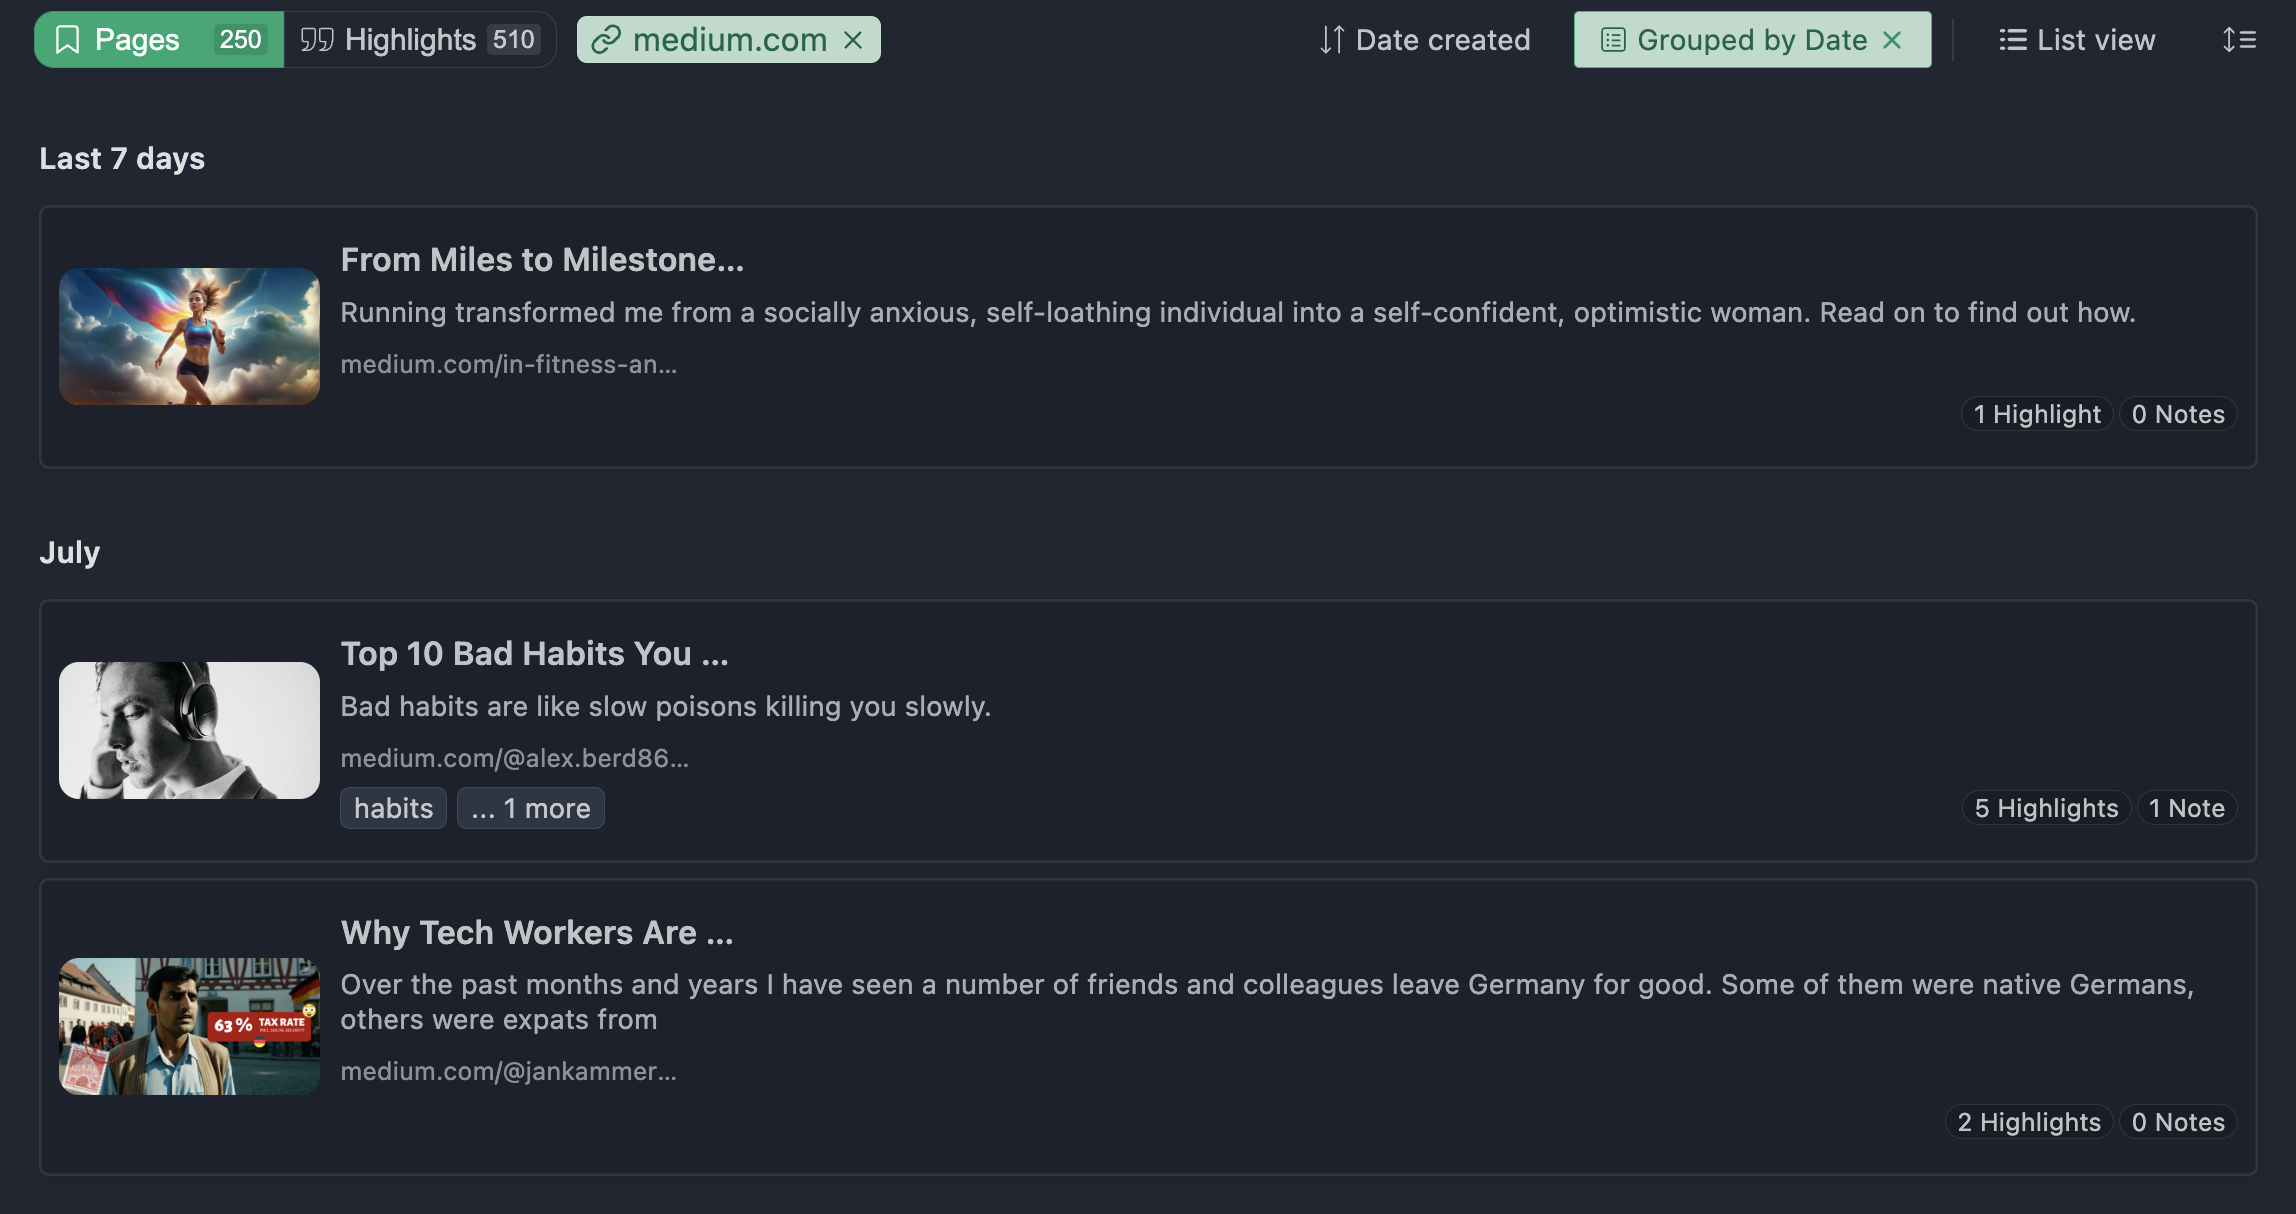
Now, for example, I can select "medium.com," and it will display all the pages I've annotated or bookmarked before.
Search Filter
The powerful full-text search is the easiest way to quickly find the information you are looking for.
Click "Search" in the left sidebar of the web app (or use the search inside the extension sidebar) and start typing. The search view shows all entity types at once — pages, highlights, tags, websites, authors, colors, images, AI summaries, and AI chats — so you get a complete picture of everything that matches your query.
For example, here are all results that contain the term "habit":

From here, you can narrow down the results by adding entity type filters. Use the arrow keys to navigate the filter dropdown and press Enter to apply — or use the quick-type syntax directly in the search input.
For example, typing type:highlights will filter to show only highlights. You can stack multiple filters too, like showing both highlights and pages at the same time.
Each active filter appears as a badge in the filter bar, so you can see exactly what's applied at a glance. Click the ✕ on any badge to remove that filter — or clear them all to go back to the full results. It's fast, keyboard-friendly, and makes finding specific pieces of research a breeze.
Saving Bookmarks
Web Highlights can not only be used for highlighting text. It can also be very practical to save pages as bookmarks so that you can either continue highlighting later on or just find the corresponding page again.
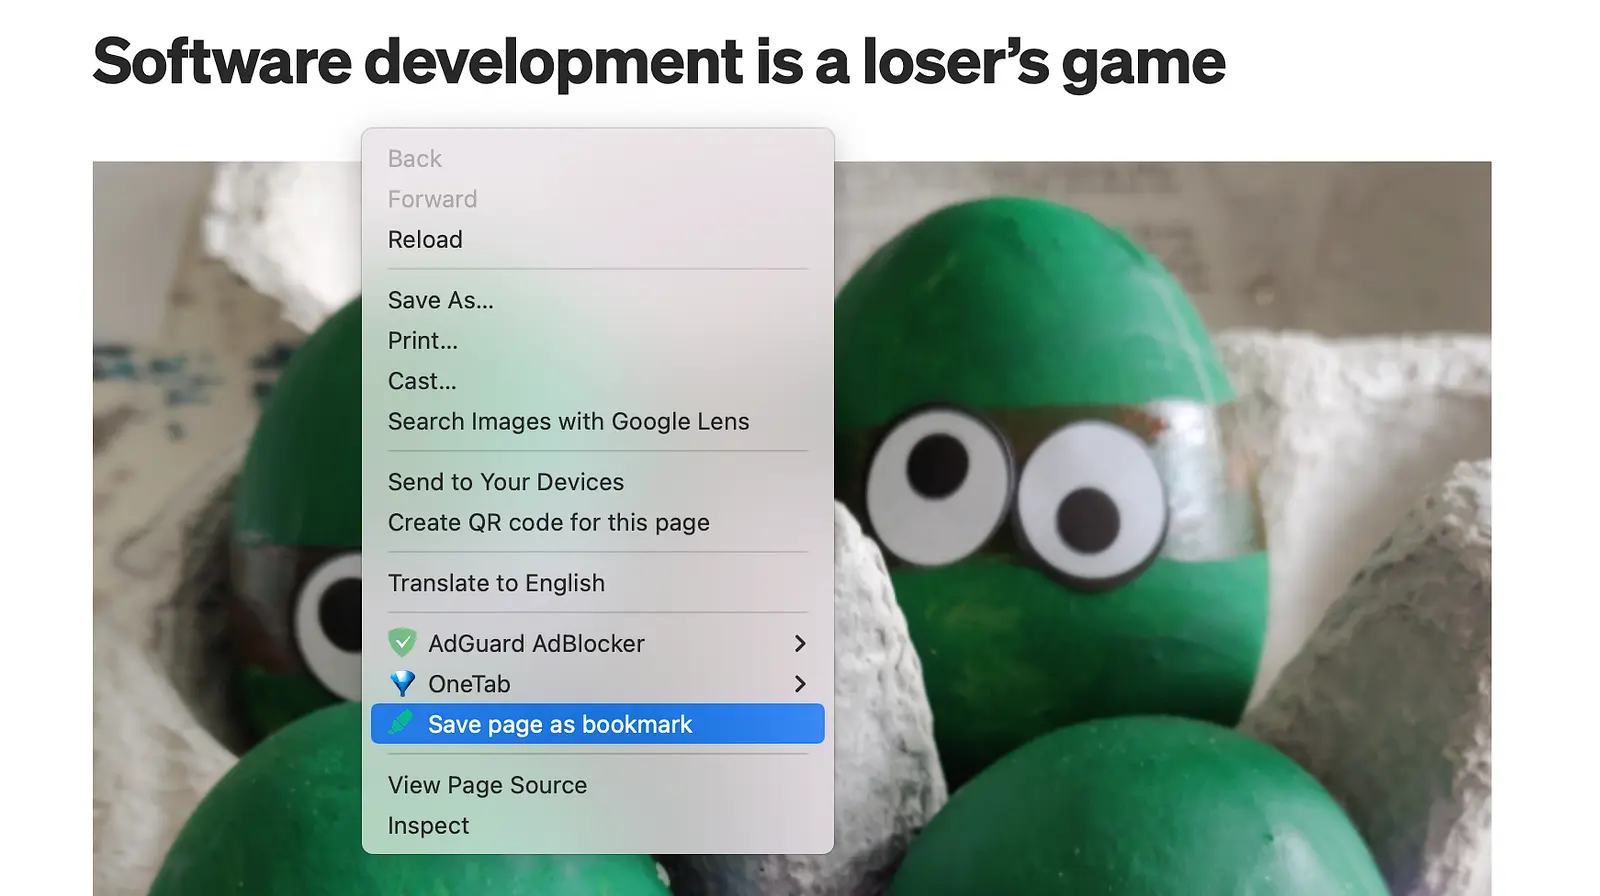
You could also right-click on any website without selecting text and choose "Save page as bookmark":
Practical Example: Save Page to Reading List
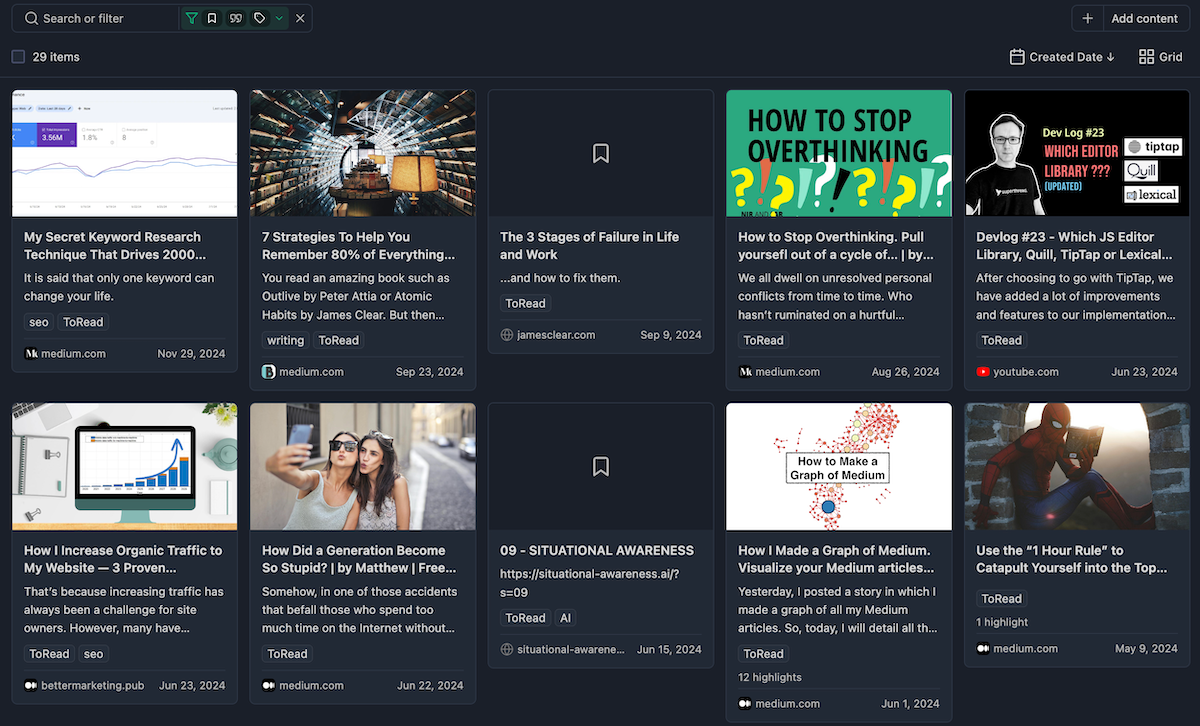
What I often do is save any interesting article I find as a bookmark and add a "ToRead" tag to it. Later, I can go back to the web app and filter for all the pages with that tag.
Here's my To-Read list:
You can take it a step further by setting a reminder so you don't forget about the article . To do this, just click the clock icon on the highlighted page and choose a date and time.
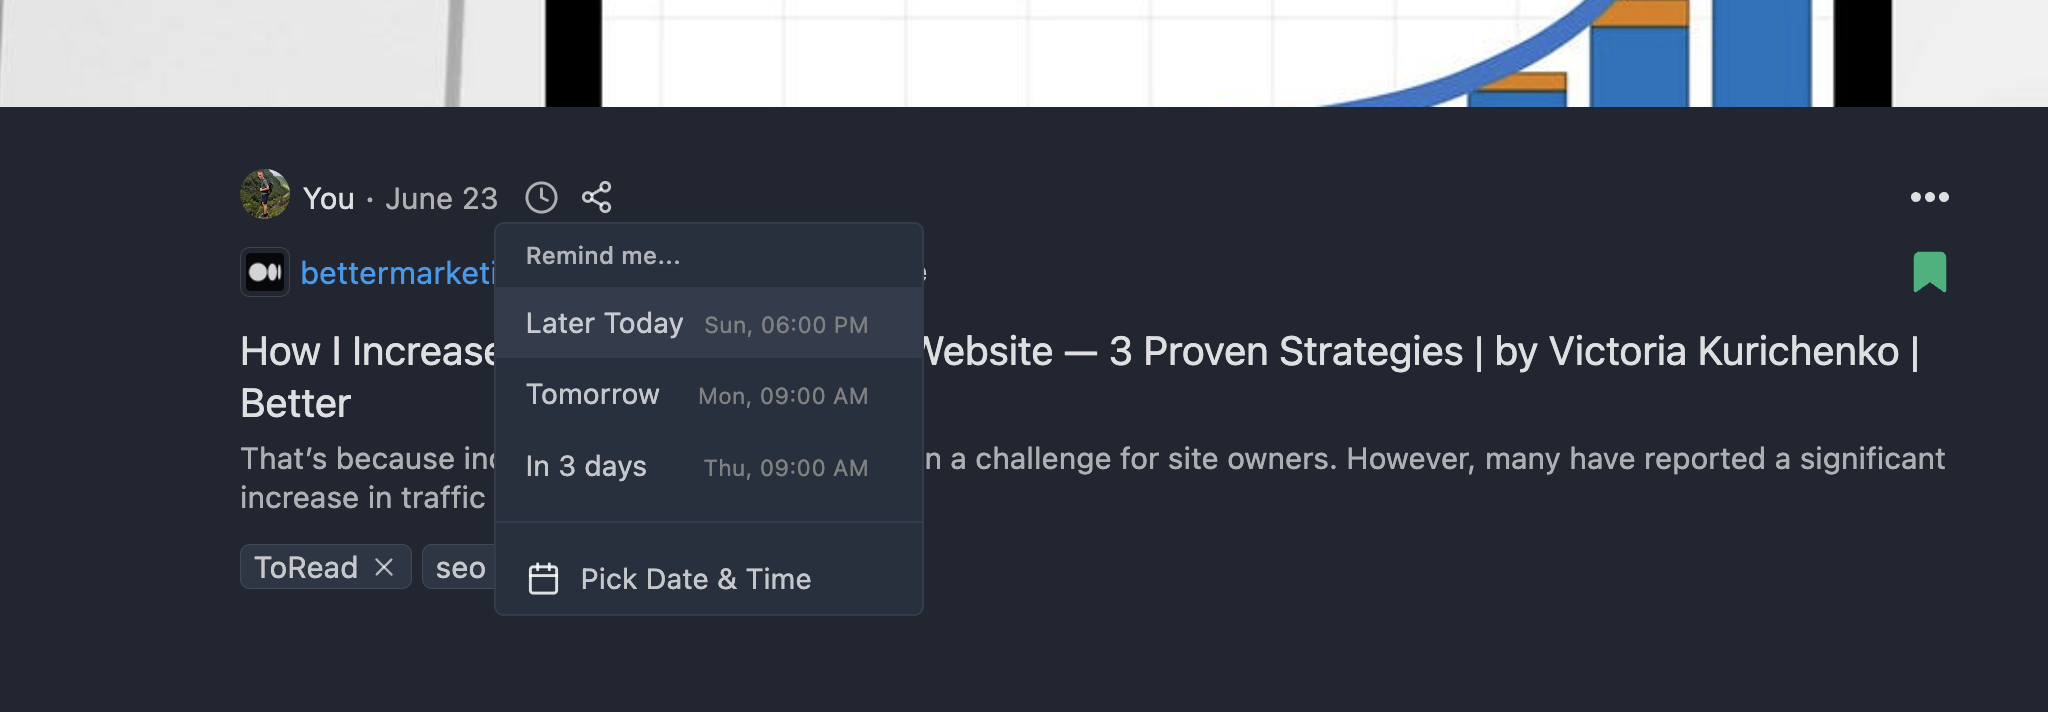
You'll then receive an email reminding you about that specific article.
Reader Mode & Saving Documents
One feature I use almost daily is Reader Mode. When you find an article you want to save for later — or just read without distractions — you can save it as a document directly from the sidebar. Web Highlights strips away ads, popups, cookie banners, and other clutter, leaving you with a clean, readable version of the page.
You can customize the reading experience too: adjust the font size, line height, article width, and choose between light, dark, sepia, or high-contrast themes. Saved documents are accessible from the "Documents" section in the web app, so you can revisit them from any device — even offline.
AI Summary & AI Chat
If you're using a browser that supports Chrome's built-in AI, you'll love the AI Summary and AI Chat features. AI Summary generates a concise overview of your highlights and the page content — all processed locally on your device, so your data never leaves your computer.
AI Chat takes it a step further and lets you have a conversation about the content. You can ask follow-up questions, drill into specific sections, or get explanations of complex topics. I've found this especially useful for longer research papers where I just need the key takeaways.
YouTube Highlighting
Here's something I wish I'd had years ago: YouTube highlighting. Web Highlights can pull the transcript of any YouTube video and let you highlight and annotate it just like a regular article. When you click on a highlight, the video jumps to that exact timestamp. It's a game-changer if you watch a lot of educational content.
Exporting Highlights
After you have made some marks for your research, you may want to export them to other tools such as Notion or Obsidian .
For this purpose, Web Highlights offers different export functionalities. This feature allows you to synchronize your notes with your favorite research tools easily.
Here are the different export options to choose from:
- Copy to Markdown
- Copy to HTML
- Export to PDF file
- Export to HTML file
- Export to Capacities
- Export to Notion
- Export to Obsidian (via Markdown)
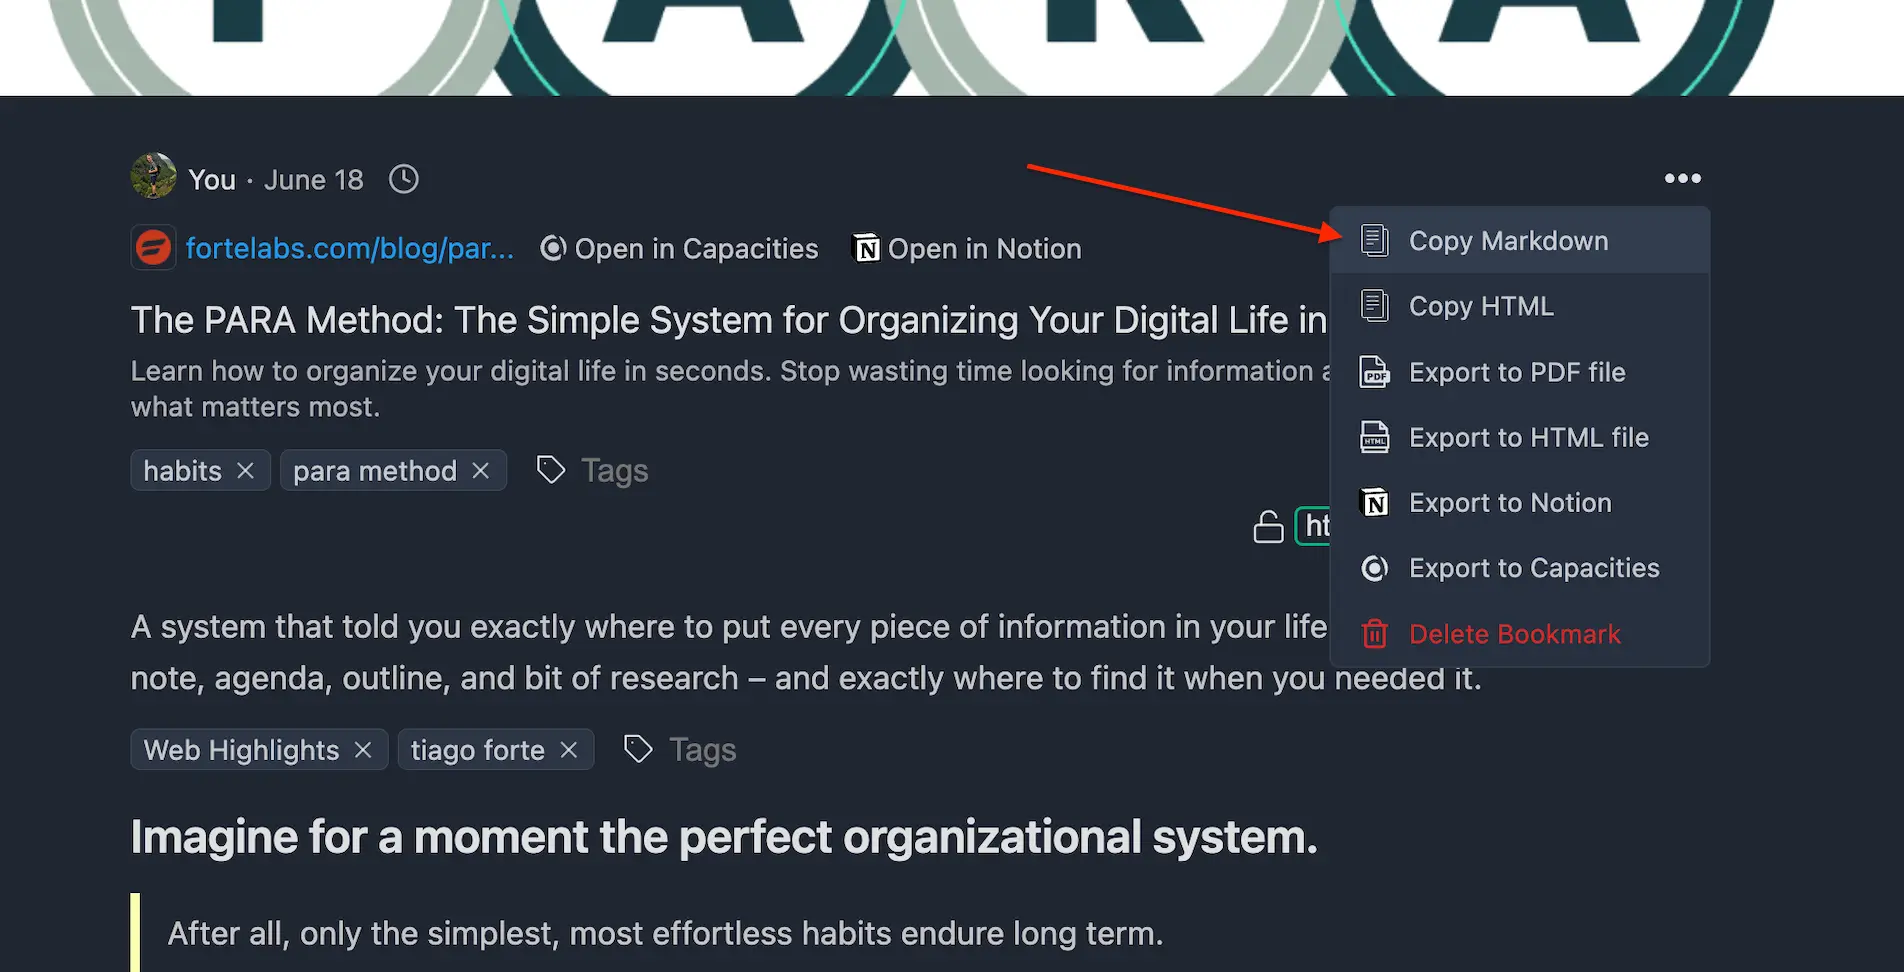
You can access all these options by clicking the three-dots icon on a highlighted page. Here's an example of how to export your research to Markdown and import it into a PKM tool like Notion:
Example: Copy Markdown
Just go to the Web App and click on "Copy Markdown" of a marked page to copy all markups of the page including the metadata.
Once you copied your markdown, you can just paste it to, e.g., Notion, and it will look like this:
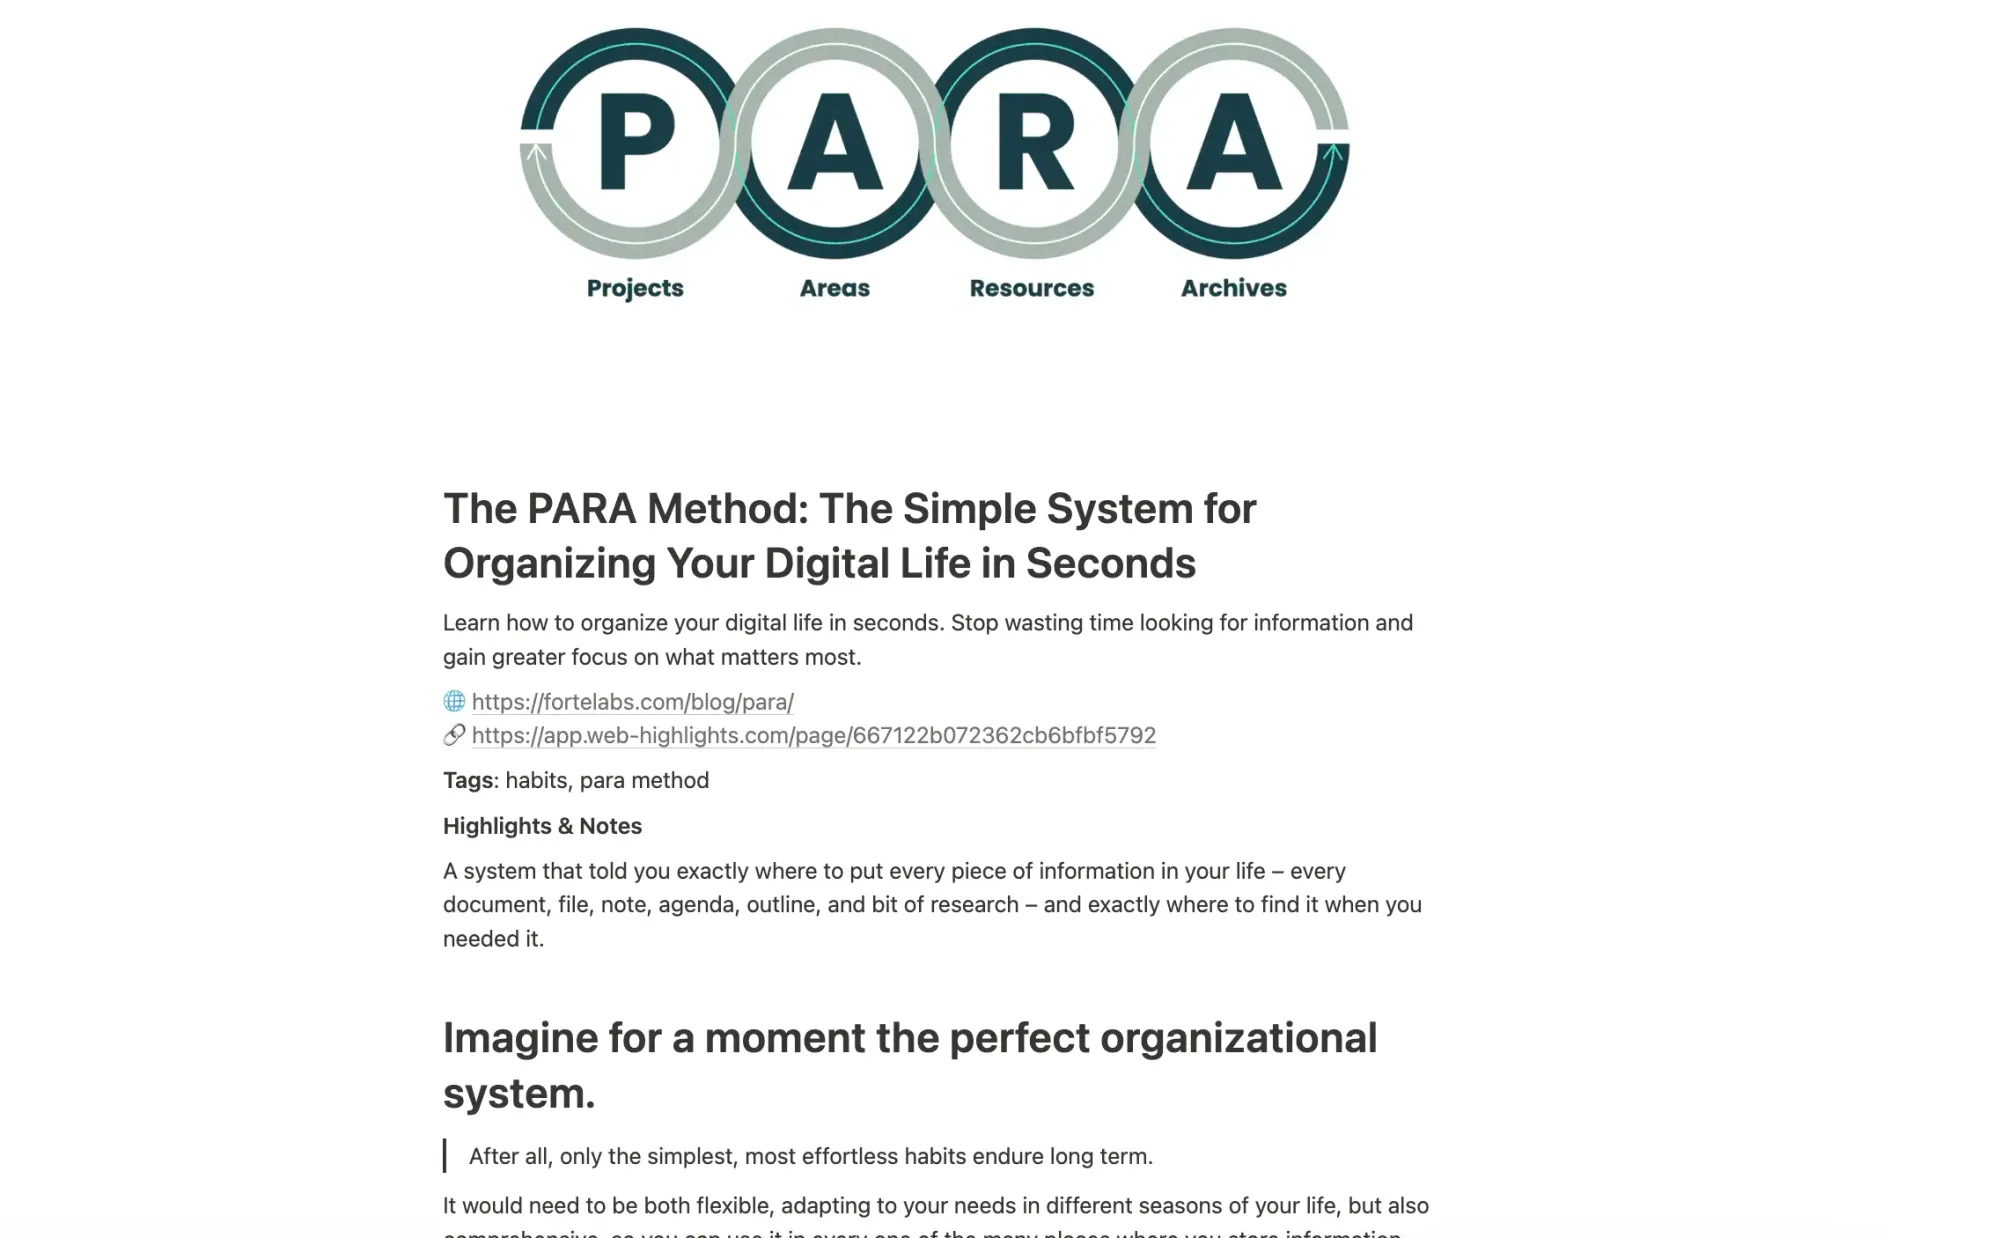
Web Highlights transfers all information about the page including the image, title, tags, highlights, and notes.
Remember What You Read
Let's be honest — how much of what you read online do you actually remember a week later? Research shows we forget up to 80% of new information within days if we don't review it. That's exactly why I built spaced repetition learning into Web Highlights.
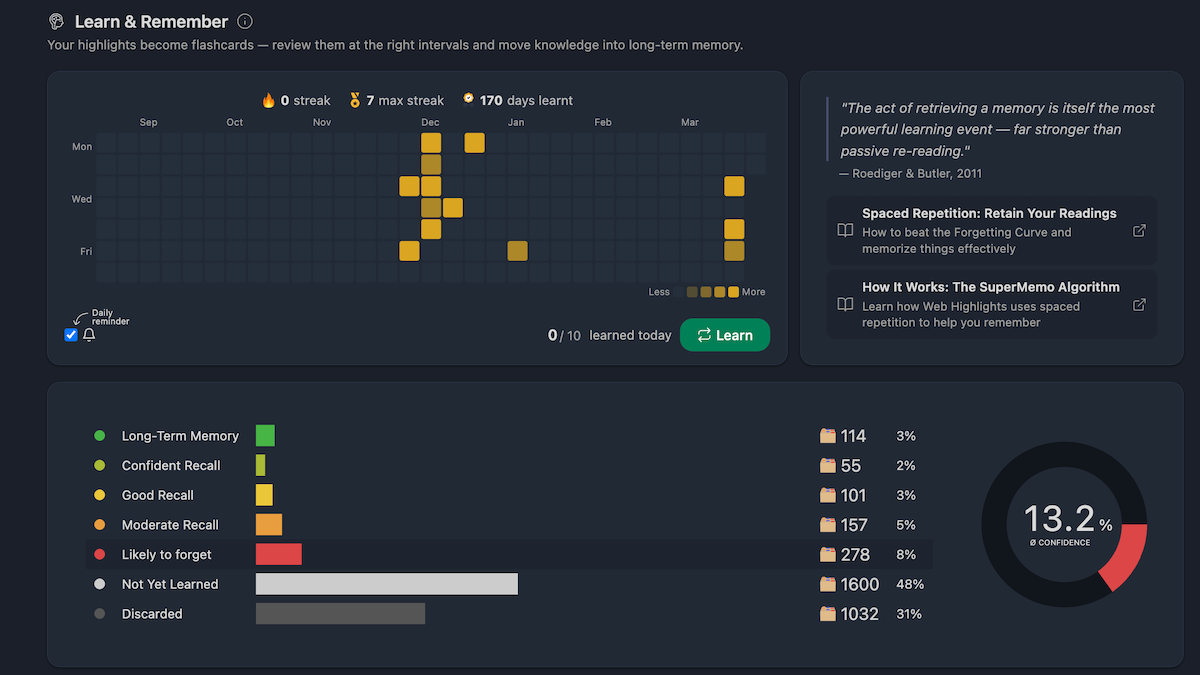
The idea is simple: your highlights are turned into flashcards, and Web Highlights reminds you to review them at scientifically optimized intervals. Under the hood, it uses the SuperMemo (SM-2) algorithm — the same approach used by popular tools like Anki. Items you know well get pushed further out; items you struggle with come back sooner.
I've written a deep dive on this topic if you're curious: Spaced Repetition — How to Make Your Readings Stick in Long-Term Memory .
Final Thoughts
Web Highlights makes organizing your research more efficient. By highlighting text and adding tags, you can easily find any piece of information you come across online. Taking notes helps keep your thoughts organized, and the export feature ensures your work syncs with your favorite tools like Notion, Obsidian, and Capacities.
With features like advanced filters using AND/OR logic, distraction-free reader mode, AI-powered summaries, YouTube transcript highlighting, and spaced repetition learning, Web Highlights has evolved far beyond a simple highlighter — it's become a complete knowledge management companion for anyone doing serious research online.
If you want to learn more, check out the full documentation or explore more use cases