How to Create Study Guides and Summaries Using Web Highlight
Learn how to create study guides using Web Highlights by highlighting, organizing, and summarizing key information. Simplify your study process now.

Studying can be overwhelming, especially when dealing with a lot of material. Web Highlights simplifies this process by allowing you to highlight important text, take notes, and organize everything quickly.
If you're a student, researcher, or just someone who prefers a personalized learning approach, Web Highlights is the ideal tool to help you quickly and easily create study guides and summaries. It's a great way to enhance your learning experience.
Let’s have a look at how to create a study guide and summary using Web Highlights.
Step-by-Step Guide to Using Web Highlights for Summaries
Creating a summary in Web Highlights is not just easy—it’s actually fun! You can experiment with different colors, fonts, and other cool features this annotation tool provides.
Here are some simple steps on how you can create summaries on Web Highlights:
1. Highlight Key Information
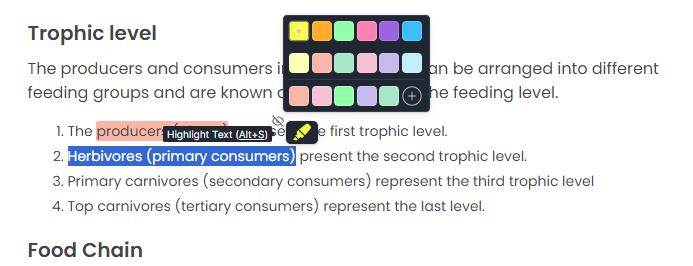
The first step in creating a summary is identifying and highlighting the most critical information.
Web Highlights allows you to select and highlight text directly from web pages or PDFs, making it easy to gather important points.
Here’s how:
- Start by skimming the material: Skimming is important, whether it's a website, an article, or a PDF document. Find and select the main points, definitions, or key concepts to help you understand your topic better.
- Click and drag to highlight: Once you find an important section, simply click and drag your cursor over the text to highlight it. Web Highlights will automatically save this selection for you in the sidebar.
- Highlight multiple sections: Unlike traditional methods, you’re not limited to just one part of a page! You can highlight separate sections across different web pages or PDFs. It helps you collect all the information in a single place.
This is very useful when pulling together information from several sources or chapters.
Keep it simple and smart! Don’t over-highlight.
It’s easy to fall into the trap of over-highlighting, which can make your notes cluttered and difficult to review later.
Here are some tips on how to avoid over-highlighting:
- Key concepts: Only highlight the fundamental concepts of the topic. Don’t highlight long passages or full paragraphs unless the entire section is essential.
- Look for keywords: Focus on highlighting important words, definitions, and concepts relevant to your topic.
- Limit your highlights per section: A good rule is to highlight no more than two or three key points per single section or page.
- Avoid highlighting fluff: Sometimes, content can contain unnecessary details, fillers, or overly descriptive text. Ignore these parts and focus on the core information related to your topic.
These tips can help you ensure your highlights focus on the key information, which is helpful in creating a visual study guide.
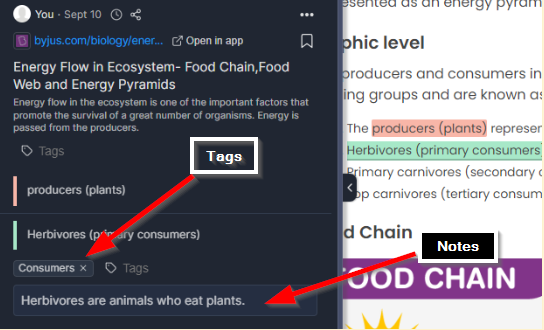
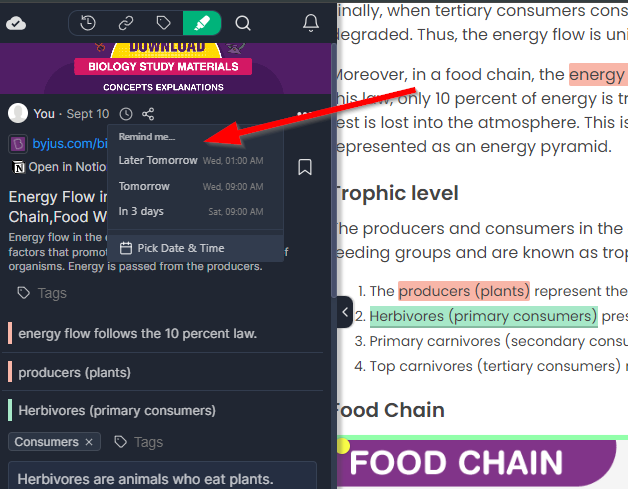
2. Organize with Tags and Notes
Get organized with Web Highlights’ tags and notes!
Once you’ve highlighted key information, it’s time to get everything in order. Web Highlights lets you add tags and notes, making it easy to sort your highlights by topic.
How to use tags and notes:
For example, if you’re preparing for your science exam, you can use tags as titles of sections or themes like “photosynthesis” or “energy transfer.” This helps you keep highlights related to similar topics under one section.
Accessing tags from the sidebar will direct you to the relevant highlights that fall under it. This helps in time management and keeps your study material organized.
You can also add short lecture notes next to your highlights to give yourself context or personal insights. This makes it easier to recall what you’ve learned later. Adding notes also helps track any additional information you may need when revising content.
3. Creating Summaries with Web Highlights
Now that your key points are highlighted and organized let’s create a summary. By combining the highlighted text, you can make a detailed yet to-the-point summary that will also be your study guide.
Follow these simple steps to create a summary:
- Review your highlights and extract the most important ones.
- Combine these highlights into a simple summary paragraph. Make sure you cover all the key terms.
- This combination of all the highlights will be automatically saved into your Web Highlights space.
Tip: Keep your summaries concise, focusing on understanding rather than just repeating content.

Here’s what your summary will look like in the web app.
You can also format your summary and add bullet points where relevant. Use different heading sizes to give your summary a more organized and personalized look.
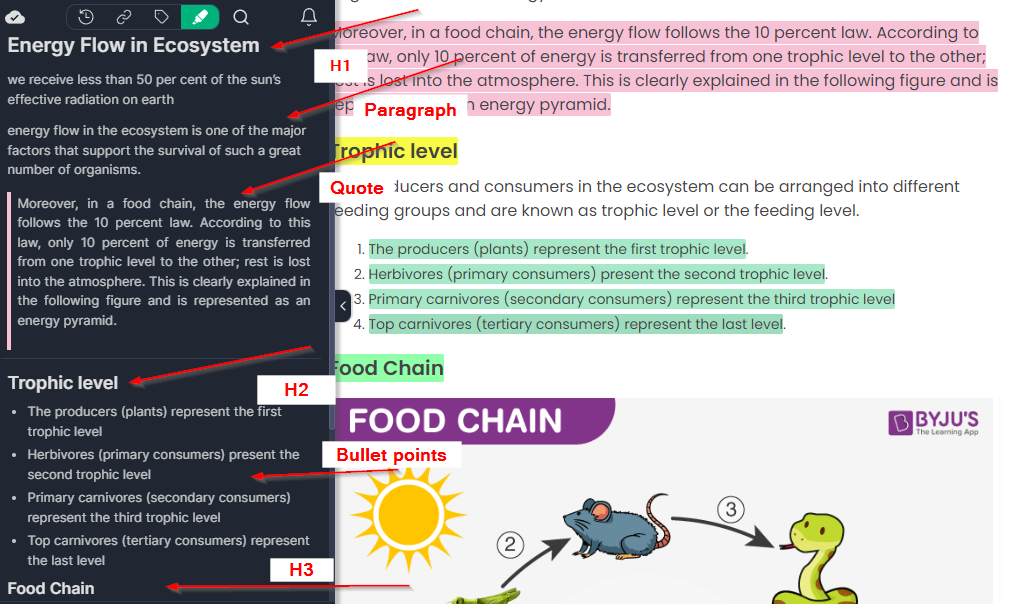
The summary can be used on your web app. You can also use it as a digital notebook for quick reference and revisions when needed!
4. Exporting Summaries
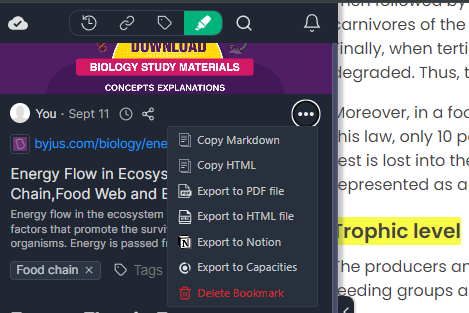
With Web Highlights, exporting summaries is easy. It allows you to export your notes and highlights into platforms like Notion, Obsidian, or Capacities. This helps you further organize and share your study guides.
Steps to export:
- Go to your Web Highlights dashboard from the app or the extension.
- Open the summary saved in the Web Highlights space.
- Select the three dots that appear in the sidebar.
- Choose your preferred platform or format - Notion, Markdown, etc.
- Your study guide will be transferred instantly and ready for further review or use.
5. Share Study Guides for Group Study Sessions
The export feature lets you share your summaries and study guides with peers. This is great for group study sessions and further collaboration.
You can decide whether to create a private link that your study colleagues can access or share it publicly with the Web Highlights discover feed.
Not only this, Web Highlights also has an auto-sync feature. This means all notes and bookmarks are saved across all your devices automatically.
By sharing your study guides, you can collectively build a more engaging learning resource and exchange ideas missed during individual study.
Note: Make sure you are logged in from the same account across all devices.
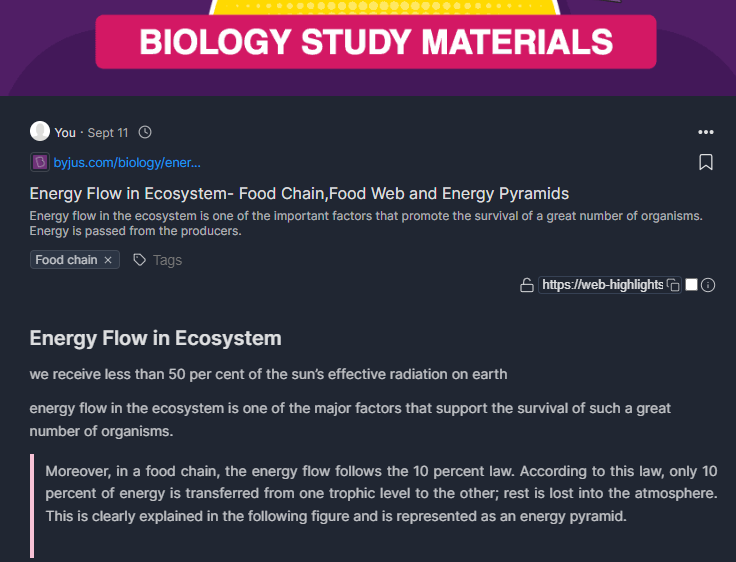
Picture this: you're sharing your "ecosystems" and "energy flow" summaries with your study group as you prepare for a science exam together. Everyone can pitch in, adding insights and diagrams to make the guide even more useful.
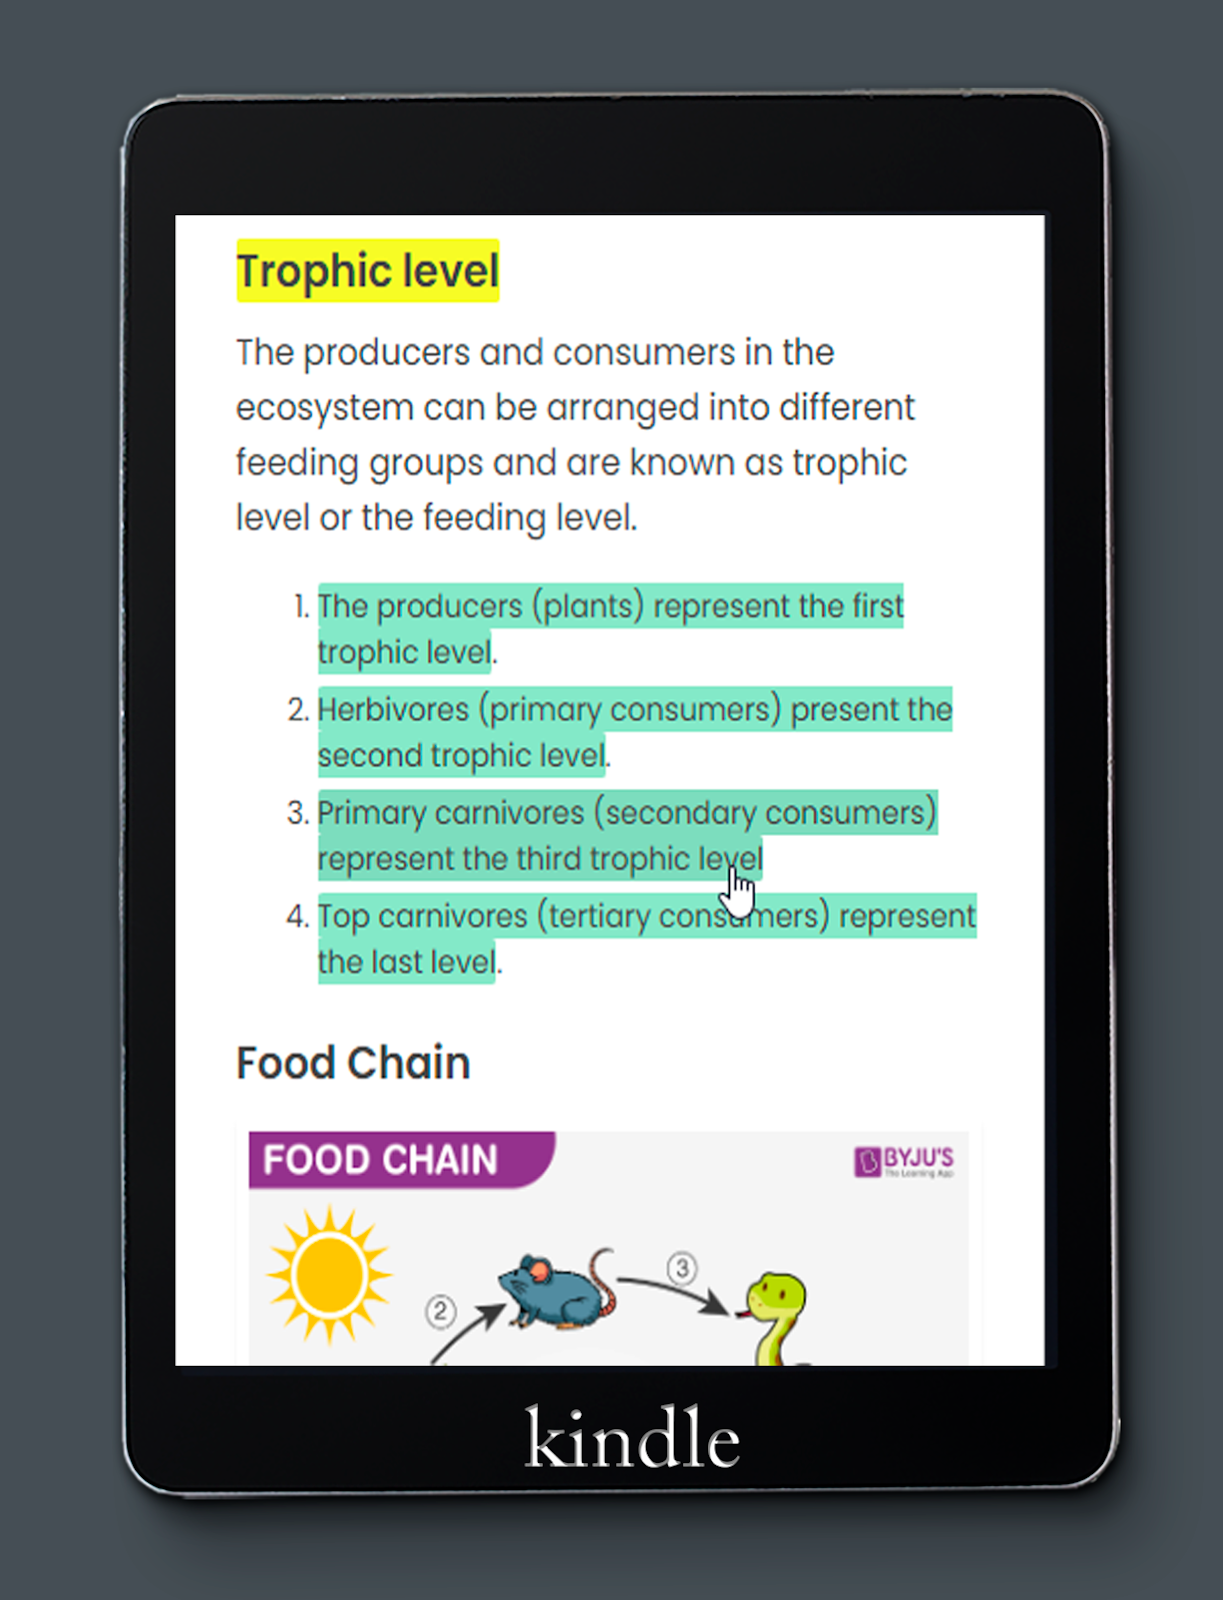
Highlight Images for Visual Learning
Web Highlights is not just limited to text!
It also supports image highlighting, which is perfect for visual learners. If you're studying subjects that include diagrams, charts, or other visual content, this feature is perfect for you. With Web Highlights, you can highlight images directly from websites or PDFs.
Visual learners benefit from studying words and images, and Web Highlights ensures you don’t miss out on those essential visual elements. You can make your study guides more engaging by including text and other interactive visuals.
Using image highlights with your text summaries creates a more exciting learning experience. Image highlighting helps you to understand visual concepts and diagrams!
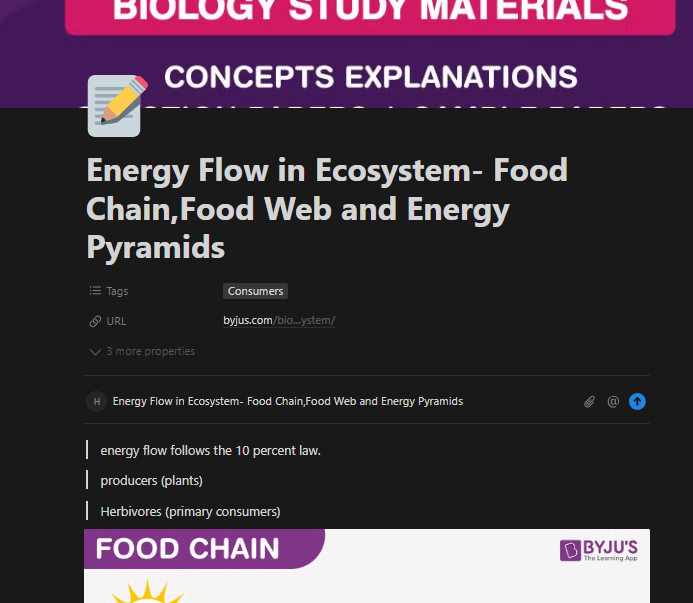
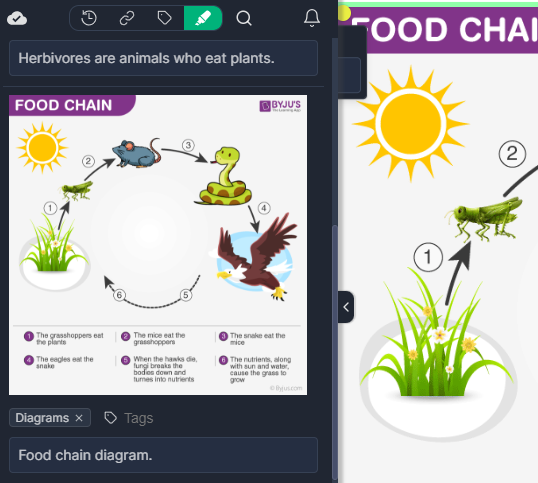
Example: If your science topic includes diagrams of the food chain or energy pyramids, you can use Web Highlights to highlight those images for your study guide. You can add tags and notes to the image as well. This creates a more comprehensive learning experience.

Using Web Highlights to Build Study Guides
Wondering how to create a study guide using Web Highlights? Let’s have a look!
1. Topic Organization
Study guides work best when they’re well-organized.
Web Highlights lets you organize your study materials by topics or chapters using tags. Then, with the search feature, you can easily find related highlights and bookmarks for specific topics. This makes it quick and easy to find what you need, saving you time and effort!
You can copy and paste all the relevant highlights and create a practical study guide.
2. Flashcards for Review
Web Highlights can turn your highlights into flashcards!
This unique feature is perfect for spaced repetition learning, a method proven to boost memory. Each learning session presents 10 flashcards — a mix of items due for review and new ones — to help you focus on consistent, bite-sized recall.
Here’s how you can create exciting flashcards:
- Highlight important definitions or concepts.
- Convert these into flashcards within Web Highlights for spaced repetition practice.
- Review 10 flashcards per day for better retention.
Tip: For Ecosystems, you can create flashcards with questions like:
“What is the primary role of producers in an ecosystem?”Answer: To convert solar energy into chemical energy for the rest of the food chain.
Pro Tips for Effective Summarizing and Studying
Here are some tips on how you can make summarizing and studying more exciting and productive:
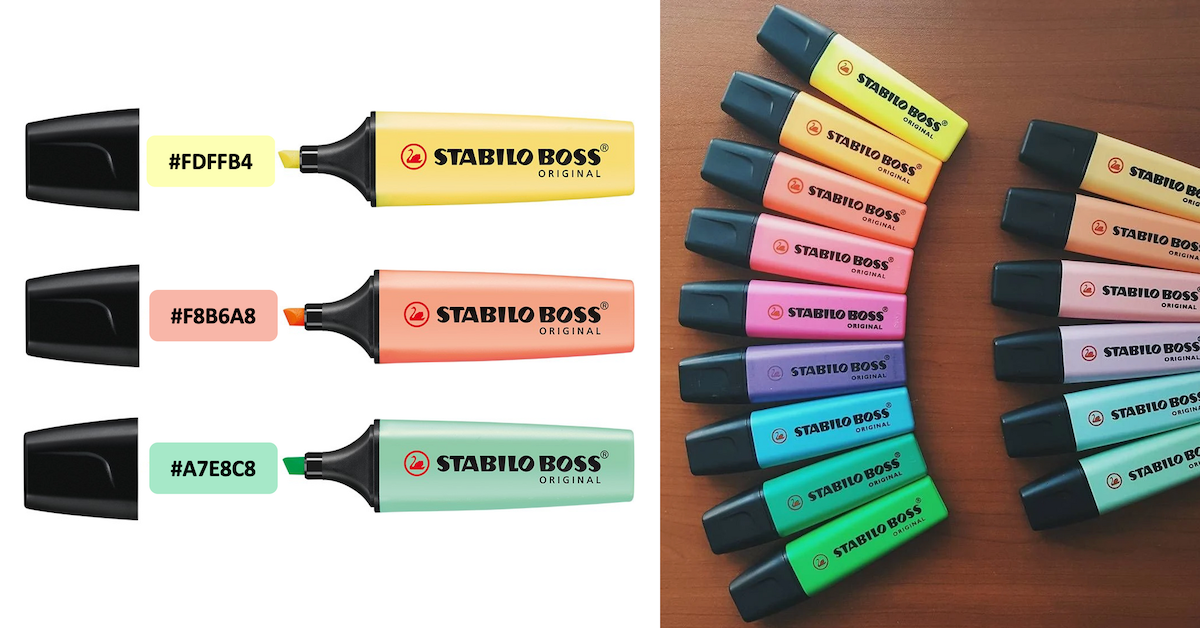
- Use Color Coding: Create a color code key to assign different colors to different types of information. It helps you visualize and remember information better.
- Review Regularly: Don’t wait until the last minute. Review your highlights and summaries regularly to reinforce what you’ve learned.
- Edit Your Notes: As you review, update your highlights and notes to reflect any new understanding.
- Use bullet points: Bullet points help you condense complex information into easier pieces. For example:
- Ecosystems are sustained by energy flow.
- Biodiversity increases resilience to environmental changes.
- Use your own words: Don’t copy and paste the content. Rephrase key ideas in your own words. This helps reinforce your understanding of the study material.
- Set Email Reminders: You can set up email reminders to revisit your highlights and notes. The Snooze-Reminder feature helps you set personalized email reminders to review important articles and notes. Choose when you want to revise or revisit any webpage or highlights.
Did You Know? You can download the Web Highlights app on your phone to review notes and highlights anytime, anywhere!
Conclusion
Web Highlights can create effective study guides and summaries. It allows highlighting key ideas, organizing information with tags, and converting notes into summaries or flashcards. It is an excellent personal study tool.
You can organize study guides by subjects or chapters and create visual elements like flashcards. This dynamic approach allows you to structure your study materials according to your learning goals and personal learning style.
Now that you know how to create study guide, start using Web Highlights today to simplify your study process, better manage your time, and create summaries and study guides that align with your learning objectives.
Try it now and take the first step in building a more organized and effective study routine.
Frequently Asked Questions
1. How to create a study guide?
To create a study guide, highlight key points from your material using Web Highlights, organize them with tags, and then combine the highlights into a summary. Add tags and relevant notes, and you will receive a digital study guide.
2. How can Web Highlights help create summaries?
Web Highlights lets you highlight important information, organize it with tags and notes, and then export it into summaries. This makes summarizing faster and more efficient.
3. How can I save time when making study guides with Web Highlights?
You can quickly organize and find relevant information using the tagging and search features, saving time when compiling your study guides.
4. Can the Web Highlights app create study guides?
Web Highlights app allows you to highlight, organize, and summarize information from web pages and PDFs, making it an excellent tool for creating study guides.
5. How do you turn highlights into summaries with Web Highlights?
Review your highlights, extract key points, and combine them into a concise summary. Then, you can export your summary to a tool like Notion or Obsidian for further use.
6. Can Web Highlights be used to create flashcards?
Web Highlights allows you to convert your highlights into flashcards for spaced repetition learning, making it an effective study tool.