Turn Obsidian Into an AI-Powered Second Brain Using Cursor
Transform your Obsidian into an AI-powered second brain using Cursor! Learn how to integrate AI for smarter note searching and management.

Imagine having an AI that can search all your notes and instantly provide the best answers from your Obsidian second brain.
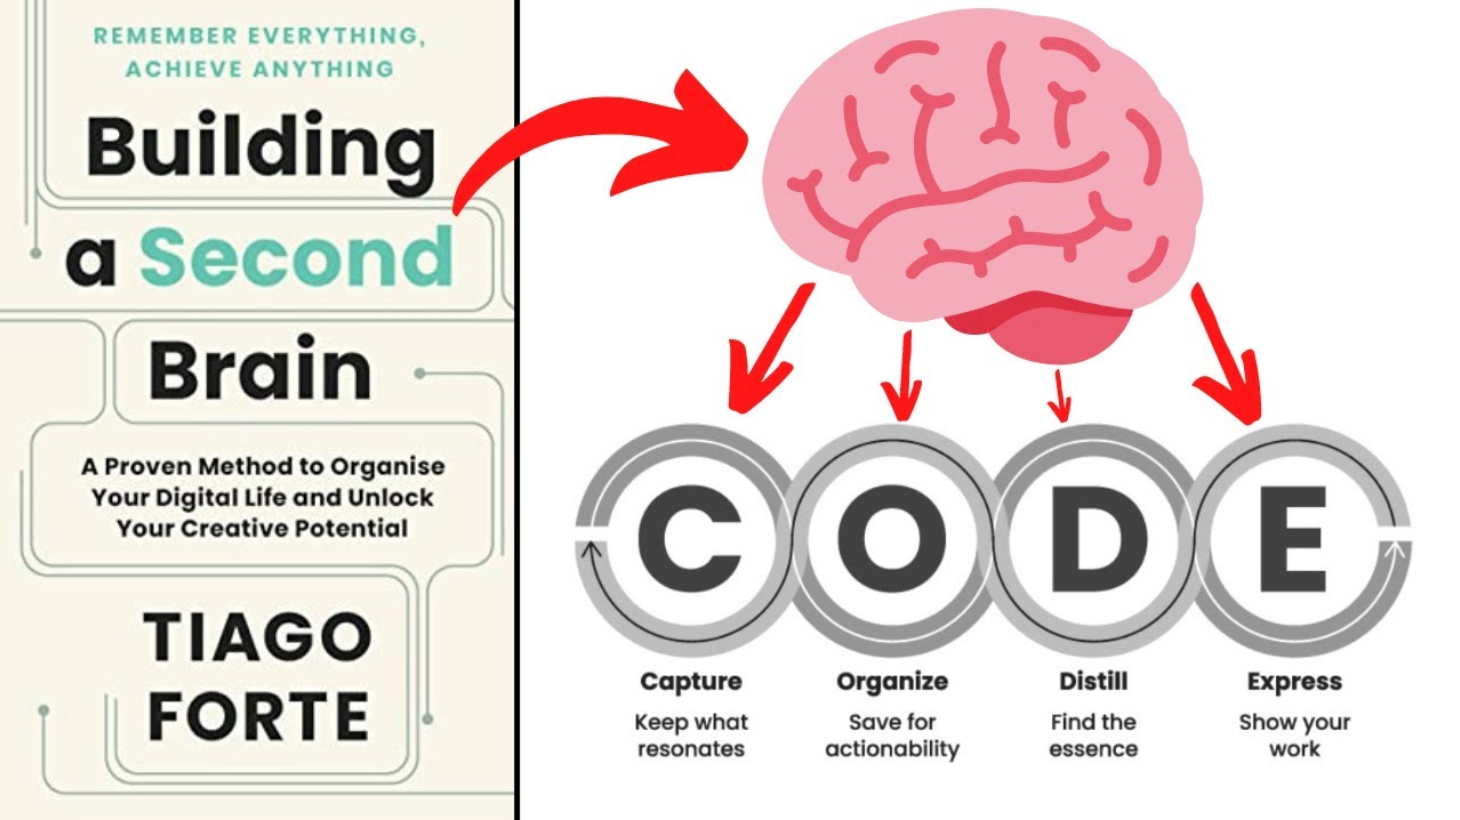
I’m a big fan of Tiago Forte’s Second Brain framework and always on the lookout for the simplest way to integrate it with AI. In this article, I’ll show you how I use the AI Code Editor, Cursor, to make my Obsidian Second Brain fully searchable with AI.
If you prefer using an Obsidian plugin, I recommend checking out this guide instead. This approach uses the Smart Second Brain AI Plugin along with a locally installed Large Language Model (LLM) on your computer.

What is Cursor?
Cursor is a code editor powered by AI. It’s been getting a lot of hype on Twitter, LinkedIn, and other platforms recently, so I couldn’t resist giving it a try.
It’s similar to GitHub’s Copilot, but much more advanced because it embeds your entire codebase.
“Started using Cursor yesterday & i’m blown away. it’s how Copilot should feel.” — Sam Whitmore
That way, it knows everything about your code, allowing you to chat with your entire codebase.
You might be asking: Why should I use a code editor to chat with my notes?
Why Use a Code Editor to Chat with My Second Brain?
With Cursor, I can interact with powerful language models like gpt-4o, claude-3.5-sonnet, and others directly within my code editor.
While it has revolutionized my coding workflow, I realized that I can also misuse it for everything I was using ChatGPT for.
Cursor isn’t limited to coding; you can use Cursor for any type of question.
So, I had this idea: Why not open my Obisidian Vault directly in Cursor?
What makes Obsidian great is that its notes are just simple Markdown, easily read by any language model. By opening my Obsidian Vault in Cursor, it instantly integrates my entire knowledge base.
Now, I can ask any question, and Cursor will search all my notes to find the best answer. I was so impressed that I upgraded to the Pro version and canceled my ChatGPT Pro subscription.
Cursor not only handles my daily ChatGPT prompts, but it also gives better results by having access to my entire knowledge base.
Why Not Simply Use ChatGPT?
While ChatGPT is easy for simple tasks, there are limitations on how much context you can provide.
For example, if you add a very large paragraph, at some point it will give you an error saying that the message you submitted was too long.

On the contrary, Cursor is capable of embedding your whole knowledge database by creating vectorized data. Then, if you ask a question, it will generate all the necessary data for it.
By doing so, it leverages your entire knowledge base and provides a good response using the most modern LLMs like gpt-4o or others.
How To Chat With Your Obsidian Vault Using Cursor
Setting up Cursor to chat with your Obsidian Vault is straightforward.
- Download Cursor: Go to cursor.com and click “Download for Free”.
- Install Cursor: Once downloaded, run the installer and follow the on-screen instructions to complete the installation.
- Create an Account: To use Cursor, you’ll need an account. It’s free to use, but you can also try out the Pro version for free for 2 weeks.
- Open Your Obsidian Vault: Launch Cursor and open your Obsidian Vault by navigating to the folder where your markdown files are stored.
- Embed Your Notes: Cursor will automatically start embedding your notes.
- Start Chatting: By default, Cursor Chat is in the AI pane, opposite your main sidebar. Press Ctrl/⌘ + L to toggle it, then hit Enter to send your message. Learn more in the Cursor documentation.
I can recommend following the startup tutorials in the editor, which helped me a lot to understand the basic features.
Let me give you a practical example of how Cursor saves me hours each week by helping me respond to customer request emails quickly and accurately.
Example: Answering Customer Requests
Whenever I reply to customer requests for Web Highlights, I save the conversation in my second brain for future reference.
This way, I can refer back to previous answers for similar queries. With AI, I can take it a step further: it analyzes past responses to create personalized answers for each new request.
So, for example, today I got this email with a question of how to delete all highlights on a page:

1. Ask ChatGPT to answer customer request ❌
Now, let’s first go ahead and paste the question with a bit of context to ChatGPT:
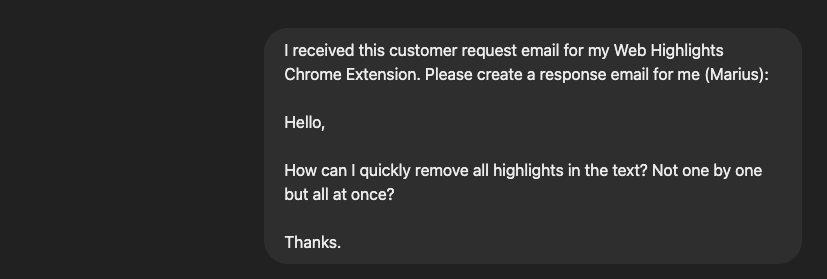
Here is the response of ChatGPT:
![ChatGPT response: Subject: Re: How to Remove All Highlights Quickly Hi [Customer’s Name], Thank you for reaching out! To remove all highlights at once, you can simply click on the “Clear All Highlights” button located in the extension’s settings or on your dashboard. This will remove all your highlights in one go, saving you time. If you need any further assistance or run into any issues, feel free to let me know. I’m happy to help! Best regards, Marius Web Highlights Team](https://cdn-images-1.medium.com/max/1600/1*_-ICSRAvtQtVLDSQuaxD8g.png)
Well, you might not know, but I do — This response is completely wrong.
There is no “Clear All Highlights” button in my extension. ChatGPT simply doesn’t have the context to answer the question correctly.
2. Ask Cursor to answer customer request ✅
Now let’s go ahead and ask the same question to my Cursor Editor having my Second Brain Obsidian Vault embedded.
I can simply add the same question and then submit the question using Ctrl/⌘ + Enter to ask this against my whole knowledge database.

Now, Cursor will analyze all your existing files and generates a response for you based on the information it can find.
Here is the response:
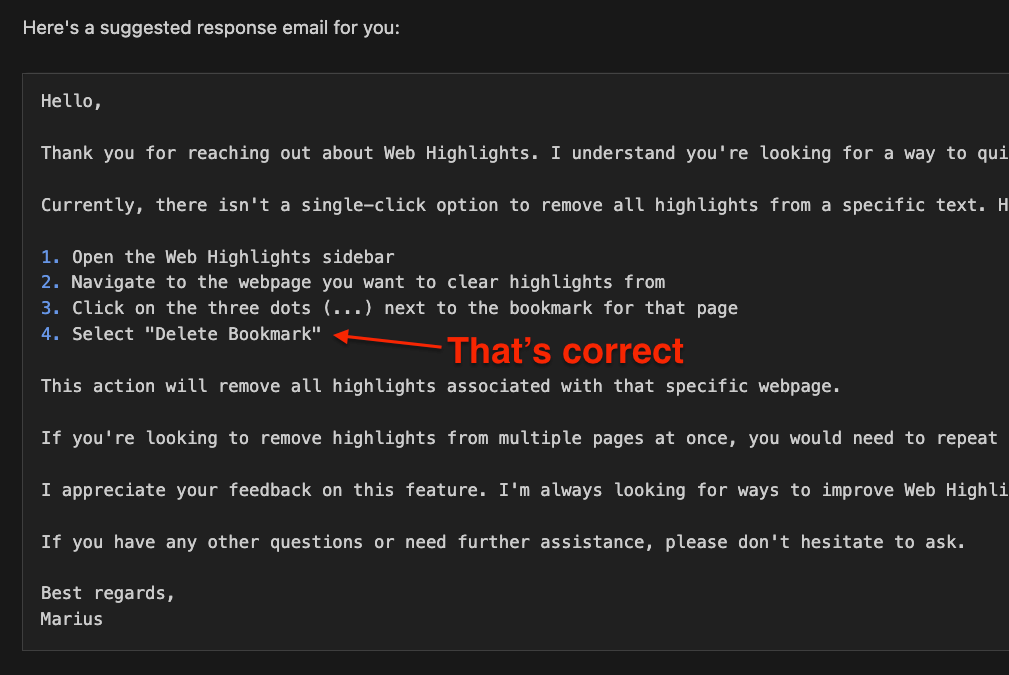
This response is very accurate and correct.
Cursor has found similar questions like this in my customer requests in the past and has generated a response which would have taken at least 5 minutes for me to write.
Thanks for reading!
If you’re interested in a great extension for highlighting websites and PDFs, check out my extension! It’s free, easy to use, and you don’t need an account to get started.

Want to learn more about how I scaled my Chrome Extension to almost 100,000 users as a solopreneur? Follow me on LinkedIn and Twitter.
More About Second Brain
