Improve Your ChatGPT with Web Highlights Highlighting Power
Improve your ChatGPT productivity with Web Highlights Chrome Extension. Highlight and tag texts to organize your research and ChatGPT conversations.


ChatGPT is an incredibly powerful tool. Using it in your daily life will soon become the new normal. But how do you keep track of important information within a conversation?
In this article, we will explore how the Chrome extension Web Highlights can improve your ChatGPT experience. While ChatGPT already offers an efficient way to organize and structure your searches in various chats, it can still be challenging to keep track of long conversations. That’s where Web Highlights comes in, providing powerful tagging and highlighting features that help you quickly find and reference important information.
Web Highlights + ChatGPT = Productivity Workspace
Of course, I also used ChatGPT to help me write this article. That doesn’t mean I let it write the article. But to get ideas for titles or just food for thought for an introduction, ChatGPT is just perfect. This workflow has almost become a daily routine for me.
To keep track of all the conversations, I use Web Highlights to highlight exciting ideas within the chat and provide tags for them. With the Web Highlights sidebar on the left, my chat window is transformed into a visually streamlined and organized workspace, as seen in the following example:
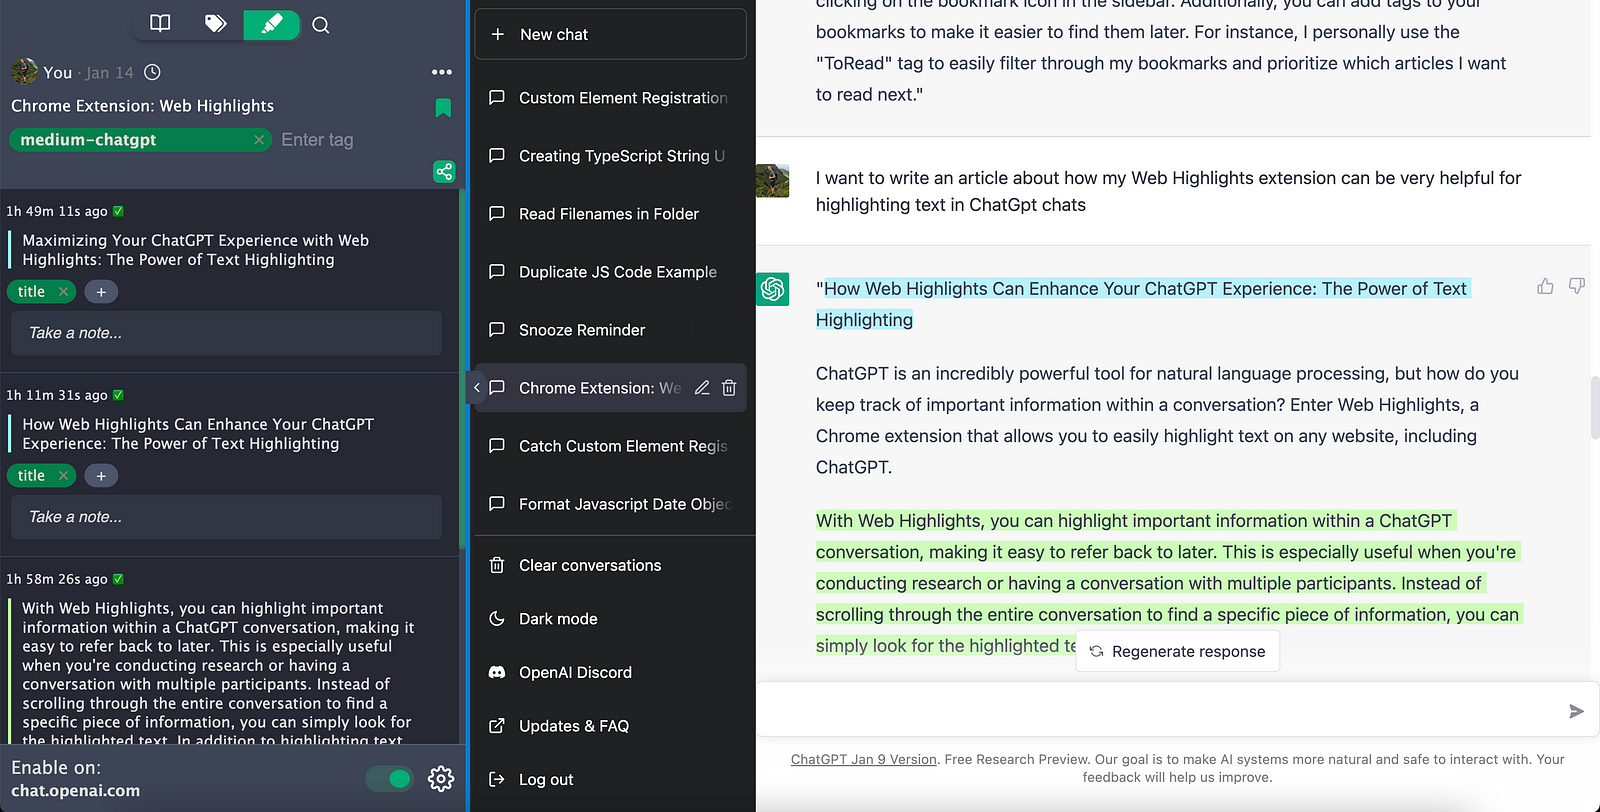
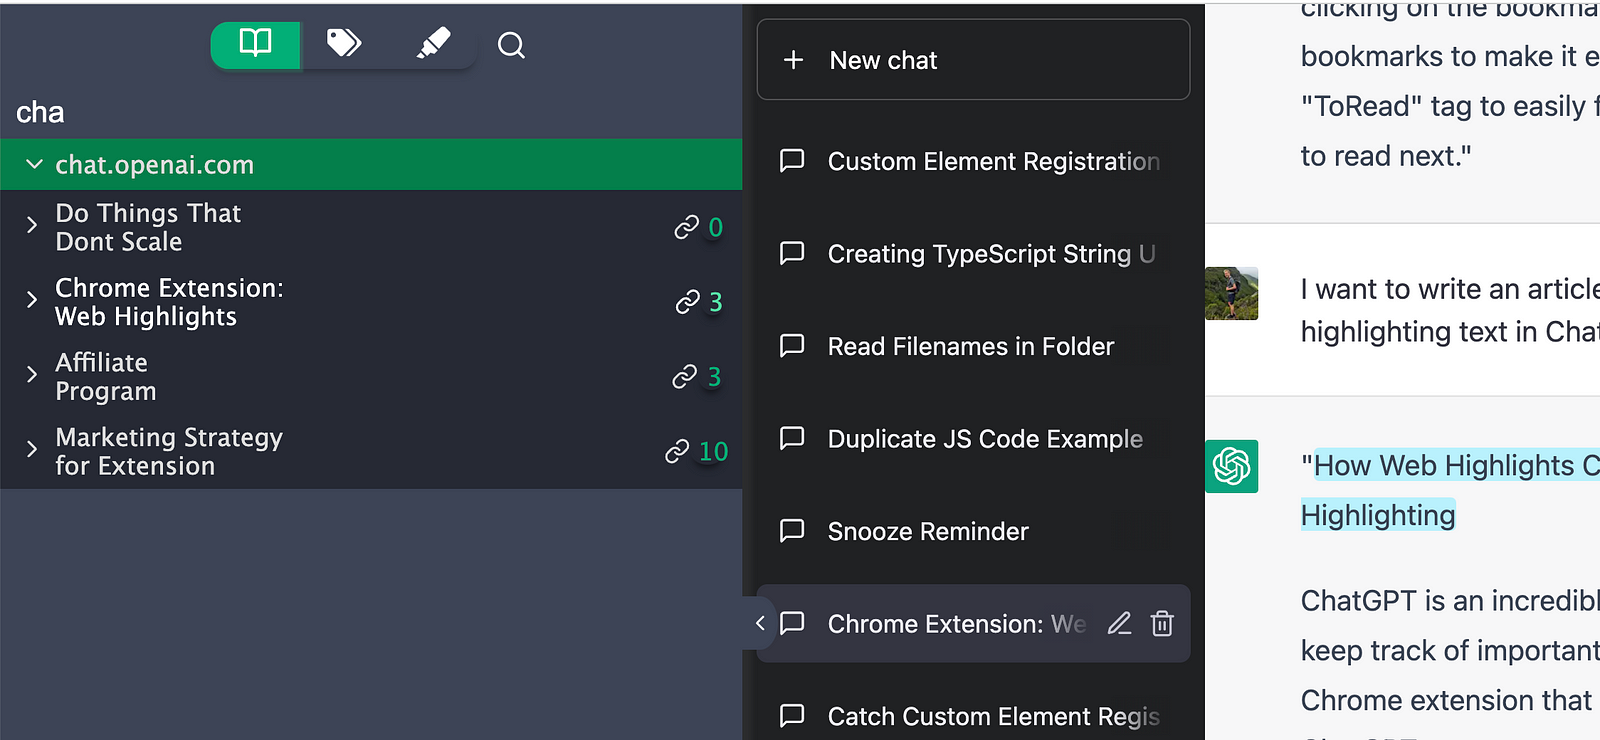
In addition to highlighting text, Web Highlights also allows you to save bookmarks and add tags to them. You can save the entire ChatGPT conversation as a bookmark and add tags. You can also easily filter for all highlighted pages on specific URL origins:
How to Refind Your Highlights
Filtering your highlights by URL makes specifically sense on ChatGPT. You can directly see all highlighted pages sorted by the chat group that was created by ChaGPT. Unfortunately, not always all highlights can be recreated on ChatGPT. Technically, that's hardly to be done because ChatGPT often changes its structure so that highlights can not be recreated. Another reason is that the URL on the initial page (chat.openai.com) has no unique identifier.
To ensure optimal usage of ChatGPT, it is important to utilize an existing chat group, which consists of your chats displayed in the left sidebar. To do this, you can start by writing your initial message and then refreshing the page. Once refreshed, the URL should contain an ID (e.g., chat.openai.com/c/c73e9c10-4e43-4f8c-a987-6a85c4e66d71) specific to your chat. This ID enables Web Highlights to locate and potentially recreate your highlights. However, it's important to be aware that the recreation process may not always be successful due to various reasons:
- The highlight is not visible on the first page load. For example, when you re-generate new responses you first have to click the arrow right to see all available answers
- ChatGPT may have undergone a redesign and the layout or structure of the website may have changed, making it difficult to locate the highlight.
- The website may have implemented technical changes that prevent the Web Highlights extension from being able to access and recreate the highlight.
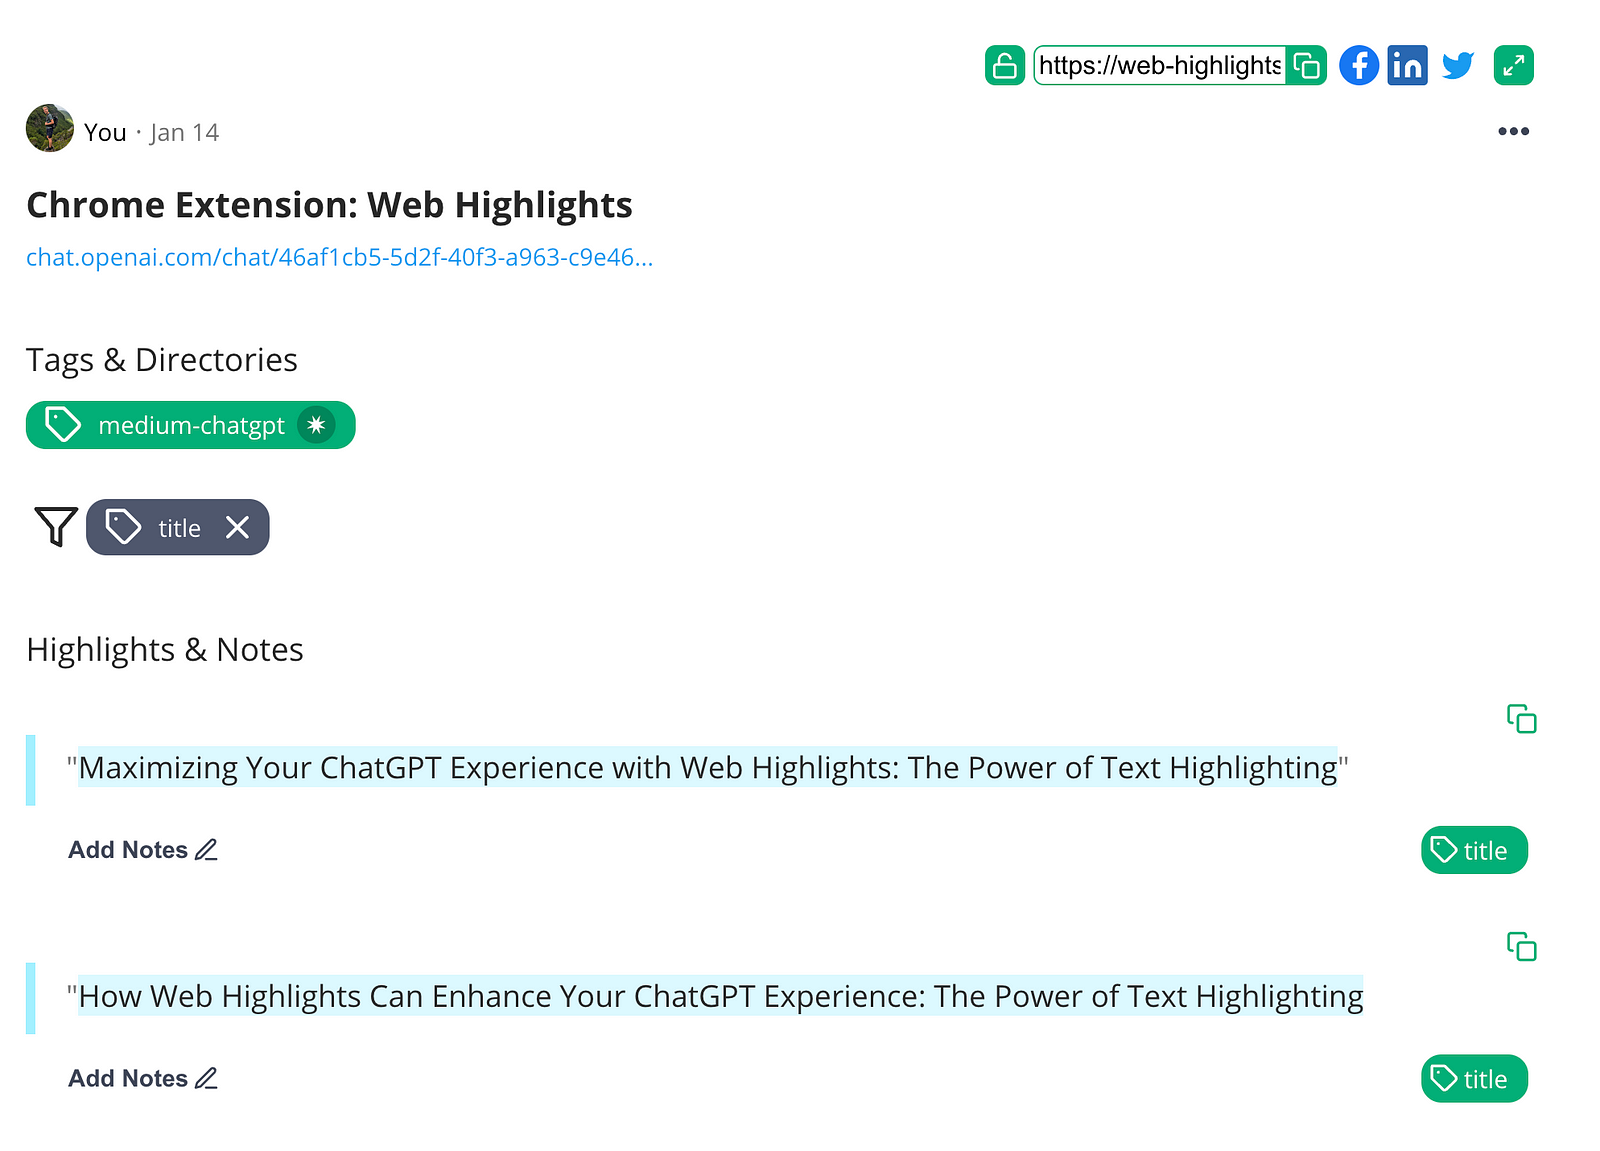
Also note, that you can always see all your highlights in the web app on https://web-highlights.com as long as you're signed up to Web Highlights. Here you can also filter for the URL to see all of your highlights.
Structuring Your Highlights
In the next example, I’ve bookmarked the current chat to save the current ChatGPT conversation under the label “medium-chatgpt”, making it easy to locate and access it within the web app on web-highlights.com later on.
Visiting the web app will give you an overview of all highlights where you can easily filter for tags:
But that’s not all!
Export your Chats to Markdown and HTML
Web Highlights also allows you to export your highlighted text, bookmarks, and tags to HTML, Markdown, and PDF files. This means you can easily share your research or notes with others or even print them out for offline reference.
For example, here is how my exported ChatGPT highlights look when exported to Notion:
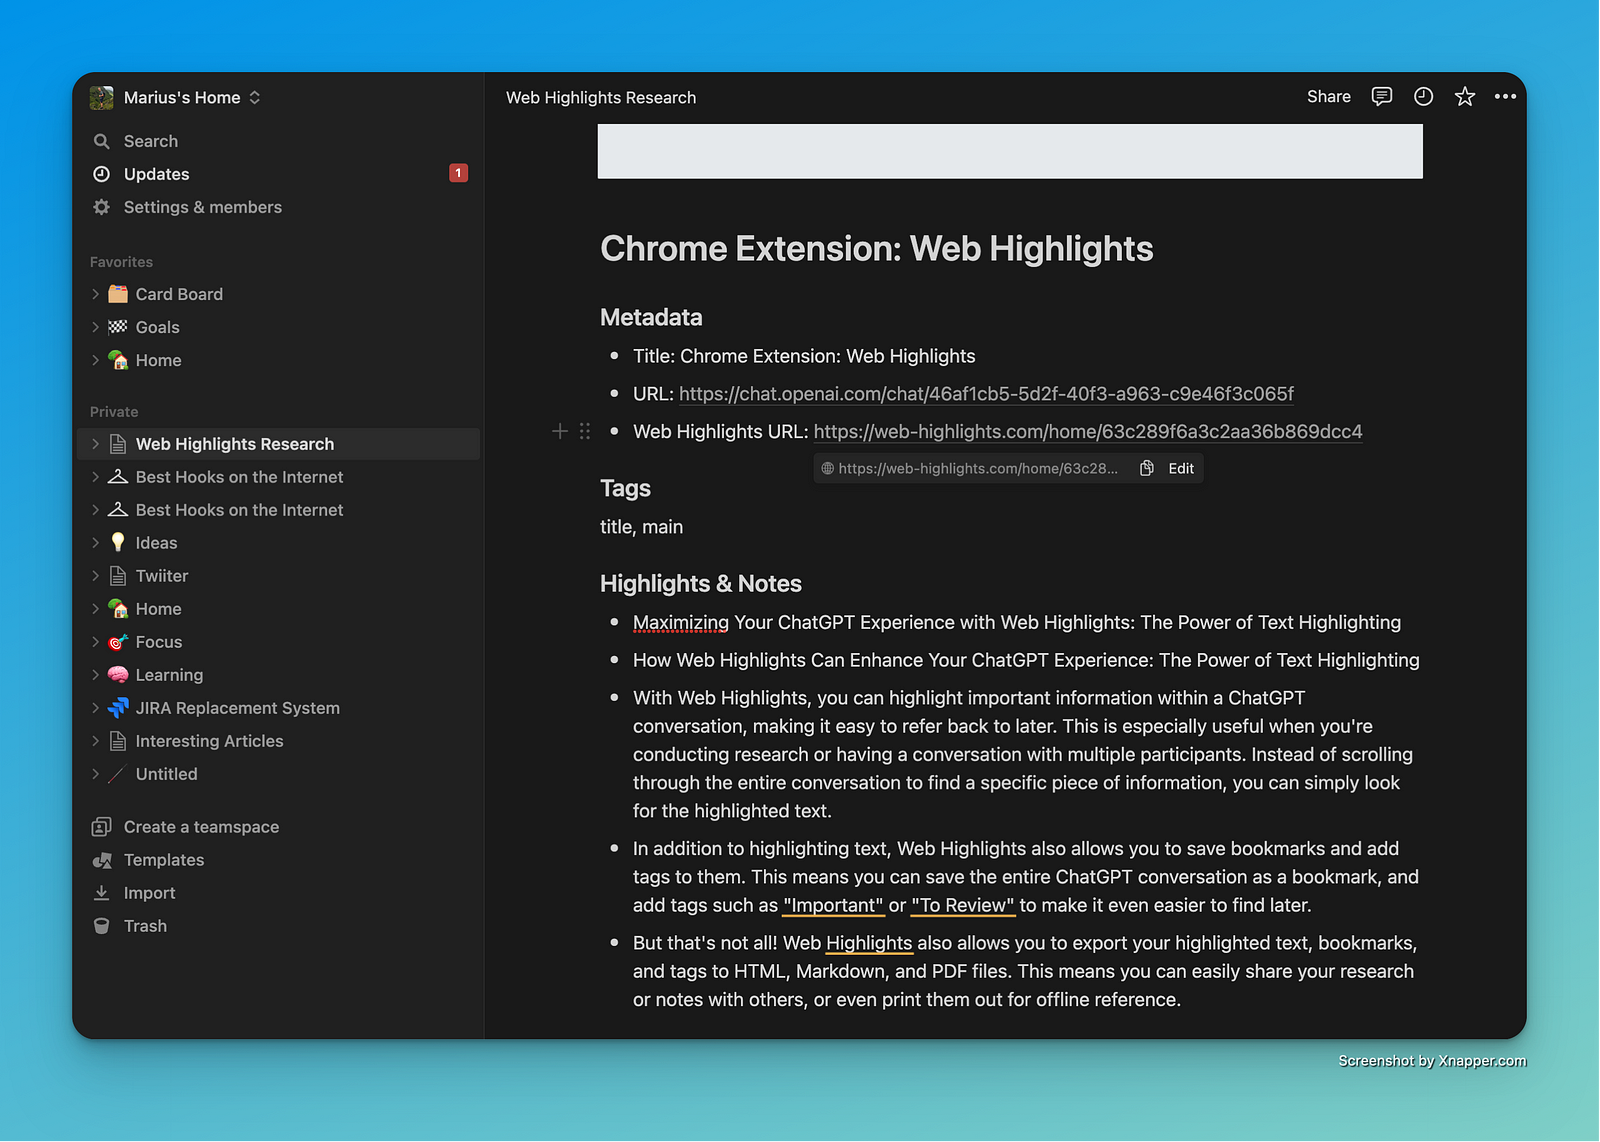
Of course, you can paste the exported markdown to any other tool supporting the Markdown language.
Share Your ChatGPT Highlights with Friends
Finally, you can also share your ChatGPT conversation highlights with friends. Easily share your highlights with others by clicking the share button.
You can generate a shareable link or utilize the built-in buttons to directly share on social media platforms such as Facebook, LinkedIn, and Twitter.
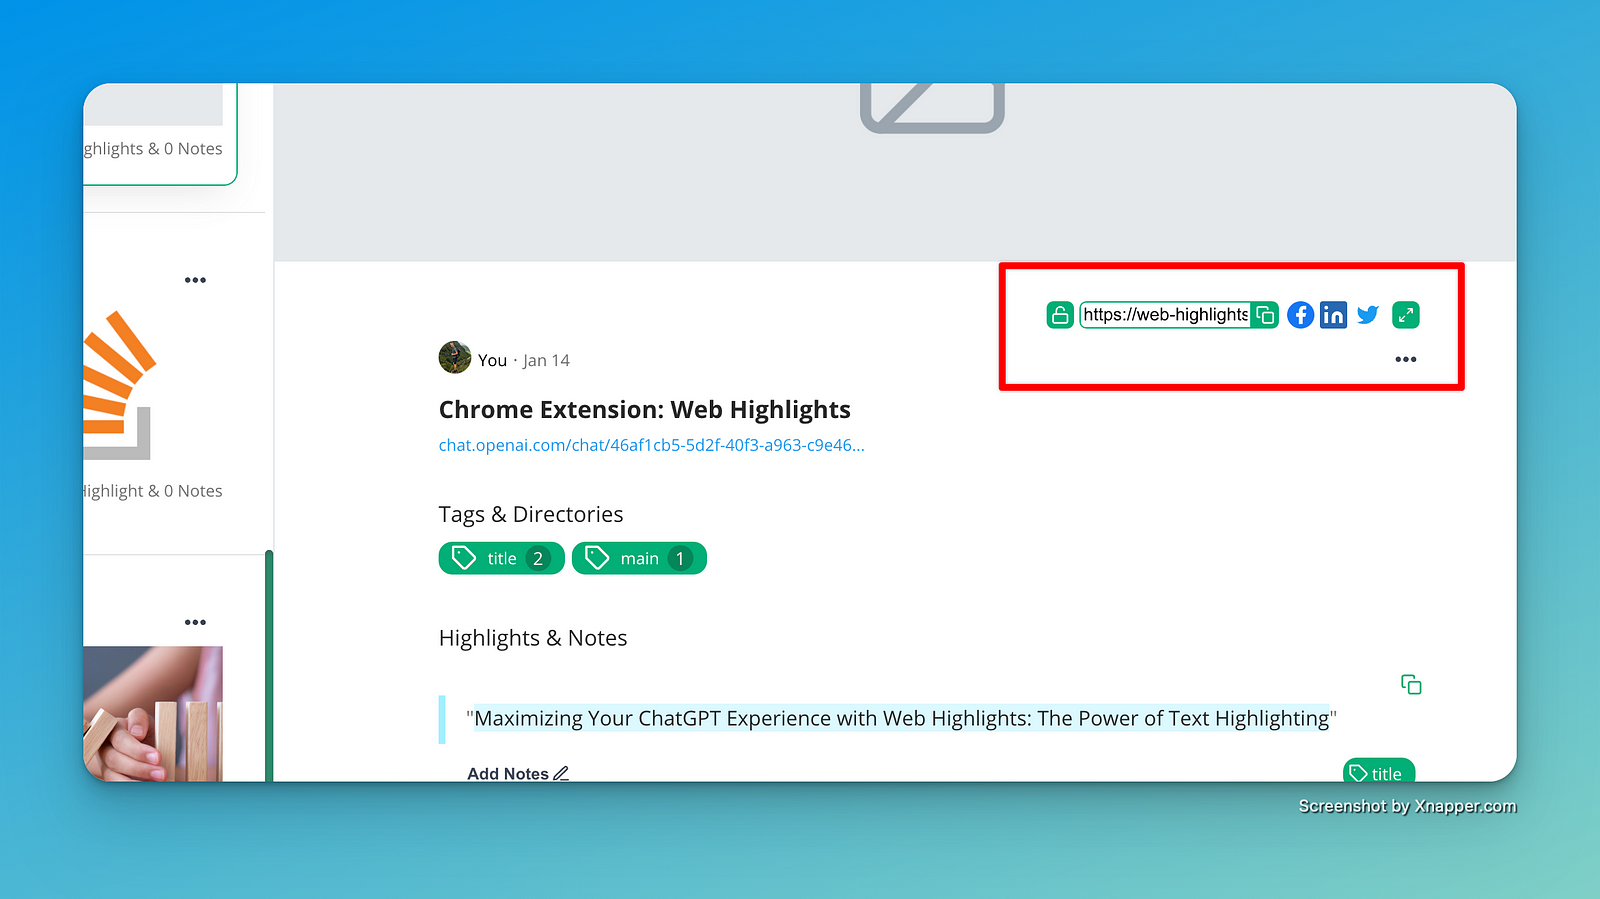
Web Highlight’s sharing option allows you to share your ChatGPT conversations easily. This is a bit more difficult otherwise because you have to be logged in to your account to see them.
Final Thoughts
Overall, Web Highlights is an extraordinary tool for enhancing your ChatGPT experience. With its ability to highlight text, save bookmarks, and export information, it makes it easy to keep track of important information within different conversations and revisit it later on.
Get the Web Highlights Chrome extension here:

I hope you enjoyed reading this article. I am always happy to answer questions and am open to criticism. Feel free to contact me at any time 😊