# Building Your Own New Tab Chrome Extension
> How to build a beautiful New Tab Chrome Extension with plain HTML, CSS, JavaScript, and Web Components
- Author: Marius Bongarts
- Published: 2022-10-23
- Updated: 2023-08-09
- Tags: Chrome Extension, Tutorial, Web Development, Web Components
- Reading time: 5 min
- URL: https://web-highlights.com/blog/building-your-own-new-tab-chrome-extension/
---
There are many great browser extensions to configure your New-Tab browser page. Many of them are great, as they allow us to have a customizable homepage in our new browser window.
In case you don’t know what I’m talking about — Browser extensions like [Infinity New Tab](https://chrome.google.com/webstore/detail/infinity-new-tab/dbfmnekepjoapopniengjbcpnbljalfg) , [New Tab Studio](https://chrome.google.com/webstore/detail/new-tab-studio-widgets-in/epngggilgnflanfabeldfpbgponcgpgl/related) , or [daily.dev](https://chrome.google.com/webstore/detail/dailydev-the-homepage-dev/jlmpjdjjbgclbocgajdjefcidcncaied) allow us to make an empty browser tab look better.
So, instead of this:
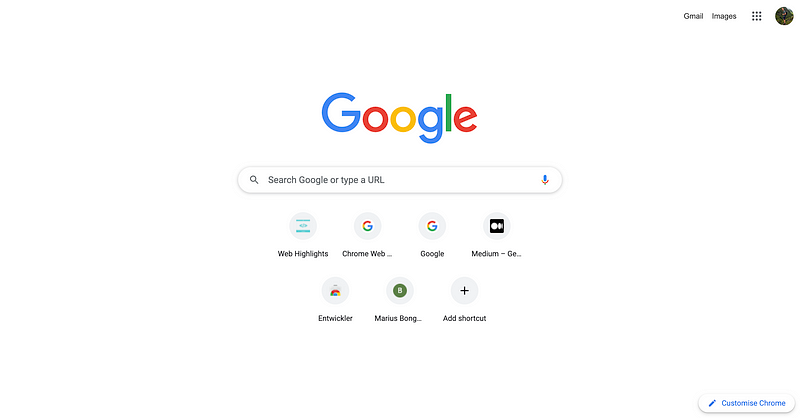
*Default Chrome New Tab*
We can get something like this:
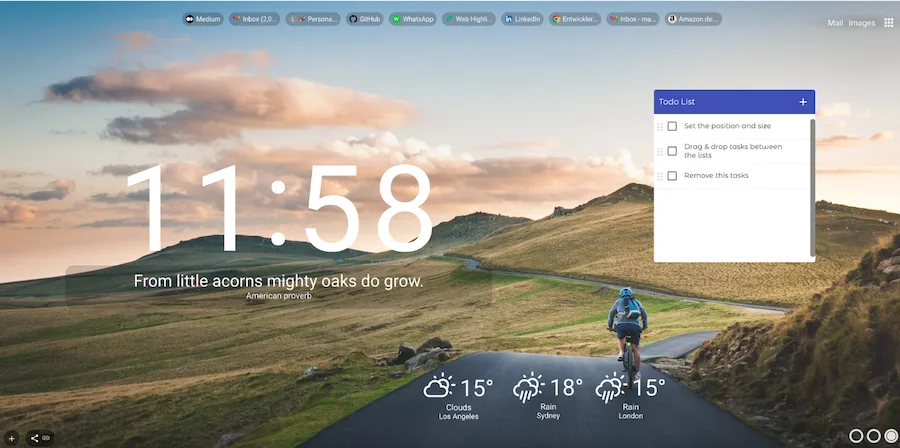
*New Tab Studio : widgets in a new tab*
Or, this:
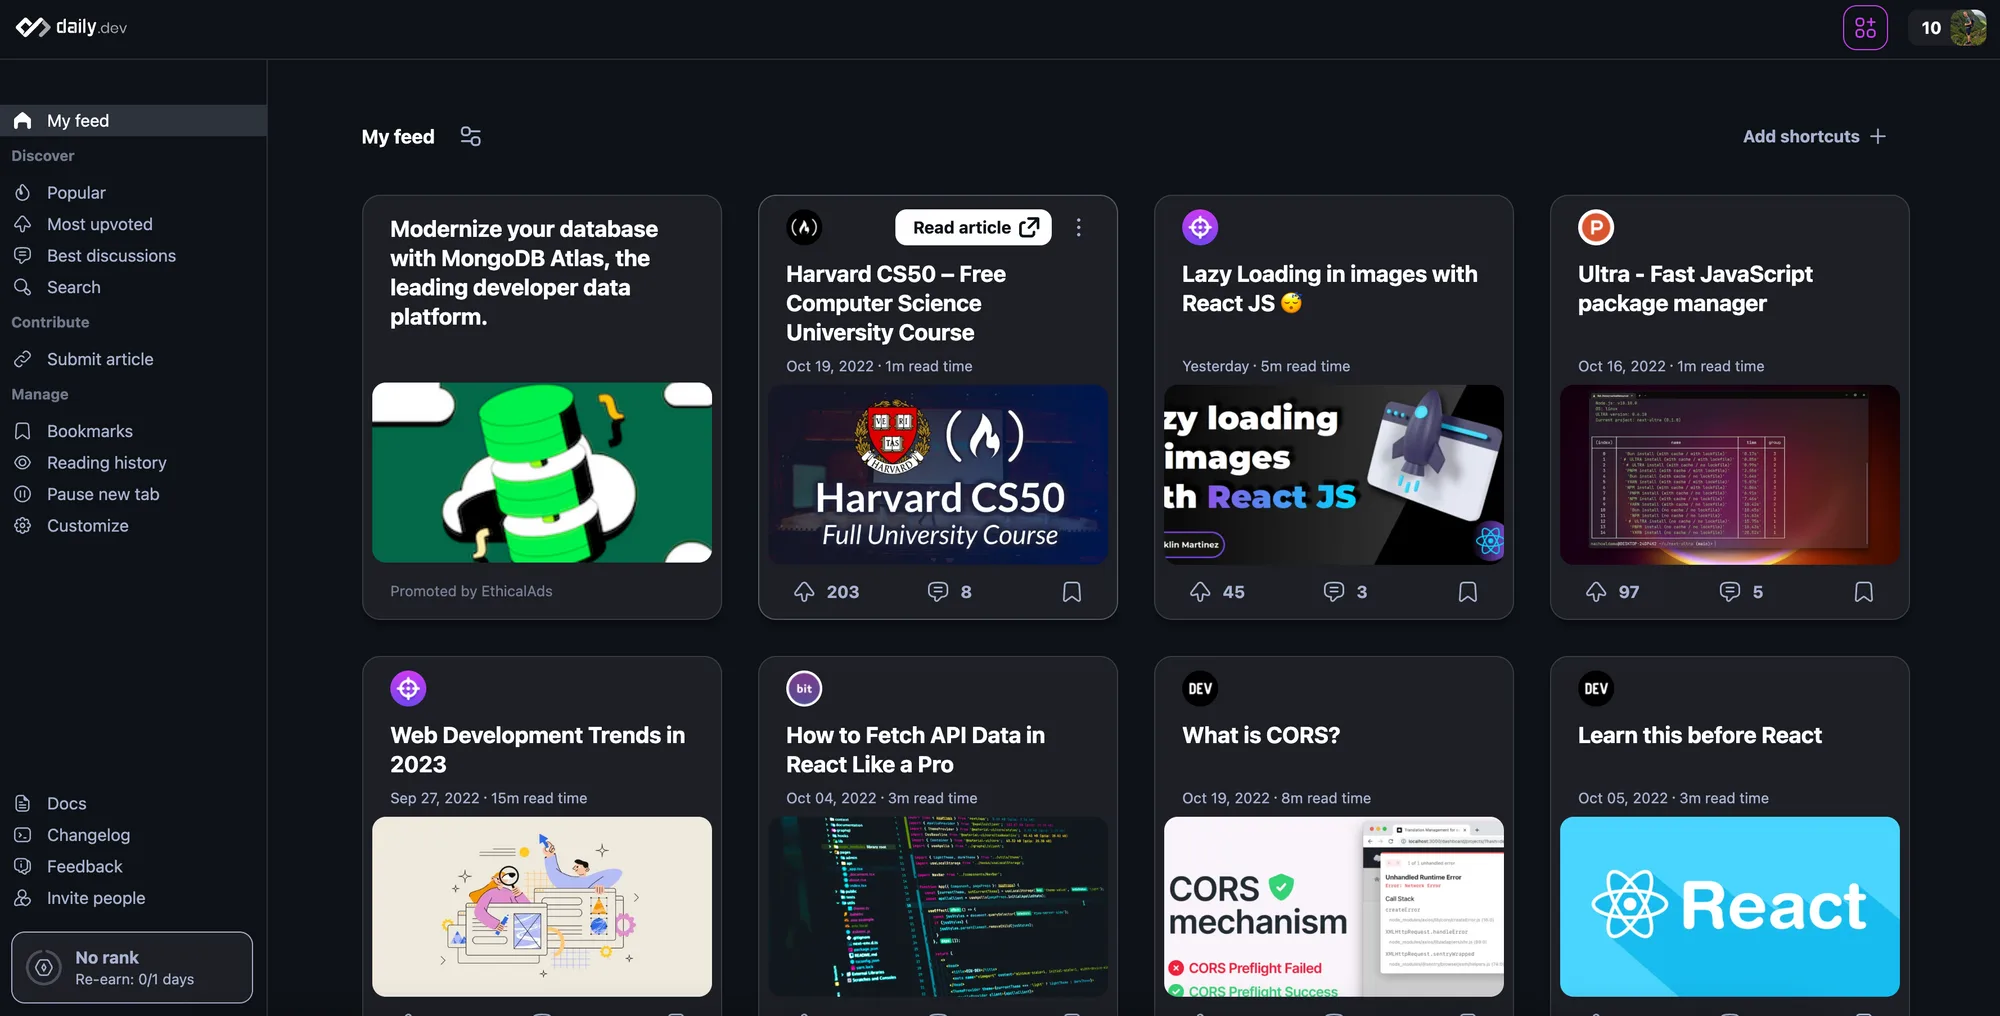
*daily.dev | The Homepage Developers Deserve*
Usually, the tab is customizable and lets you design it the way you like it the most.
---
Still, all of these extensions eventually reach their limits. Yet the beauty of being a developer is that you can build your own stuff. Therefore, I will show you how to build your own fully customizable New-Tab Chrome Extension using plain HTML and JavaScript.
Here is what it will look like:
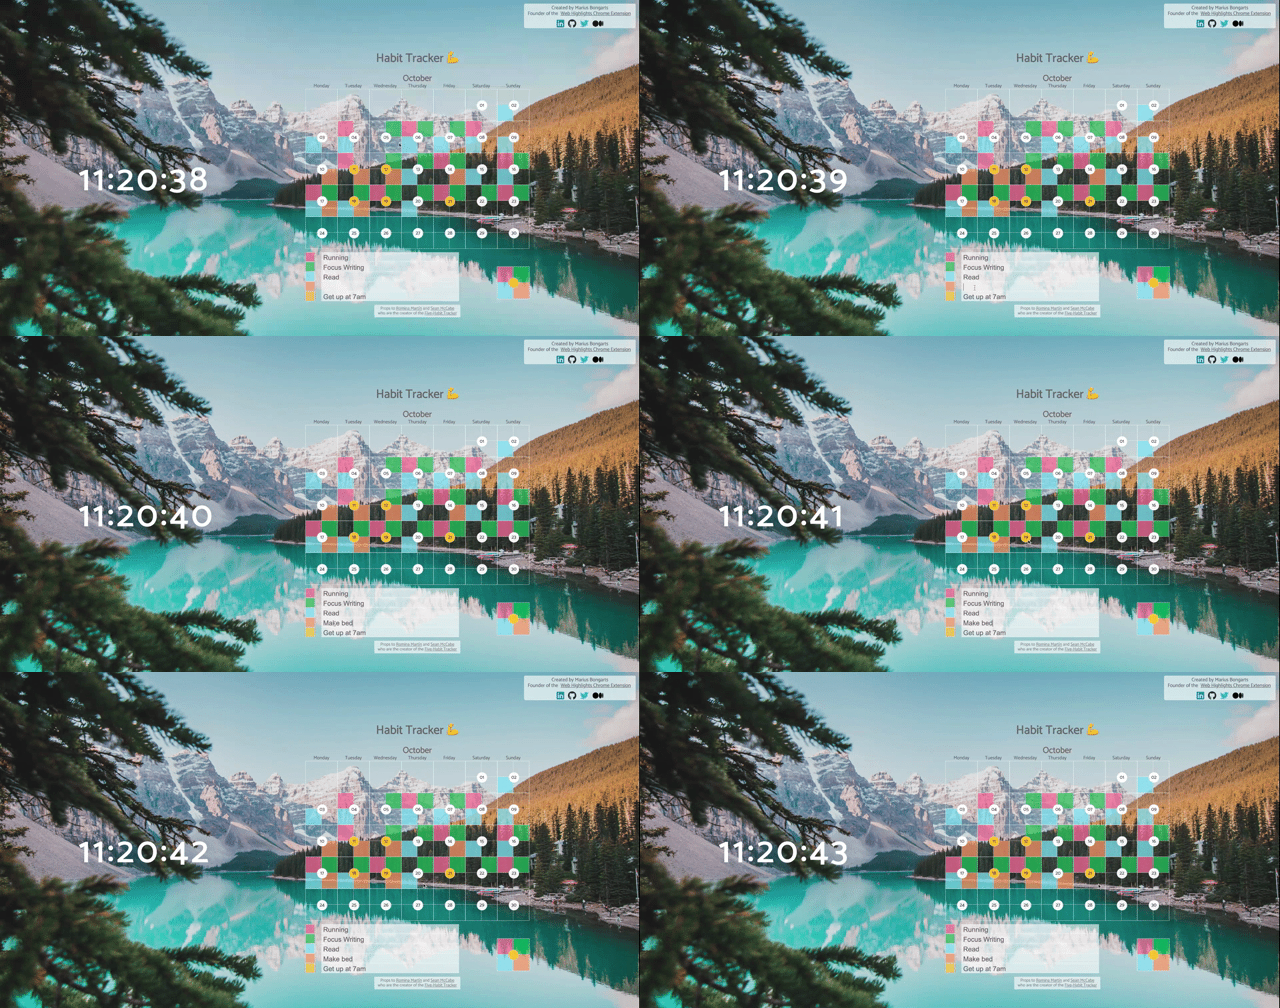
*Our personal New Tab Dashboard*
You can find a [demo of the page here](https://mariusbongarts.github.io/new-tab-chrome-extension/) . And here is the [GitHub repository](https://github.com/MariusBongarts/new-tab-chrome-extension/tree/main) .
### Get Started — Chrome Extension Setup
Let’s dive right into the setup of our Chrome extension. First of all, we need to create a `manifest.json` file. The manifest is the entry point of our extension, which defines metadata, such as name and version, as well as additional functionalities.
#### Create manifest.json
Let’s create a `manifest.json` and add some metadata:
```json
{
"name": "New Tab - React",
"version": "1.0.0",
"manifest_version": 3
}
```
[View this code on GitHub Gist](https://gist.github.com/MariusBongarts/a86a749214b394ffada6c46b858372db)
The first three values `name` , `version` and `manifest_version` are sufficient to create our first chrome extension.
#### Install the extension
Open your Chrome browser and navigate to **chrome://extensions** .
Enable Developer Mode by clicking the toggle switch next to **Developer mode** . Click the **Load unpacked** button and select the directory with our `manifest.json` .
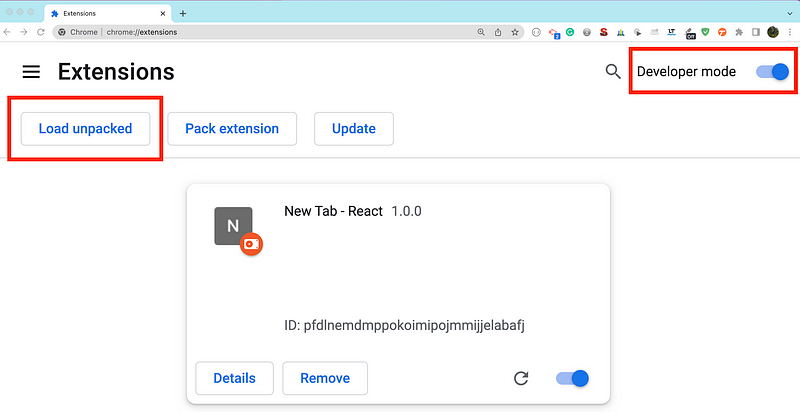
*Load your Chrome Extension*
Congratulations! You’ve just created a Chrome Extension!
#### Setup New-Tab page
Great, we created our own Chrome Extension. Still, currently, it doesn’t do anything. Let’s make our extension show a simple HTML file whenever the user opens a new tab.
We can do that by adding a `chrome_url_overrides` property to our `manifest.json` . This is where you determine which html file will be used whenever a user opens a new tab.
Therefore let’s create an example `index.html` file:
```html
Hello World!
Hello from New Tab!
```
[View this code on GitHub Gist](https://gist.github.com/MariusBongarts/071985c418ad45a3e2e7348bed684895)
And pass it to our `manifest.json` :
```json
{
"name": "New Tab - React",
"version": "1.0.0",
"manifest_version": 3,
"chrome_url_overrides": {
"newtab": "index.html"
},
"permissions": ["storage"]
}
```
[View this code on GitHub Gist](https://gist.github.com/MariusBongarts/95ec1681489621eb913d155e69159a5b)
Notice that we also set the `storage` permission to be able to access the storage from our page and to store things locally.
Now, let’s reload our extension:
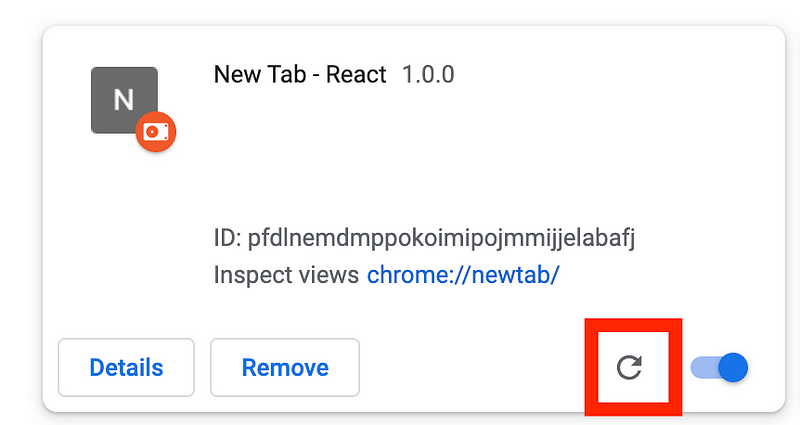
*Reload Chrome Extension*
Finally, when opening a new tab in chrome, we can see our very own New-Tab page:
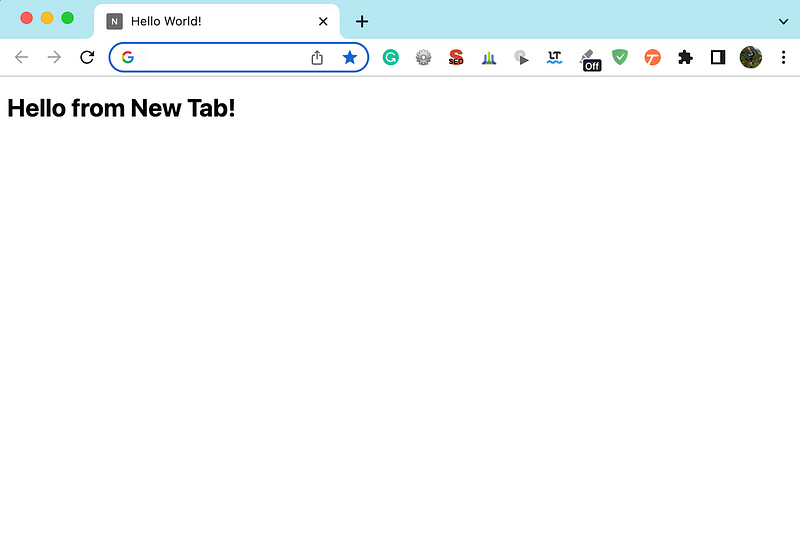
*Our own New-Tab page*
### Customize our Page
Once we have the setup done, we can let our ideas run wild. You can design your website the way you want.
Our New Tab extension contains two things:
- A **clock** that updates every second
- A **habit tracker** that lets you measure five habits of your choice with customizable colors
Both components are built with plain HTML, CSS, and JavaScript. Still, I wrapped both into their own Web Components to encapsulate them better. This will also make our entry `[index.html](https://github.com/MariusBongarts/new-tab-chrome-extension/blob/main/index.html)` look much cleaner and more structured:
```html
```
[View this code on GitHub Gist](https://gist.github.com/MariusBongarts/8bbac2dfa057cf4a4d972fa0eb1399e9)
We registered the custom elements `` and `` by loading its scripts from the _/src/\*_ folder. Both contain a shadow root with our actual content. If you are unfamiliar with Web Components, I highly recommend reading one of my Web Component beginner series first:
- [The Complete Web Component Guide: Custom Elements](https://javascript.plainenglish.io/will-web-components-replace-frontend-frameworks-535891d779ba) (Part 1)
- [Build Your Own Blog Portfolio with Web Components (Part 1)](https://medium.com/@mariusbongarts11/showcase-your-medium-articles-with-web-components-part-1-basics-d2c6618e9482)
#### Clock component
Let’s have a look at our clock Web Components. This component is straightforward and looks like this:
```js
class MyClock extends HTMLElement {
static styles = `
`;
get template() {
return `
${MyClock.styles}
`;
}
constructor() {
super();
this.attachShadow({ mode: "open" });
}
connectedCallback() {
this.shadowRoot.innerHTML = this.template;
this.init();
}
init() {
const setTime = () => {
const localeTimeString = new Date().toLocaleTimeString();
this.shadowRoot.getElementById("clock").innerHTML = localeTimeString;
};
setTime();
setInterval(() => {
setTime();
}, 1000);
}
}
customElements.define("my-clock", MyClock);
```
[View this code on GitHub Gist](https://gist.github.com/MariusBongarts/988c31ea7a2d92510264ce9acfb10725)
In the constructor, we first call our super-class `HTMLElement` and then attach an open Shadow-DOM to our component to make our styles encapsulates from other parts of the website.
Then, in our `connectedCallback()` lifecycle method, we add some HTML to our `shadowRoot` . Here it is only one `div` element and some styles. Then, we set an interval to update its content to be a `localeTimeString` every second.
#### Habit-Tracker component
For this article, I did not want to spend too much time developing my own fancy tools to show in the New Tab. So, I did what I often do — I went to CodePen to search for awesome stuff.
And I was not disappointed when I found this awesome Five-Habit tracker by [**Romina Martín**](https://twitter.com/rominamartinlib) :
[Embedded content](https://codepen.io/RominaMartin/embed/preview/Pdpbjo?default-tabs=js%2Cresult&height=300&host=https%3A%2F%2Fcodepen.io&slug-hash=Pdpbjo)
I love it. So, I copied it and wrapped everything inside its own Web Component. You can find the full source code of the custom element’s code [here](https://github.com/MariusBongarts/new-tab-chrome-extension/blob/main/src/five-habit-tracker/main.js) .
I made some design adjustments to make it look better in front of a background image. Also, I needed to make it work inside a shadow DOM, but that’s it.
The habit-tracker works out of the box and saves its state to the local storage (That’s why we needed the storage permission inside our `manifest.json` file). Thank you for such a great tool Romina Martín!
### Background Image
For a new-tab extension one thing must not be missing — an amazing background image. So, I found [this photo from Jaime Reimer](https://www.pexels.com/de-de/foto/schone-aussicht-auf-den-moranensee-2662116/) on Pexels.
To make it look good and to cover our whole page, I added some CSS to our `index.css` file:
```css
html {
background: url("./images/pexels-jaime-reimer-2662116.jpeg") no-repeat center
center fixed;
background-size: cover;
background-blend-mode: multiply;
}
body {
font-family: Catamaran;
background: rgba(37, 33, 33, 0.143);
min-height: 100vh;
min-width: 100vw;
// ...
}
```
[View this code on GitHub Gist](https://gist.github.com/MariusBongarts/a06ed27824981be4f6da18cbd3aac596)
Noticeable is, that I also added some dark shadow layer to the `body` to provide better contrast between the background image and text on the page.
### Final Thoughts
Creating your own Chrome Extension is much easier than many may think. Creating a page for the New-Tab Window in Chrome is just as easy. Once the very simple setup is done, we can build a normal website with HMTL, CSS, and Javascript.
Being able to design your very own New-Tab Chrome page can be a lot of fun as you can let your creativity run wild.