# Create a Custom Chrome History Extension with React - Part 1
> Learn how to set up and create a custom Chrome history extension using React with our step-by-step guide. Implement the Chrome History API easily.
- Author: Marius Bongarts
- Published: 2023-02-13
- Updated: 2024-07-23
- Tags: Chrome Extension, React, Software
- Reading time: 5 min
- URL: https://web-highlights.com/blog/build-your-own-custom-chrome-history-extension-with-react-part-1-set-up/
---
In this series of articles, I will walk you through creating your own browser history Chrome extension using React. We will use the **Chrome History API** to read our browser history and display it in our personalized React dashboard.
Here is what we are going to build:
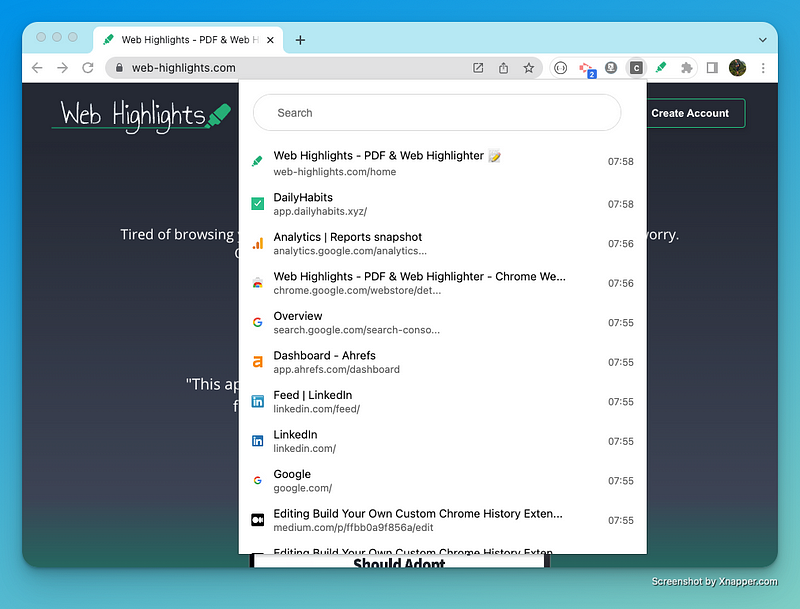
*Our own Chrome History - What we will build*
Without further ado, let’s get started.
### Extension setup
Create an ‘ _/extension’_ folder anywhere on your machine to get started. We will later copy & paste it into our React app. Then create a `manifest.json` file inside our **_extension_** folder:
```json
{
"name": "Chrome History Extension",
"version": "1.0.0",
"manifest_version": 3
}
```
[View this code on GitHub Gist](https://gist.github.com/MariusBongarts/19c5a920705cd19a60dff01005663dec)
The manifest is our entry point, which defines our extension's metadata. For now, we only provide the `name` , `version` , and `manifest_version` , which is enough to install the extension in our browser.
Open your Chrome browser and navigate to **chrome://extensions** .
Enable Developer Mode by clicking the toggle switch next to **Developer mode** . Click the “ **Load unpacked”** button and select the **_extension_** directory of our repo containing our `manifest.json` .
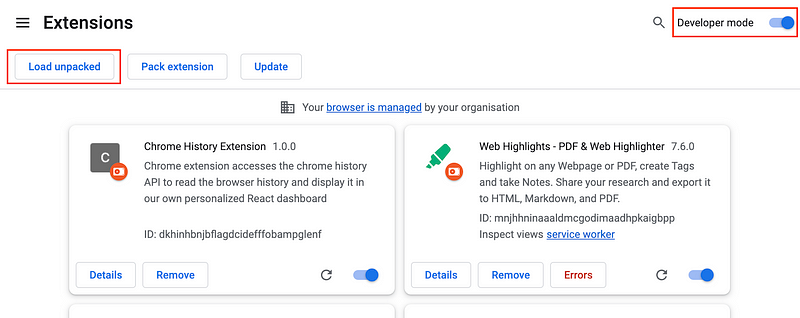
*Install the extension*
> Congratulations! You just created a Chrome Extension! 👏
Currently, the extension doesn’t do anything. Therefore let’s define a page to open when clicking our extension icon in the chrome toolbar. We can do this by defining an `action` in our `manifest.json` .
> _An action’s popup will be shown when the user clicks on the extension’s action button in the toolbar. The popup can contain any HTML contents you like, and will be automatically sized to fit its contents. The popup cannot be smaller than 25x25 and cannot be larger than 800x600. -_ [developer.chrome.com](https://developer.chrome.com/docs/extensions/reference/action/)
Here is how to define an **HTML popup** that opens when clicking our extension icon:
```json
{
"name": "chrome-history-extension",
"description": "Chrome extension that accesses the chrome history API to read the browser history and display it in our own personalized React dashboard",
"version": "1.0.0",
"manifest_version": 3,
"action": {
"default_title": "Chrome History Dashboard",
"default_popup": "./index.html"
}
}
```
[View this code on GitHub Gist](https://gist.github.com/MariusBongarts/08e5fcd0e8fc30c0e84401c360a867fa)
Our `index.html` file contains a simple HTML file with some styles to set the _width_ and _height_ of the body element. Furthermore, it provides the JavaScript for our React app by loading the `app.js` file.
```html
Chrome History Dashboard
```
[View this code on GitHub Gist](https://gist.github.com/MariusBongarts/f47e52f4f58f31ab9c82950565e81097)
As we still need to set up the React app, our popup only contains a blank page with the defined width and height. You should now be able to see it when clicking the extension icon:
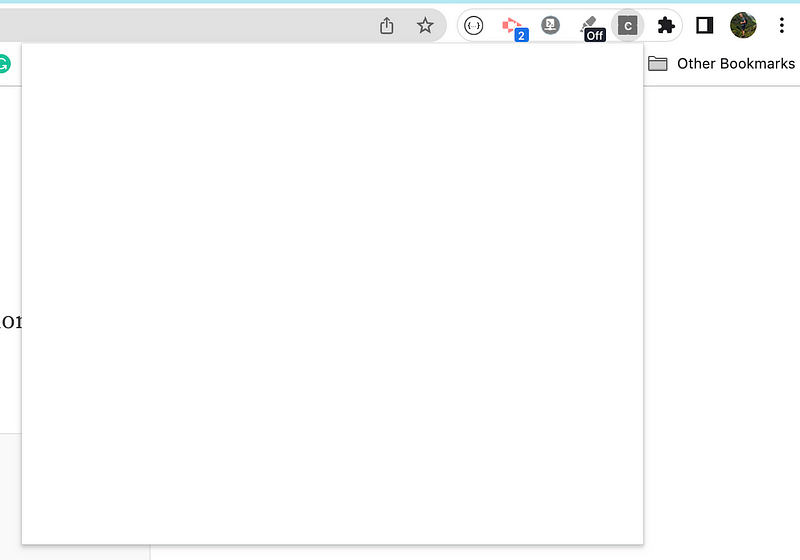
*Extension Popup*
If you like, you can also include a custom icon for your extension by providing the `default_icon` attribute:
```json
{
"action": {
"default_title": "Chrome History Dashboard",
"default_popup": "./index.html",
"default_icon": {
"16": "images/icon16.png", // optional
"24": "images/icon24.png", // optional
"32": "images/icon32.png" // optional
},
}
}
```
[View this code on GitHub Gist](https://gist.github.com/MariusBongarts/b5c242b7612bf639e8777a452d14b39d)
### React Setup
We will build a React application. Therefore let us create some boilerplate by running the following script using the `create-react-app` CLI:
`npx create-react-app chrome-history-extension --template typescript`
Let’s eliminate all the unnecessary stuff. Remove all CSS styles and the React template code in the `App.tsx` component. You can also delete the **_/public_** folder (We will replace it with our **/extension** folder later).
To test our setup, let’s put a simple _“Hello from React App_ 👋 _”_ headline to our component:
```tsx
function App() {
return (
);
}
export default App;
```
[View this code on GitHub Gist](https://gist.github.com/MariusBongarts/645637756acb27cf205c9308e695f943)
Finally, we will adjust our `index.tsx` file a bit to create the entry point of our application programmatically:
```tsx
import React from "react";
import ReactDOM from "react-dom/client";
import App from "./App";
const rootElement = document.createElement("div");
rootElement.id = "chrome-history-dashboard";
document.body.appendChild(rootElement);
const root = ReactDOM.createRoot(rootElement);
root.render(
);
```
[View this code on GitHub Gist](https://gist.github.com/MariusBongarts/a0bd990f80687215d1337c95e860f24f)
### Webpack setup
In the next step, we will configure an application bundler to build our chrome extension automatically. Furthermore, we will set up a development environment to test our extension.
We will use **Webpack 5** as a module bundler. To use it, we install _webpack_ and the _copy-webpack-plugin_ plugin by running:
`yarn add -D webpack@^5 copy-webpack-plugin`
OR
`npm i -D webpack@5 copy-webpack-plugin`
Now, let’s create a `webpack.config.js` file and put the following code in it:
```js
const path = require("path");
const CopyPlugin = require("copy-webpack-plugin");
module.exports = {
entry: "./src/index.tsx",
mode: "production",
module: {
rules: [
{
test: /\.tsx?$/,
use: [
{
loader: "ts-loader",
options: {
compilerOptions: { noEmit: false },
},
},
],
exclude: /node_modules/,
},
],
},
resolve: {
extensions: [".tsx", ".ts", ".js"],
},
output: {
filename: "app.js",
path: path.resolve(__dirname, "dist"),
},
plugins: [
new CopyPlugin({
patterns: [{ from: "./extension", to: "" }],
}),
],
};
```
[View this code on GitHub Gist](https://gist.github.com/MariusBongarts/a67a94708c1c7510d0c8702cec20815a)
If you don’t know how webpack works, I highly recommend learning it. Still, for now, it’s relevant to know that it will replace the built-in `react-scripts` configuration to start and build the app. Therefore it uses a `ts-loader` to transpile our Typescript `.tsx` templates into JavaScript and bundles them into one Javascript file ( `app.js` ).
Additionally, we will create a `CopyPlugin` that transfers all files from the _/extension_ directory, including the `manifest.json` file, to the _/dist_ build folder.
Navigate to the `package.json` file and look at our `"start"` and `"build"` scripts. They should look like this:
```json
{
"name": "chrome-history-extension",
...
"scripts": {
"start": "react-scripts start",
"build": "react-scripts build",
},
...
}
```
[View this code on GitHub Gist](https://gist.github.com/MariusBongarts/caa3b886733ca92c79bcc4cae504243a)
Let’s replace those scripts with webpack:
```json
{
"name": "chrome-history-extension",
...
"scripts": {
"start": "webpack serve --config webpack.dev.js",
"build": "webpack",
},
...
}
```
[View this code on GitHub Gist](https://gist.github.com/MariusBongarts/a1e80f5f452d22f6511aaea41e1653d6)
You can see that our `build` script simply calls `webpack` . By default, webpack will look for a `webpack.config.js` configuration file that we just created.
Furthermore, we defined a `start` script. This script takes a different webpack configuration with a dev server, enabling us to test our extension locally without installing the extension. By that, we can better and faster test our extension. Here is what the development configuration looks like:
```js
const path = require("path");
const config = require("./webpack.config");
module.exports = {
...config,
mode: "development",
devServer: {
static: {
directory: path.join(__dirname, "extension"),
},
port: 8080,
},
performance: { hints: false },
output: { ...config.output, publicPath: "/" },
};
```
[View this code on GitHub Gist](https://gist.github.com/MariusBongarts/f4955081bc03010788f28c8735816910)
This config takes our original configuration from the `webpack.config.js` file and overrides some values. We configure a webpack dev server to serve our application statically from the `extension` folder on port 8080.
Now, you should be able to run `yarn start` and see our application running on [localhost:8080](http://localhost:8080/) .
Furthermore, you can run `yarn build` , and webpack should automatically generate all necessary files for our extension and copy them to the _/dist_ folder. We can now load our unpacked extension from this folder.
Opening our popup should show the React app containing our _“Hello From React App 👋”_ headline:
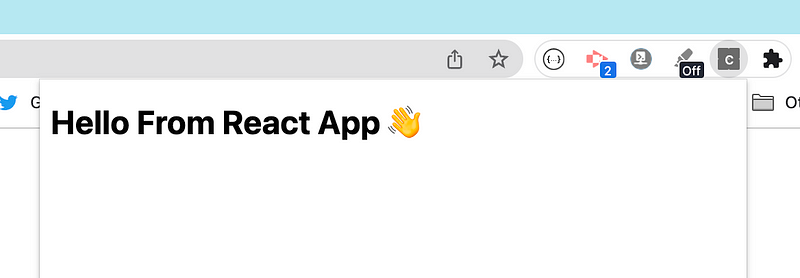
*Chrome Extension Popup + React app*
We are finished with the setup and will continue implementing the chrome history API in the following article. [Here is the Github repository](https://github.com/MariusBongarts/chrome-history-extension) , including the extension's final version.
### Final Thoughts
In this article, we laid the groundwork for displaying our Chrome history in our React Chrome extension in subsequent articles. We’ve covered the essential steps for setting up a Chrome extension and integrating React with Webpack to bundle them into a Chrome extension effortlessly.
With these building blocks in place, we’re now ready for the next article, in which we will learn how to access the Chrome History API to show it inside our extension. Follow me or [**subscribe**](https://medium.com/subscribe/@mariusbongarts) to get my stories via email not to miss the next article.
I hope you enjoyed reading this article. I am always happy to answer questions and am open to criticism. Feel free to contact me at any time! Get in touch with me via [****LinkedIn****](https://www.linkedin.com/in/marius-bongarts-6b3638171/) , [****Twitter****](https://twitter.com/MariusBongarts) , or leave a comment.